Showing posts with label Recipe. Show all posts

Sunday, March 29, 2020

Hey Day Challenge Round Up: It's Been a Month

     Hey everyone, so it's been a little while since my last Hey, Day round up.  A lot has been going on for me personally, as well as in the world at large, so I've been a little behind on this.  However, here are all the videos I've released since my last round up video.  If you're looking for mindless entertainment, perhaps this is for you.

DIY Quote Jar


     You may have seen my craft blog post on making a quote jar.  Here's a video adaptation, complete with some of Brian's best absurd quotes.  This video was released on February 17th.

DIY Glittery Photo Frame


     This is a fast and easy way to spruce up a photo frame.  The video launched on February 20th.

DIY Pink and Orange Party Hat


     Make your own fun party hat in this tutorial.  This video premiered on February 25th, in honor of my sister Katie's birthday.

DIY Club/Membership Cards


     In this video, I show you an old club card that I made when I was in middle school.  I also show you how I designed a club card in Microsoft Publisher.  This video launched on March 2nd.

Turning Myself into a Paper Doll


     You may already have seen this video and its follow up in a post on my craft blog.  If not, here's your chance.  The video premiered on March 3rd.

DIY Period Products Case


     In this video, I show you how to make a period products case.  This could be a great gift, particularly for a kid in your life who has just had their first period, or may soon get their first period.  This video went live on March 8th.

Future Files Part III: Coolest Jobs


     In this video, I tell you about what I want to do when I grow up.  This video launched on March 15th.

Sloppy Joes with Tater Tots?!?


     Sloppy tots are actually really tasty.  I would definitely recommend checking out this video recipe if you like both sloppy joes and tater tots.  The video went up on March 19th.

Spring Cleaning and Sticker Organizer


     In this video, I do some spring cleaning and show you how to make a sticker organizer.  I filmed this video well before UMaine switched to remote instruction, so sadly now that I'm no longer seeing my students in person, my sticker organizer isn't getting much use.  It was super helpful for a few weeks, though.  The video premiered on March 20th.

DIY Trophies with Plastic Animals


     If you've been following my blog for a while, you've probably seen some of my Halloween trophy written tutorials.  This video tutorial shows the basic process of making trophies (although without the costuming that I usually do for the Halloween trophies).  The video debuted on March 25th.

DIY Mobile of Humiliation


     This is exactly what the title suggests, a mobile of bad pictures.  Not my favorite video to make or watch.  It went up on March 27th.

Happy Day aka Neon Yellow Day


     In this video, I tell you about an old holiday I made up when I was a teenager, Neon Yellow Day, and do some activities that make me happy, namely making an ice cream float and crafting.  It premiered today.

     So those are all of the videos that went up over the past month and then some.  I have filmed some of April's videos, but not all.  Will I finish them?  I don't know.  The past month, I haven't really felt like filming.  (I was coming off a bad cold for the early part of the month, which is what initially delayed my filming.)  Plus, now that I'm teaching remotely, I'm making videos of my Zoom lectures, which takes more than twice the effort of just teaching, but is essential for students who can no longer tune in at the usual time.  I'm also trying to finish my dissertation and I have no idea what's happening with the wedding.  There's a lot going on for me right now, and it's a little overwhelming.
     That's not to say that I definitely won't make more videos.  If you do enjoy them, then let me know and I'll take that into consideration.  This craft blog, and by extension my YouTube channel, are a labor of love.  My goal with both of these platforms is to provide inspiration and entertainment for you.  My craft blog posts tend to get more traffic than the videos, so it seems probably more people are enjoying the blog content.  But if the videos are something you really do like, please weigh in.  Even if my audience is small, if I'm keeping you entertained, then I'll do what I can to continue that.  I may just scale down the number of videos I'm posting, or take a brief hiatus.
      Stay safe, everyone.  I'm wishing you all the best.

Monday, January 20, 2020

Hey Day Challenge Week III Round Up

     We've made it through three weeks of the Hey, Day Challenge!  I feel a little accomplished.  In this video series, I challenge myself to try out activities relating to various pages from the book Hey, Day! by Clea Hantman and Keva Marie, a day book filled with things to "do, make, and ponder."  I'm not covering every page in the book, but rather about 10 per month.
     If you've been meaning to follow my Hey, Day Challenge video series, but haven't had a chance to, here's a round up of all the videos that aired between January 12th and January 19th.  I've included a brief description of each video so you can determine whether the videos sound like they're up your alley.

Be a Vegetarian for a Day (Featuring a Veggie Burrito Recipe)


     If you're looking for a new vegetarian recipe, check out this video.  In it, Brian shows us how to make vegetarian burritos.

Constructing Sentences from Random Words


     In this video, I choose words at random from five different books and construct sentences using them.

     Stay tuned because we have a fun craft tutorial coming out on Tuesday.  Also, since I'm only releasing one video this week, I may skip a week with the round ups and do weeks IV and V together, so if you don't see a round up post from me next week, that's probably why.

Sunday, January 12, 2020

Hey, Day Challenge Week II Round Up

     Two weeks of the Hey, Day Challenge down, only 50 more to go (assuming I can stay on top of things).  In this video series, I challenge myself to try out activities relating to various pages from the book Hey, Day! by Clea Hantman and Keva Marie, a day book filled with things to "do, make, and ponder."  I'm not covering every page in the book, but rather about 10 per month.
     If you've been meaning to follow my Hey, Day Challenge video series, but haven't had a chance to, here's a round up of all the videos that aired between January 5th and January 11th.  I've included a brief description of each video so you can determine whether the videos sound like they're up your alley.

DIY Tradition


     A more appropriate title for this video would be "Blondie Brownie Recipe," because that's basically what this video is.  The point of this Hey, Day Challenge is to create a tradition, and since January 22nd is Blonde Brownie Day, I figured I would see if I could adapt Brian's "3-2-1 Brownie" recipe to make a blonde brownie in a mug.  If you want to bypass the intro and get right to the recipe, you can skip to the 2:22 minute mark.
     If you like blonde brownies, keep this recipe handy and celebrate Blonde Brownie Day with a blonde brownie in a mug.  Also, if you like the Brownie in a Mug Recipe Mug featured in this video, you can find it here.

DIY Pandora's Box (Now with 100% Less Devastation)


     In this video we DIY what the authors of "Hey, Day!" call a Pandora's Box, which is basically a time capsule.  I also talk about the previous time capsules I've made and go on a tangent about the time I got lost at UMaine when I was a kid.  The intro is honestly my favorite part of this video, but that's probably because these are my memories and stories, so if you want to skip to the crafting, it starts around the 6:30 minute mark.

Bad Jokes


     This video is me telling a bunch of bad jokes.  If you like bad jokes, you may enjoy this video.  Feel free to share your own bad jokes with me, if you'd like.

Friday, March 22, 2019

Alice in Wonderland Tea Party


     Here is the Alice in Wonderland tea party post I've been promising.  Brian and I held this tea party at the end of last summer, so you won't see the jumbo mushrooms or roses anywhere around.  I didn't end up making those until October, but they would have fit in well with this party.  Here are some tips for throwing a bash of your own.  Check out my Alice in Wonderland birthday party post for some additional decor and dessert ideas.

The Tablescape


     The tablecloth was an old one I sewed for my Alice in Wonderland birthday party a few years back.  The "flowers with faces" centerpiece was also from that party.  Check out this post to see how to make it.  The mini teacups came from Goodwill.  I had planned on getting mismatched teacups because that seemed more fitting for a Mad Tea Party, but when Brian found a set of mini teacups for me, I couldn't resist.  It's hard to tell from this picture, but the teacups are resting on the coffee filter doilies.  See this post for making the coffee filter doilies and this post for dyeing them.
     For the dessert stand, I placed a fancy looking goblet between two nice-ish plates.  I didn't use any sort of adhesive to hold them together, which meant the arrangement was a little more precarious than I would have preferred, although things seemed to work out just fine.  If you have accident prone guests, I would recommend going with something less breakable, though.

Food


     These mosaic sandwiches are pretty and fun to eat.  Prepare your favorite tea sandwich filling and place between two slices of bread.  Cut off the edges, if you'd like.  Cut slices of cucumbers and radishes (or other colorful veggies of your choice) and place atop the sandwiches.  Cut sandwiches into triangles.


     For dessert, macaroons can make a tasty treat.  I can't remember which recipe I used, so use whichever one sounds best to you.  You'll want to keep an eye on the macaroons, though, as some ovens cook faster than others.  When using the recipe I found, I originally tried cooking the macaroons for the amount of time the recipe called for, which left the macaroons a little singed on the bottom.  For successive batches, I put them in for less and less time, but they still ended up a little dark.


     Why not finish your tea party with these "painting the roses red" cream cheese candies?  I used this recipe, with some slight modifications.  I replaced the mint extract with vanilla extract because I'm not too much of a mint person.  I also ended up having to use more confectioner's sugar than the recipe called for, although I didn't record how much more I used.  I live in a really humid environment, so if you live in a drier climate, the original amount of confectioner's sugar may work just fine.
     Once you've prepared the mixture and are satisfied with the consistency, separate the mixture into two equal pieces.  Combine one with some red food coloring, while leaving the other as it is.  Using a silicone rose mold, add red and white mixtures to the mold to create your roses.  Leave uncovered to dry.  Store in a sealed container.

Costumes

     Add some extra wonder to your tea party by encouraging your guests to come as their favorite Wonderland characters.  Looking for some Alice costume ideas?  See this post for a DIY Alice hair bow and this post for how to make your own pinafore apron.  Need a hat for your Hatter?  Check out this post and this post.  Some ears for the Cheshire Cat?  See this post.  Don't have someone to be the White Rabbit?  Add a White Rabbit plushie (see this post).

Thursday, October 12, 2017

My Halloween Party 2017

     This past Saturday Brian and I hosted our annual Halloween party.  We spent a good portion of the day on Friday and Saturday morning cleaning, putting up decorations, and making the food.  We were still finishing the snacks when the first of our guests arrived.  In spite of the business, I had a great time.  Here's a recap of our party.

Snacks


     Brian and I made our cemetery cupcakes (recipe in this post, although you'll have to scroll a little to find it).  I had picked up a skeleton mold on clearance at the end of last Halloween season, so this year I added bones to the cupcakes.  They didn't have any mint chocolate baking chips at Joann, so I opted to make the tombstones strawberry flavored instead.
     Brian made his classic eyeball deviled eggs (recipe in this post, although you'll have to scroll here too) and I made some cheese and pretzel "witch's broomsticks" (see this post).  I had stumbled across this caramel apple cream cheese spread online and decided to give it a try.  It was delicious and the easiest of the snacks we made.  The caramel sauce I used spilled off the cream cheese pretty quickly, so I'd recommend waiting to add it until you're about ready to serve it and keep extra caramel sauce on hand so people can add extra if they want.
     I poured the rest of the pretzel sticks into our new candy bowl.  The new bowl has a motion sensor that, when motion is detected, causes the eye to open up and causes the bowl to say something spooky.  Any time people got close enough to the table, the candy bowl would come to life.  We also had three types of pizza on hand, so everyone was well fed.


     For drinks, I had seen this vampire drink idea online and decided to give it a try.  I used Sprite Zero and liquid cherry Kool Aid.  You'll want to use clear plastic cups so that your guests can see the effect.  All you have to do squirt a little of the Kool Aid into the soda and the Kool Aid looks like blood as it disperses.

The Tablescapes


     We had our usual two tables, the snack table, pictured in the snacks section of this post, and the main table.  Some of the items on the tables are hand crafted, so I've included the relevant links in this paragraph in case you want to try making one of your own.  On the snack table, the deviled egg eyes are on top of the Halloween platter I made a couple of years back.  The cupcakes are balanced on my spider web cupcake stand.  The tablecloth I made as well.
     For the big table, I used many of the same adornments I've used in the past.  The only crafted item is the spooky faced candle, which Brian and I made last year for Halloween.  The tablecloth I picked up on clearance from Joann ages ago and the bat salt and pepper shakers came from the Target dollar aisle, also years ago.  I think the tealights might also have been from Target.

Outdoor Decor


     Here's what the whole outdoor setup looked like this year.  The eyeball path markers came from Kmart years ago.  The gnomes were a Christmas gift from Brian's mom a few years ago.  She got them from Oriental Trading.  The rest of the stuff you'll see in greater detail below, so I'll put in links there.


     Here's the door.  I didn't have a good way to display the Wayton manor sign, so I used a twist tie to fasten it to the old mailbox.  My eyeball wreath made an appearance again this year.  I also put up my spooky doorbell from Target and the jack o'lantern lights Brian got me from Rite Aid a few years back.


     Next up is my favorite part of my Halloween decor, my Halloween cemetery.  The cemetery has been gradually expanding and this year I decide it was finally time to make a second row of stones.  Since I'd been leaning my handmade stones against the house previously, I didn't have a way to get them to stand.  I used toothpicks and that held them up for a while, although they were no match for the strong gusts of wind we had that day.  By the end of the party, most if not all of them had toppled.
     If you're looking to make some foam tombstones, check out these posts.  It's kind of hard to see, but my eerie graveyard bouquet is in front of Ada Lillian's stone.  My cemetery angel ended up all the way at the back, next to the small gravestones which are hidden from view by the taller tombstones.  Two of the other stones, the fencing, and some of the bones came in this Halloween cemetery kit from Target.  The other two visible stones I picked up at Dollar Tree a while back.  The "haunted: keep out" tape I picked up at A.C. Moore on clearance a couple of years back, but I also got some from Kmart last year (when we still had a Kmart in this area).  If you look closely, you can see my haunted hedge eyes (from Target) peeking out from behind the tombstone with a bat at the top.  The bat gate posts at the ends of the fence came from Dollar Tree.  They had some purple and red paint on them which I thought was kind of awkward looking, so I painted them black.


     Here's my "beware of werewolf" display.  As far as Halloween displays go, this one was relatively easy to make and people tend to like it.

Indoor Decor


     We don't have a lot of room in our apartment, so when it comes time to put out Halloween decorations, I throw some fabric over the printers and storage containers and put the decorations on top.  Here you'll see the spellbook I made a couple of years ago with my Silhouette CAMEO (I describe the process a little in this post) and my haunted mirror.  The spooky radio is a new addition.  I had seen it at Target last year, but it sold out in store before I had a chance to get one.  I ordered one online, but it wasn't going to arrive until after Halloween, so it became part of my Christmas present from Brian :).  Turn the knob and you'll hear quirky ads, song snippets, and news bulletins.  It's so fun and it has become one of my favorite Halloween decorations.  The spooky telephone is also from Target and that's another fun prop.  The lenticular portrait came from Rite Aid and its frame from the Orono Thrift Shop (if you scroll to the bottom of this post, I talk about reframing store bought lenticulars).  The little blue bottle is an antique poison bottle my dad gave me.


     Here you'll see my murderous dolls, my creepy rag doll, and my gingerbread zombie.  If you've seen last year's post, you'll notice that only a couple of the lenticulars that I usually have as part of this setup are featured here.  I needed more room for the dolls, so I moved the other lenticulars to the wall.  To cover this storage container, I threw my tie dyed sheet over it and then covered the sheet with some cloth I'd gotten from Dollar Tree.


     Here's my potions shelf.  If you're looking to make some potions, you'll find ideas in these posts.  The eyeball beakers and test tubes came from Target.  I filled each one with water and added a few drops of food coloring.  I also made a couple of last minute potion bottles and added some glass bottles my parents had given me to fill out the shelf.  There's the trophy Brian and I won last year for best couples costume up toward the top.  My pom pom pals are also paling around on the shelves.  The candle came from Kohl's ages ago.  The book of spells and potions I made this year.  I don't think I'll have a chance to write about it this Halloween season, but I hope to get a post out on it for next year.


     These are some figurines my mom got me from A.C. Moore years ago.


     This year I added some decorations to the fridge door.  I actually managed to get the Halloween countdown calendar and its Halloween clothespins set up on October 1st and so far Brian and I have been remembering to turn them over each day.  The radiation hazard sign I made using my CAMEO.  I plan to post the template next year, along with the template for the biohazard sign I put on my bedroom door.


     Felt sleepy bat and my Halloween sign ended up back at the edge of the hallway again this year.


     Here's the biohazard sign I mentioned earlier.


     I ended up decorating the bathroom too this year, using some of the decorations from my The Shining themed birthday party.  The door became room 217 (from Stephen King's book.  If you're a fan of Stanley Kubrick's movie, you'll know this as room 237).


     Inside the bathroom across from the mirror I put up the letters spelling out "redrum" . . .


. . . which you'll see what it means if you look in the mirror.  I put the invite I made on the sink (to see the invite in more detail, check out this post).  It got a drop of water splashed on it, but it should be easy to reprint for next year if I want to go with the same theme.


     I tucked the roque mallet in beside the bathtub.

Costume Contest

     Unfortunately I didn't think to take many pictures during the party, so you'll only see a handful of them here.  In addition to the pictures below, we had Rick from Rick and Morty, a werewolf, and a zebra.


     "Most creative costume" went to Katie for her "it's raining cats and dogs" costume.  In the background, you can see my plushie garland hanging over the entryway.


     Jacob won "best costume" with his Buckethead costume.


     Brian and I won the "best couples/group costume" award for our dark sorcerer and witch get ups.  Like my look?  Check out the following links for how to make the cape and hat, the broom pendant, and the magic wand.  You can't really see my top in this pic, but it's by Dare to Wear fashion and it's pretty awesome.


     Here Katie and Jacob are with their trophies.  Brian and I didn't get a pic with ours, but you can see it in this post.

     Well, that about sums up my Halloween party 2017.  I hope you can find some ideas in here for your Halloween get together.

Thursday, September 14, 2017

Halloween Mummy Veggie "Meatballs"


     This Halloween snack is almost too cute to eat.  The recipe is from Pillsbury, but made it vegetarian and modified it a little.

Ingredients:

*Veggie "meatballs" (I used Nate's Zesty Italian Meatless Meatballs)
*Crescent roll dough
*Marinara sauce

Tools:

*Knife
*Toothpick

Directions:

*Roll out the crescent roll dough.

*Cut the dough into thin strips.

*Wrap the strips of dough around the "meatballs" to form "bandages."  Make sure to leave a gap between the bandages for the "face."

*Bake in the oven for about 15 minutes, or until the dough is golden brown and the "meatballs" are cooked all the way through.

*Use a toothpick to make marinara sauce "eyes."

*For a dinner, serve with spaghetti and crescent rolls.


Thursday, March 2, 2017

Spring Shapes Cinnamon Sugar Tortilla Bites


     While spring may still be weeks away, and perhaps even further here in Maine, that doesn't mean that you can't make things feel springy inside.  Bring some spring cheer to your snacking with these cinnamon sugar tortilla bites, which are as tasty as they are adorable.

Materials:
*Spring shaped cookie cutters
*Flour tortilla
*Butter
*Cinnamon
*Sugar

Directions:
*Preheat your oven to 350 degrees F.
*Cut spring shapes from your flour tortilla and place these shapes on a baking sheet.
*Melt butter and brush it across your shapes so that each one has a light coating.
*Sprinkle on some cinnamon sugar.
*Bake in the oven for about 5 minutes, or until golden brown.

Thursday, October 13, 2016

My Halloween 2016 Party


My favorite photo from the party.  It's a very accurate depiction of my family.

     This past Sunday I hosted my annual Halloween party.  It took a lot of work putting it all together; Brian and I spent most of the day Saturday and right up until the morning on Sunday cleaning, digging out and putting up decorations, finishing the last minute prop additions, and making and decorating the food.  If it wasn't for fall break, I wouldn't have had the time for this (and really I didn't; the rest of the semester is going to be a bit more hectic because I took the time out, but I needed a break), but it's something I'd been looking forward to for weeks and it definitely lived up to my expectations. Here's a recap of the party with plenty of food, games, and snack ideas.

Halloween Snacks


     Brian and I made our cemetery cupcakes (recipe in this post, although you'll have to scroll a little to find it) and eyeball deviled eggs (recipe in this post, although you'll have to scroll here too) again this year.  We had some bananas on the verge of spoiling, so Brian decided to make some banana bread too.  My family is all about cheese, but instead of going with just a cheese platter, as per usual, I decided to make these "witch's broomsticks" which are fast and easy to create.  I threw in some extra cheese cubes on the side, though, because you can never have too much cheese.

Witch's Broomsticks

Ingredients:
*String cheese sticks (each stick makes three "brooms")
*Pretzel sticks

Supplies:
*Knife

Directions:
*Cut string cheese in thirds lengthwise.
*Cut slits in the cheese pieces, going about halfway up.
*Carefully pull up on the thin sections you've created.  These will form the "bristles" of the broom.
*Place a pretzel stick in the other end, being careful not to push it in too deep, or else the broom might break.

The Tablescapes


     We had two tables at the party, the snack table and the main table.  On the snack table, the deviled egg eyes are on top of the Halloween platter I made a couple of years back.  The cupcakes are balanced on this spider web cupcake stand.  I included the 
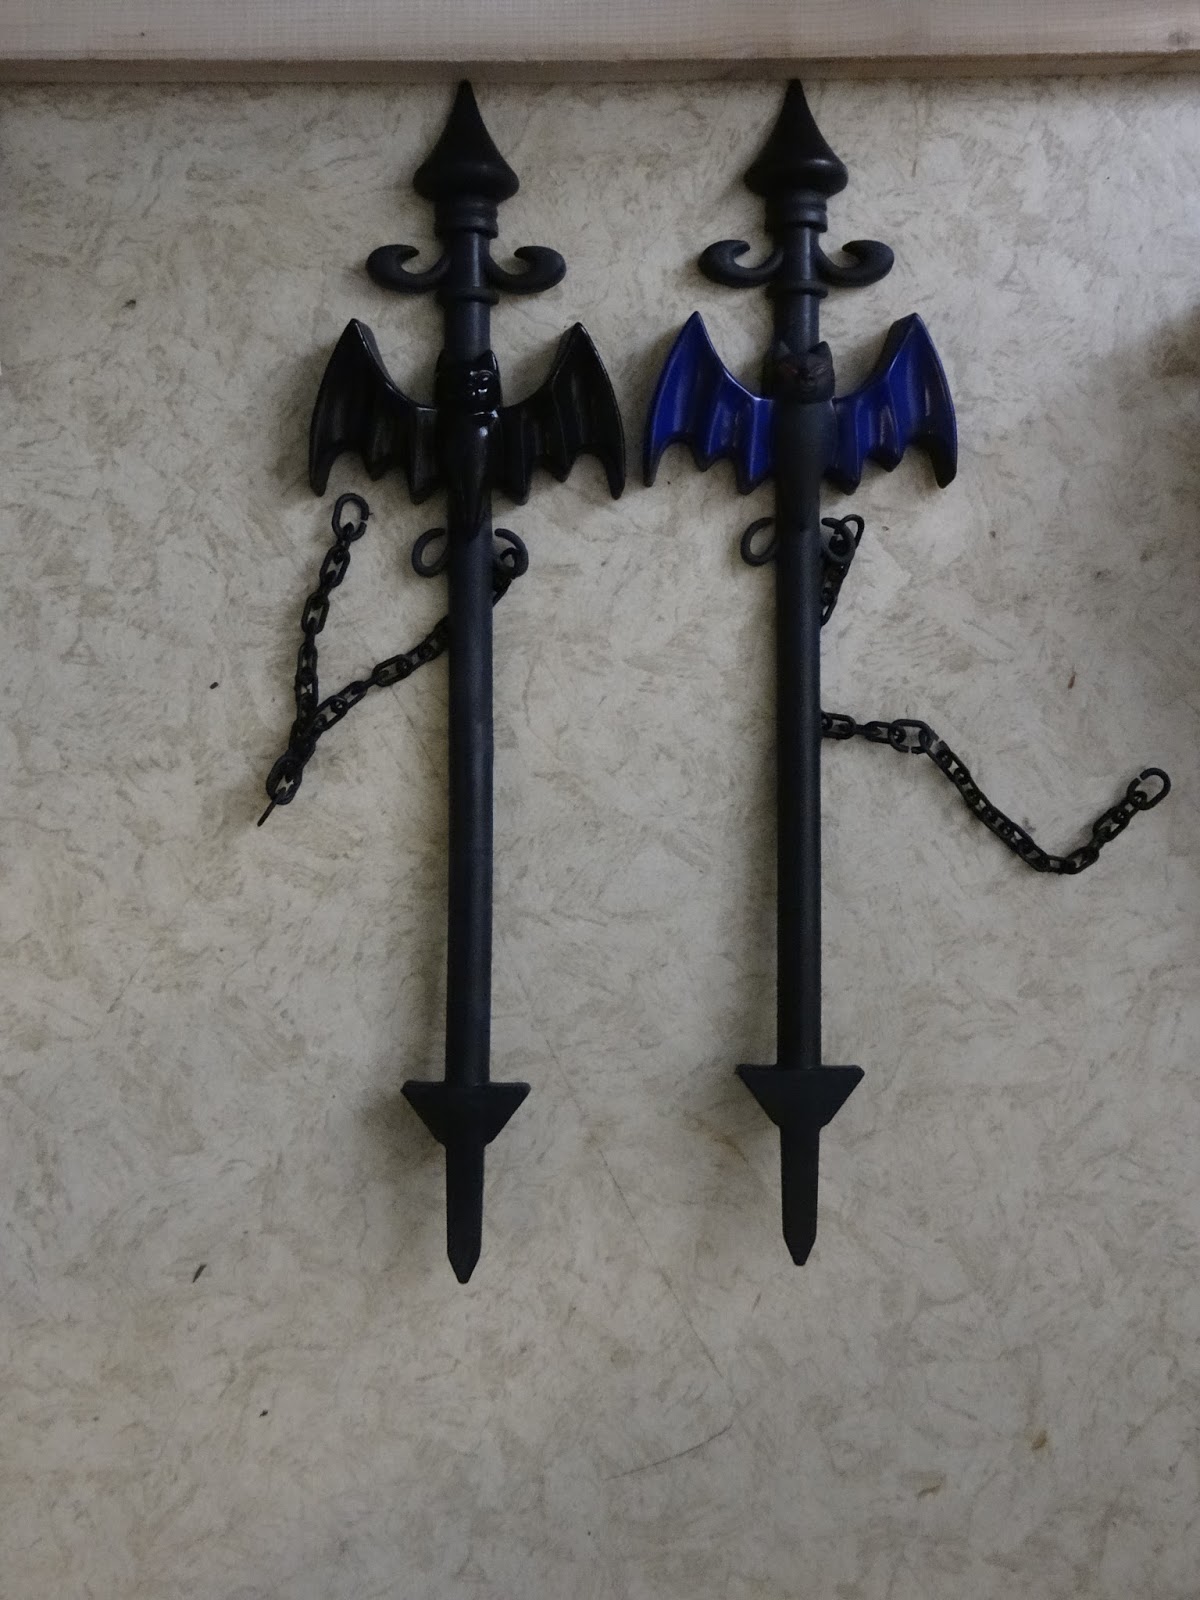
appetizer picks in their spooky stone holder, although they ended up being more decorative than functional (we were supposed to have some green olives too, but forgot to pick them up when we were out on Saturday).  Here's how I made the tablecloth.  I ended up going with plain black paper plates and napkins because they were cheaper and there weren't any plates at Target that were must haves.  I think they worked out really well.


     For the big table, I went with a very similar setup to the one I've done for the past couple of years.  The tablecloth I picked up on clearance from Joann ages ago and the bat salt and pepper shakers came from the Target dollar aisle, also years ago.  I think the tealights might also have been from Target.  Here's how to make the glitter drip glasses.  I also swapped out my spiderweb candle from Kohl's for the spooky faced candle Brian and I made this year.

Outdoor Decor


     Here's the whole outdoor setup.  If you've seen my post from last year, you'll notice there's a new display, which I'm super excited about!  But first up, the old stuff.  The eyeball path markers I got from Kmart several years back and the jack o'lantern lights on the door Brian surprised me with a couple of years ago for Halloween.  He got them from Rite Aid.  Those zombie lawn gnomes lurking at the edge of the house Brian's mom gave me for Christmas.  She got them from Oriental Trading.


     Here's the doorway.  In addition to the jack o'lantern lights, you can see my glow in the dark eyeball wreath and my "knock if you dare" door hanger, which used to be available for free online, but I can no longer find a link to it.  Also, see that thing hanging off the bottom of the rusted old mailbox?  That's our new doorbell, which we picked up from Target.  The top part opens up when you push the button to reveal a glowing eyeball that moves as the doorbell says spooky stuff.  It's pretty neat.


     This is what my cemetery ended up looking like this year.  My little cemetery is my favorite Halloween display, so this year I did not let the threat of rain stop me.  Farthest to the left you'll see my tombstone with plaque accompanied by my eerie graveyard bouquet.  The bouquet was the only part of the display that seemed like it would get ruined by the slightest bit of rain, so I brought it inside as soon as I finished taking pictures.  The next stone over is my original insulation foam tombstones accompanied by one of my Styrofoam tombstones, with my Barbie "stone" angel statue propped against them,  Since Barbie's wings are cardboard, I'd caution against putting her outside in the rain, although my statue seemed to hold up just fine.  The other tombstones came from Target (they were part of a kit along with some of the skeletal remains and fencing), Dollar Tree, and some sort of yard sale/flea market.  If you look closely, you can see my haunted hedge eyes peeking out from behind one of the stones.  I got the hedge eyes from Target at the end of the season a couple of years ago.  The fence that came with the kit you saw in last year's post.  The "haunted: keep out" tape I used to string the fence pieces together I got on sale at A.C. Moore last year.  I didn't have a chance to use it for my party (not sure if I'd even bought it then), but I did use it for Halloween night, so that wasn't new to this party.


     Notice the bat gate posts in the cemetery picture?  Those came from Dollar Tree, but they had this ugly, peeling accent paint on them.  You can't really tell from the picture above, but the bats had poorly done red eyes and peeling purple wings.  I quickly brushed some black acrylic paint over them (spray paint would probably have worked really well for this, but I didn't have any on hand and forgot that I had to paint these until the morning of the party) and they looked so much better.


     Here's the new display.  I'm hoping to devote an entire blog post to it next year, so I'm not going to say too much about it here, but it's basically a modification of the "beware of dog" idea for your pet werewolf.  In the original display, the werewolf is gone, the leash just hangs limply over the sign.  The scare factor is in what's not there rather than what is there.  However, when my friend Ken showed up dressed as a (were)wolf, I couldn't resist getting some pics of him in our werewolf display.  Yes, that's Brian the dark sorcerer in the background.  No, I don't know what he's doing.

Indoor Decor


     This year I again had to have multiple Halloween "mantles" to display all of my decorations.  I threw some cloth over the printer and then added my spooky display items.  The setup is similar to the layout I had last year.  At the top there's one of my creepy dolls.  My spellbook moved up to the top as well.  I made the spellbook using my Silhouette CAMEO for Halloween last year (see last year's party post for details).  There's my haunted mirror and at the opposite side, one of my Halloween lenticulars which came from Rite Aid a few years back that I reframed.  In between the two are some new additions to my Halloween decor.  That tiny blue bottle is an antique poison bottle that my dad gave me.  I knew I wanted to incorporate it into my Halloween decor somehow and this seemed like a good spot for it.  Beside it is my new spooky telephone, which I got from Target.  You pick it up and it says creepy things.  I adore it.


     Here's the other "mantle," a pile of storage boxes covered in my tie dyed sheet with some Dollar Tree gauzy cloth thrown over top.  In addition to the lenticulars, the creepy dolls, and the bouquet, which I decided to put up there after I brought it inside so it wouldn't get rained on, you'll see my felt gingerbread zombie.  This little critter almost didn't make it into my Halloween display this year.  When I was setting up the decorations, I could not find it anywhere and eventually gave up.  However, my mom came to my party early and I was showing her my spellbook.  I opened it up to show her that it had a space for storage inside and there was my zombie.
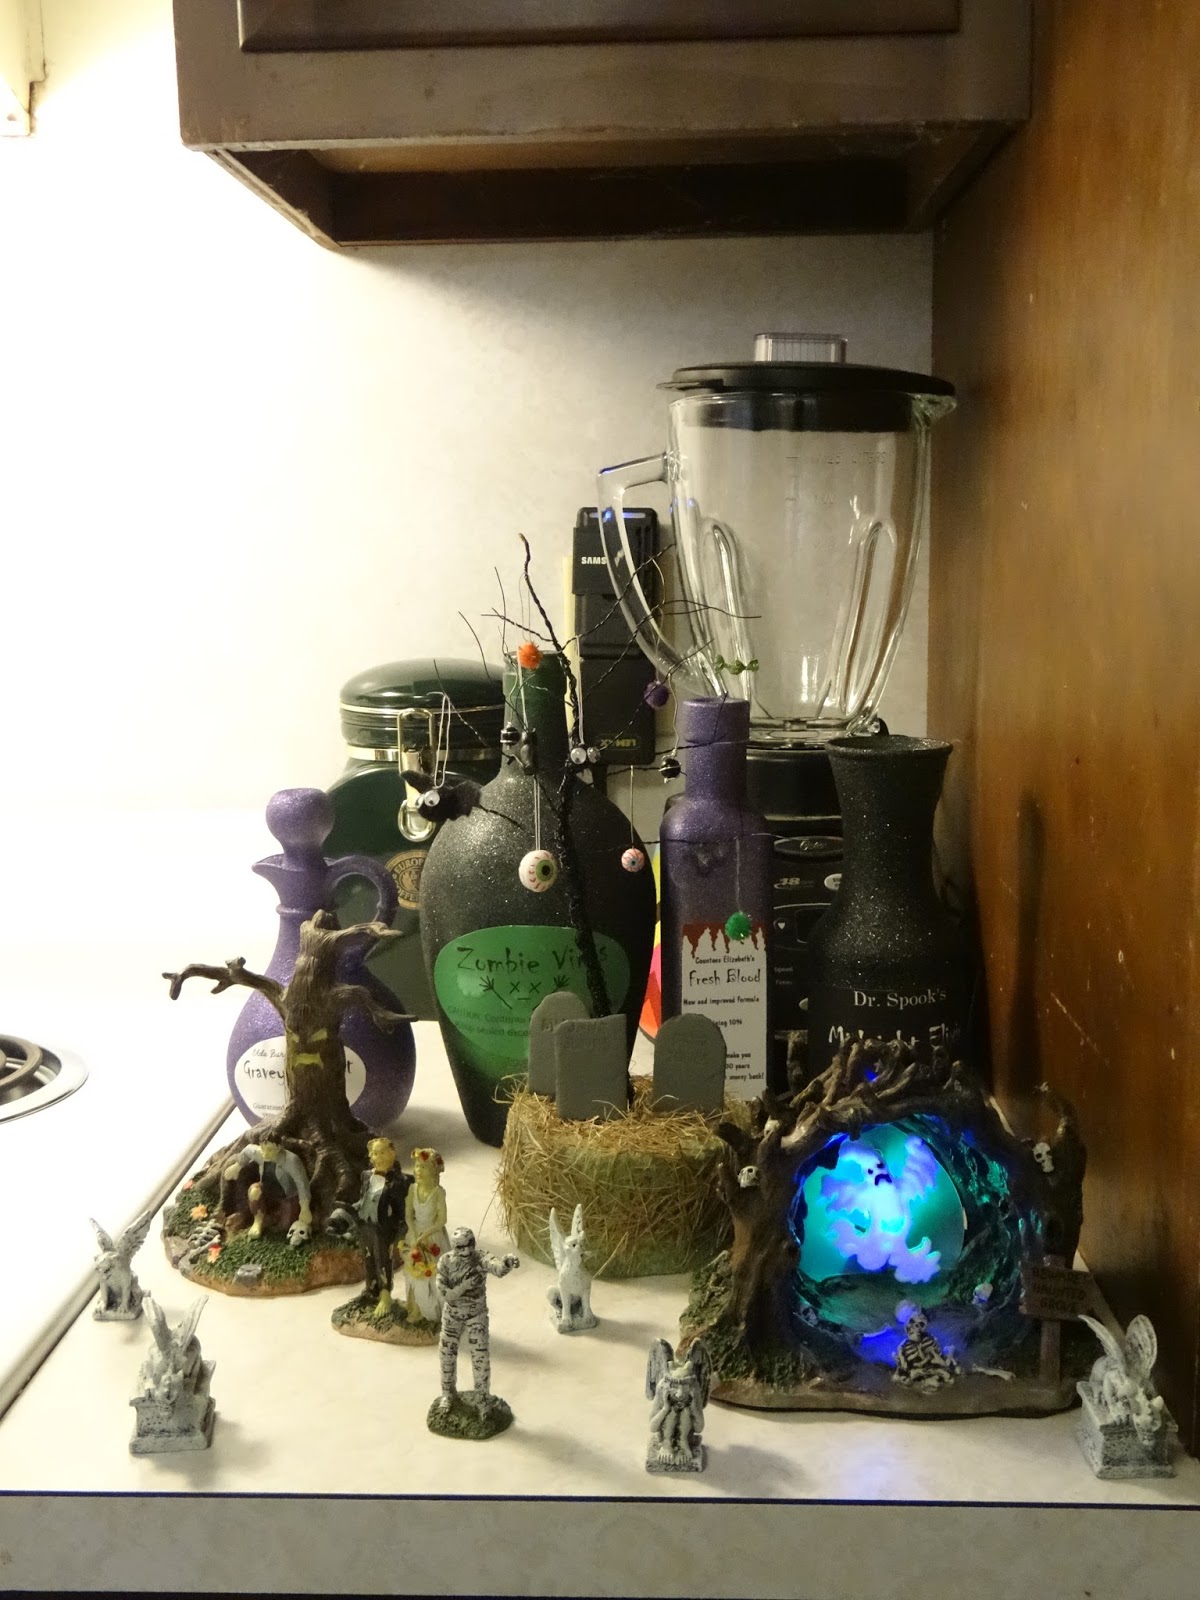
     Below the "mantle" is a shelf of spookiness.  Previously, I had put a lot of these items on one of the counters in the kitchen, but when Brian bought the bread machine, that ended up taking up that bit of counter space that I had used in previous years.  We have a "junk" shelf of assorted trinkets and I had cleared it off so I could move it down the hall without spilling everything everywhere.  I realized that I could use that shelf for my Halloween display.  On the top shelf are my Halloween tree and my potion bottles.  I added a couple of vintage glass bottles I got from dad, one to the middle shelf and one to the bottom, because I thought they fit with the aesthetic.  On the other shelves you'll see some little Halloween figurines I've accumulated years ago from A.C. Moore and a yard sale, my "beware" sign from ages ago from Target, my old centerpiece candle, my pom pom pals, and a plush bat I got from Target a couple of years ago.


     This was the last indoor setup.  I needed a spot near an outlet for my haunted grove and the other printer seemed like the ideal location, so I threw some fabric over the printer and set the grove up there.  There was a lot of extra space on top of the printer and I'd been needing a place to put my spooky sign, so that's where it ended up.  I usually hang up my felt sleepy bat along the wall toward the end of the kitchen, but this year it was going to be so far removed from everything else that I decided to move it in closer.

Games and Activities


     We did not have the Yankee swap (scroll to the activities section of this post for details) this year because I didn't have a chance to gather prizes, but if you're looking for an activity for your party, that's always a fun one.  What we did instead was we played my jack o'lantern game.  We had six people for the first round and that seemed like a good amount; any more and it would have been too many.  Dad won and got the first trophy (DIY post to come) of the day for his prowess at the jack o'lantern game.  We also had a costume contest and awarded trophies for best individual costume and best couples costume.


     I set up a photo booth for my guests.  I'll have instructions for how to DIY your own in a future post, but this picture was too awesome to wait to share.


     Finally, Brian did his annual Tarot readings.

Costumes


     Looking for some costume ideas?  Here are a few from my party.  Katie dressed up as Sandy from Grease, while Jacob went as a ghost.


     Brian went as a dark sorcerer and I dressed as a witch (for "magic" wand instructions, see this post).


     My friends Ayesha, Ken, and Stephanie went as characters from Little Red Riding Hood, which made for an awesome group costume.

Thursday, June 30, 2016

Oreo Strawberry Shortcake Bites


     Looking for a fast and easy snack for your upcoming Fourth of July celebration?  Why not try a twist on strawberry shortcake, using vanilla Oreo Thins as the "cake" for a bite sized alternative?  Check out the video below to find out how I make them.  If the embedded video doesn't work for you, you can see the video on my YouTube channel at https://www.youtube.com/watch?v=dYz1934Qcfk.


Thursday, October 15, 2015

Bat Mask and Halloween Party Ideas

Bat Mask


Materials:
*Tulle
*Puffy fabric paint
*Elastic cord
*Waxed paper
*Scissors
*Tape
*X-acto knife

Directions:
*I got the template and instructions for this craft from Joann's website.  I basically followed the directions given there, except for the following:
*I used elastic cord in place of ribbon to hold the mask up.
*I practiced drawing lines on a scrap of tulle to get a feel for drawing lines on the material itself.
*I peeled the mask off the waxed paper before cutting.
*I used an X-acto knife to help with cutting out parts of the mask, including for making incisions through which to loop the elastic cord.

Halloween Snacks and Food Related Party Crafts


     Brian and I made our cemetery cupcakes again this year, but we varied the recipe slightly.  I found some cute Halloween tombstone candy molds from Joann and thought they would be perfect for my cupcakes.

Halloween Cemetery Cupcakes

Ingredients:
*10 oz bag of white candy melts
*10 oz bag of black candy melts
*10 oz bag of pumpkin spice flavored candy melts (could be substituted for flavor of your choice)
*Brian's vanilla icing (scroll to the bottom of this blog post for recipe)
*Green food coloring
*Devil's food cupcakes
*Oreos

Supplies:
*Tombstone mold
*Microwave safe bowl
*Spoon
*Food processor (or blender)

Directions for tombstones:
*Place 3 pumpkin spice candy melts, 5 black candy melts, and 14 white candy melts in a microwave safe bowl and microwave for 1 minute (we have a 900 watt microwave, so time may vary depending on the wattage of your microwave).  Stir until smooth and the colors are thoroughly mixed to produce a uniform gray color.
*Spoon the mixture into the four tombstone shaped molds.  The amount of candy in the bowl should be enough to fill each mold about halfway.  I liked filling them halfway because the thinner, lighter tombstones didn't have to be pressed as deep into the cupcakes to stay upright, but if you want maximal thickness, use twice as much candy as the first step calls for.
*Place candy mold in the freezer.  Let sit for about 10 minutes and then pop the candies out of the mold.  Clean the mold and repeat the process to make the remainder of the tombstones.

Directions for cupcake decorating:
*Prepare devil's food cupcakes according to the directions on the packaging.
*Prepare icing and add green food coloring a few drops at a time, until the icing is the shade of green that you want for your cemetery "grass."
*Place three Oreos in a food processor and grind them up.
*Take one of the cupcakes, ice it, push a tombstone into the center, and sprinkle some Oreo "dirt" at the foot of the tombstone.


     Here are some of the other snacks we had.  This year Brian and I made our eyeball deviled eggs again (for recipe, see this post.  It also has instructions for how to make a neat Halloween egg plate, which the eggs are resting on, although you can't really tell from this picture).  We cut up some sharp cheddar cheese and put it in the center of the egg plate.  Brian's mom made the eyeball cookies by making a chocolate chip cookie type dough and placing Hershey's Hugs and Hershey's Drops in the center.  As for the non-food items present, here's how I made the cupcake stand, here's how I made the appetizer skewers and their "stone" holder, and here's how I made the tablecloth.


     Here's the table setup.  It's basically the same as it was for last year's Halloween party.  I again used my glittery goblets.

Indoor Decor


     This year I had so many decorations that I wanted to keep on my Halloween "mantle" that I ended up throwing some spare cloth over the printer and its stand and using that as a secondary place to put my spooky accent items.  Here's how I made the haunted mirror.  I used my Silhouette CAMEO to construct the spell book in the center.  I combined elements from this pattern and this pattern and used Old English Text MT font for the text.  That particular lenticular portrait is one that I bought from Rite Aid last year.  All of the lenticulars I've bought have either come without a frame or in a tacky plastic frame, but in this post I explain how to make them look nicer (scroll to the bottom of the post to find the directions).  On top of the printer is one of my creepy dolls.  Here's how to make them.


     Here's my traditional Halloween "mantle" (read: tower of storage containers I've thrown a sheet over).  I took some black gauzy cloth I got from Dollar Tree and threw it over my tie dyed sheet that I usually cover it with.  Instructions for the gingerbread zombie plushie will be coming in a later post.


     Here's my felt sleepy bat and my spooky sign.


     And here's my Halloween banner.


     And some pom pom pals hanging around with the sign I got from the Target dollar aisle a few years back.


     The figurines and the light up haunted grove in the foreground of the photo my mom gave me a number of years ago.  I think she got them from A. C. Moore.  There's my Halloween tree with ornaments and behind that you can see my potion bottles.

Outdoor Decor


     Here's the whole outdoor setup.  The eyeball path markers I got from Kmart several years back and the jack o'lantern lights on the door Brian surprised me with last year for Halloween.  He got them from Rite Aid.  Those zombie lawn gnomes lurking at the edge of the house Brian's mom gave me for Christmas.  She got them from Oriental Trading.  Also, it's hard to see, but there is a light up spider on the glass part of the screen door that I got this year from Dollar Tree.


     Here's a closeup on the door.  That's my glow in the dark eyeball wreath on the door.  The door hanger I printed out from the internet and laminated, but I can't find a link to the PDF for the door hanger anymore.


     Here's my little Halloween cemetery.  It was predicted to rain up until noontime, which was one hour before my party started, so I had to wait until then to put everything up.  That's why it looks like it was just thrown together, but I'm so glad that I got to put it out there that I don't care.  The tombstone on the far left of the picture I made from insulation foam and the third and sixth from left I made from regular styrofoam.  The other tombstones came from Target (they were part of a kit along with some of the skeletal remains and fencing), Dollar Tree, and some sort of yard sale/flea market.  In front of my insulation foam tombstone you can see my eerie graveyard bouquet.  Those skeletal arms in front of the two tiny tombstones I made from skeletal salad tongs I picked up from Dollar Tree (directions to come).  Lastly, it's hard to see, but peeking out from behind the tombstone that the skull is in front of you can see my haunted hedge eyes, which I got from Target last year.  We don't have any hedges nearby, so I figured that was a good place for them.

Activities


     We had a Yankee swap again this year.  I wrote numbers on masking tape and stuck them to the bottom of the paper witch hats I made last year and Brian stuck numbers to the prizes so that no one would know which hat corresponded to a particular prize.  This year I didn't have time to craft prizes (too much time spent writing my paper on quantum teleportation :p), so I picked up inexpensive items from Joann and Dollar Tree.  What we did for the swap was that people would pick up one of the hats and then find the prize corresponding to the number on the bottom of the hat.  If they liked their prize, then they got to keep it and if they didn't, then they could swap with someone for their prize.


     This year Brian also did Tarot readings for our guests.  People seemed to get a kick out of that.  Yes, Brian is wearing his Mad Hatter hat with a vampire cape.  Don't ask me why.

Costumes


     For my Halloween parties, I like to reuse bits of old Halloween costumes.  This year I went as a "bat lady," (like a cat lady, except fond of bats instead of cats).  I'm wearing the mask I wrote about in this post, my batty cape, and a bat headband that I'll give instructions for soon.  Brian's mom went as the Queen of Hearts.  I have a number of other costume ideas in the Halloween section of my craft blog (as well as other Halloween crafting ideas), so if you're looking for costume ideas check that out.