Thursday, July 26, 2012

Clothes Dyeing


Have a plain colored shirt that you would like to liven up or shirt that has started to fade?  Here's a way to give bland or old clothes a new life.

Materials:
*Light colored shirt or other garment
*Fabric dye
*Salt

Directions:
*Fill a three quart saucepan with water, 2/3 cups salt, and a few drops of fabric dye.  Stir until the salt has dissolved.
*Heat water on the stovetop until it is boiling, then reduce heat.
*Put the shirt or other garment that you are dyeing into the water.
*Stir constantly for half an hour.  This step is essential if you want even coloring.  I did not stir constantly and I ended up with uneven dyeing, but I liked the end result anyway.
*After the shirt has been in the dye for 15 minutes, turn off the burner.
*At the end of the 30 minutes, remove the shirt from the dye solution.  Rinse with warm water, then wash in your washing machine.
Note: There are a number of different dyeing techniques, each rquiring varying levels of effort and difficulty.  This is the one that I chose to use, but there are many others you can choose from, some of which you can find here.

Thursday, July 19, 2012

Melted Crayon Art 2.0 and Splattered Stationary


I had a lot of fun making melted crayon art last week and I really liked the end result, but I saw a lot of potential for improvement in this art.  I decided that I wanted to make another canvas, one that required more imagination and creativity, and this is what I came up with.

Materials:
*64 pack of crayons
*8 1/2 x 11 canvas
*Hot glue gun and glue
*Hair dryer
*Ribbon
*Glitter glue in a color of your choice
*Large paintbrush
*Small paintbrush

Directions:
*To achieve the ombré background effect, begin by painting the entire canvas with a coating of glitter glue.  Let dry.
*Once the first coat has dried, paint the bottom half of the canvas with another coating of glitter glue.
*After the second coat has dried, paint the bottom third of the canvas with another coat of glitter glue.
*Finally, paint a thin strip at the very bottom of the canvas with a coat of glitter glue. 
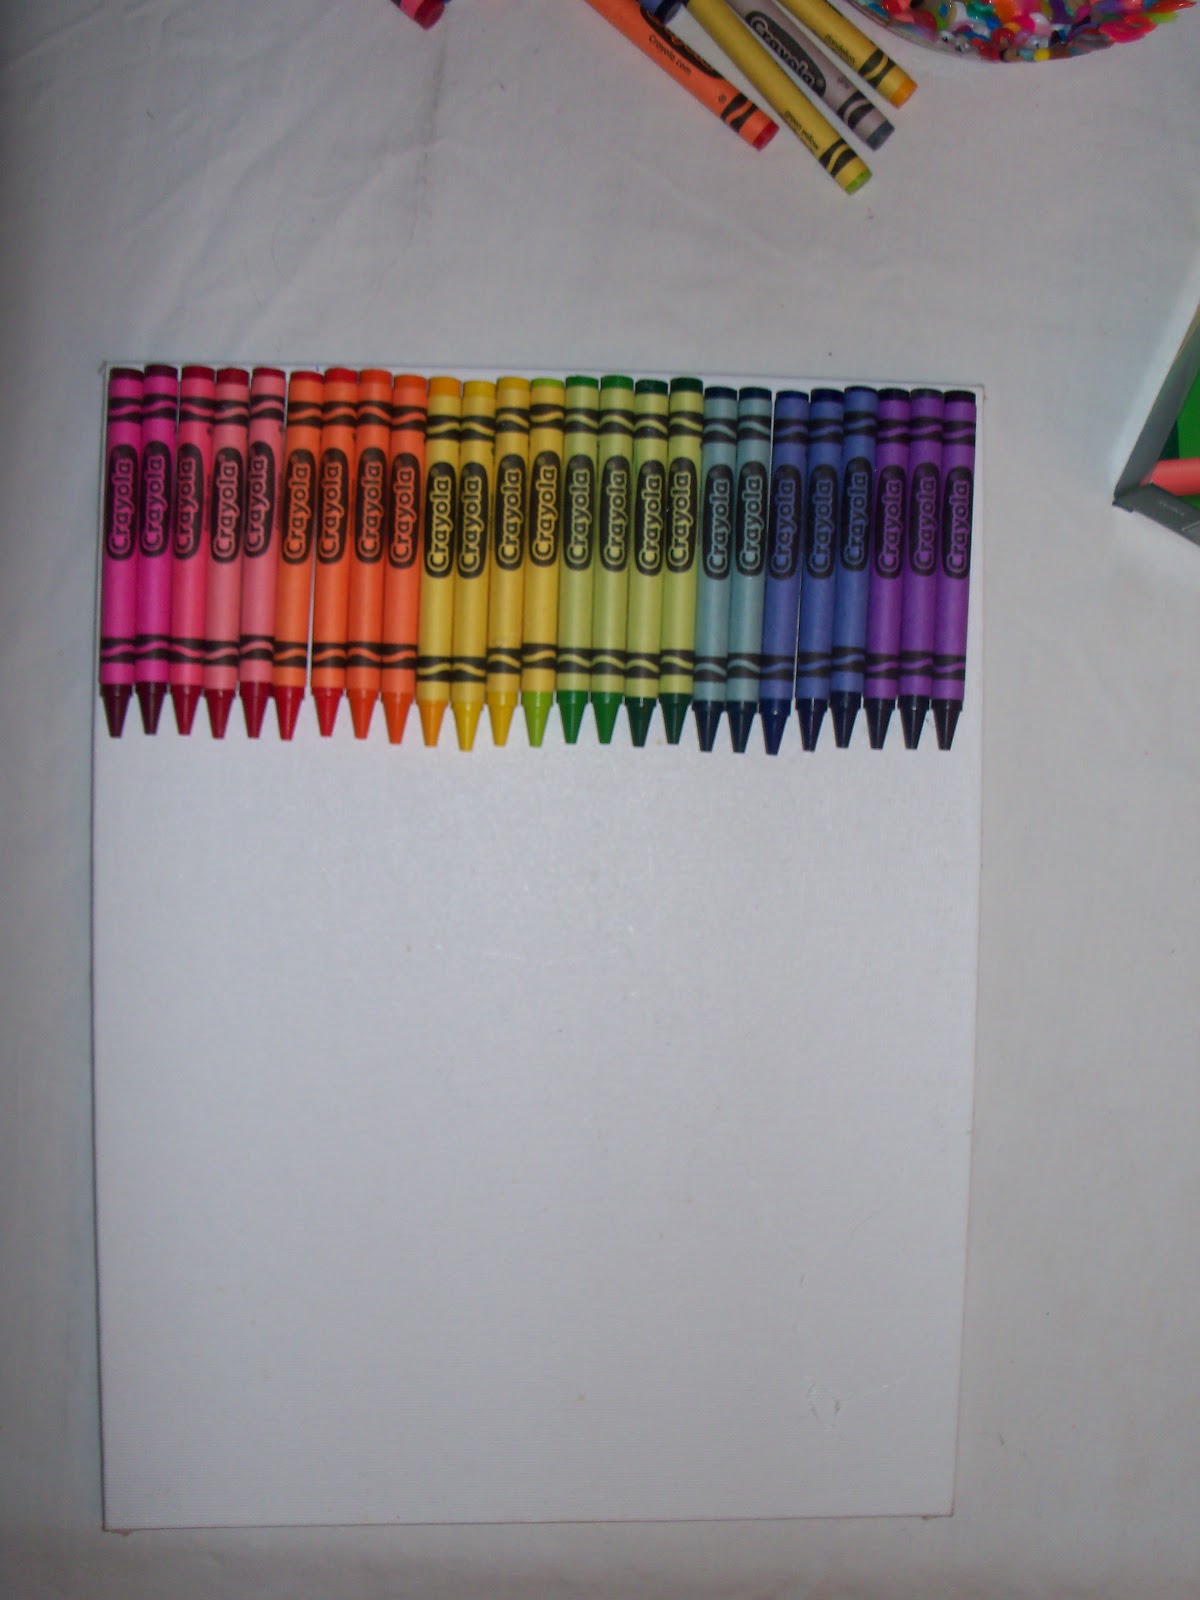
*When your canvas has finished drying, arrange your crayons on the canvas in a color pattern you find pleasing.  Make sure to set aside the white crayon, which you will need later.
*Using the hot glue gun, glue the crayons with the tips facing down.  Make sure you are gluing the crayons to the lightly colored top portion of the canvas so that you do not end up covering your color gradation.  You should end up with something like this:


*Cover your work area with newspaper to prevent melted wax from adhering to your area.  Lean the canvas against a wall.
*Turn your hair dryer on high heat and aim at the middle of the crayons.  Run the heat over the crayons until they have melted to your liking.  Be careful, as some of the wax may splatter a little.
*Once the crayons have melted as much as you wanted them to, let them sit for some time so the wax will resolidify. 
*Once the crayons have hardened some, break the white crayon in half.  Peel the paper off the bottom portion of the crayon and drop it into a ceramic bowl.
*Turn your hairdryer on high heat and hold it over the crayon until the crayon has melted.
*Dip the small paintbrush into the melted crayon and fling the white wax at the canvas.  Repeat until you are satisfied with your canvas.  If the crayon begins solitifying before you are finished, turn the hairdryer on it for a moment until the wax has melted again.
*When you have finished splatter painting with the white crayon, let your artwork sit until the wax has fully solidified.
*Glue a piece of ribbon to the back of the canvas to serve as a hook from which you can hang the canvas.

Bonus Craft: Splattered Stationary


This craft idea resulted from a failed craft attempt.  I was trying to make bubble stationary, but when I pressed the bubbles onto the stationary the resulting color was not dark enough for me.  I did not want to dump out the solution, so here is what I ended up doing.

Materials:
*Food coloring
*Dish soap
*Sugar
*Water
*Heavyweight white paper
*Plastic spray bottle

Directions:
*Combine a couple drops of food coloring, a squirt of dish soap, a small amount of sugar, and some water in a spray bottle.
*Cover your work area in newspaper to prevent staining your furniture etc. with food coloring.
*Standing a foot or so from your paper, spray with the solution in your spray bottle.  Make sure not to spray too much liquid in one area or it may cause your paper to wrinkle. 
*Once you have created a pattern you like, set your paper aside to dry.

Looking for more creative inspiration?  Check out my latest addition to my stylish storage containers blog post.

Thursday, July 12, 2012

Melted Crayon Art


I've seen melted crayon art online before and I thought it was really cool, so I finally got around to making it.  I'm including a link to the original post I worked from in addition to my own, slightly modified directions.

Materials:
*Two 24-packs of crayons
*8 1/2 x 11 canvas
*Hot glue gun and glue
*Hair dryer
*Ribbon

Directions:
*Arrange crayons along the canvas in a color pattern you find pleasing.  You will not need to use all 48 crayons
*Using the hot glue gun, glue the crayons to the canvas, with the tips facing down.  You should end up with something like this:


*Cover your work area with newspaper to prevent melted wax from adhering to your area.  Lean the canvas against a wall
*Turn your hair dryer on high heat and aim at the middle of the crayons.  Run the heat over the crayons until they have melted to your liking.  Be careful, as some of the wax may splatter a little
*Once the crayons have melted as much as you wanted them to, let the art work sit until the wax has cooled
*Glue a piece of ribbon to the back of the canvas to serve as a hook from which you can hang the canvas

Saturday, July 7, 2012

Photo Magnets


Materials:
*Small pictures
*Large clear flat backed glass marbles
*Scissors
*Pen
*Mod Podge
*Paintbrush
*Magnetic backing
*Strong adhesive

Directions:
*Place flat backed glass marble on top of your picture and move it around until you can see the portion of the picture that you want to see through the marble
*Trace around the marble
*Cut out the picture
*Using your paintbrush, spread a very thin layer of Mod Podge across the back of the marble
*Place the picture on the back of the marble.  Set aside to dry
*Once dry, glue a piece of magnetic backing to the back of the marble.  Even if you have self-adhering magnetic backing, it may not be strong enough to support the weight of the marble

If you have a magnetic photo frame . . .
*Pick up some smaller clear flat backed glass marbles.  Using the above procedure, create magnetic captions, images, and other decorations