Friday, May 31, 2019
Horror Pocket Pals: A Nightmare on Elm Street Nancy Thompson Plushie
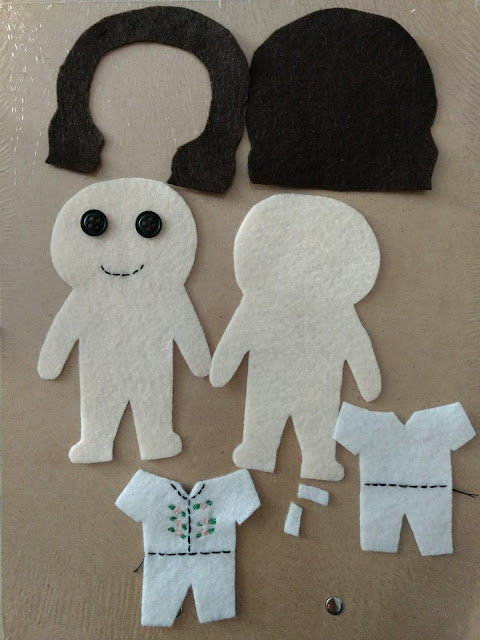
Nancy Thompson from A Nightmare on Elm Street is one of my favorite protagonists, so naturally I had to make a plushie of her. I chose Nancy's look from her final showdown with Freddy, the scene in which she vanquishes him - at least temporarily. In that scene she's wearing pajamas with floral embroidery. I couldn't replicate the actual embroidery on her pajamas, so I decided to go with some fairly simplistic flowers to give a similar vibe. I also included the bandage she had been wearing since she burned herself in her dream. You'll notice I have her streak of gray hair in my template, but not on my plushie. I intended to include it, but forgot to. For this reason, it's not mentioned in the tutorial, but you could easily make it using gray felt or embroidery floss.
Materials:
*Brown felt
*White felt
*Peach felt
*Black buttons
*Black embroidery floss
*Pink embroidery floss
*Yellow embroidery floss
*Green embroidery floss
*Sewing needle
*Brown thread
*White thread
*Peach thread
*Metallic marker
*Scissors
*Stuffing
Directions:
*Print out the template given below:
*Cut two body pieces from peach felt, the two hair parts from brown felt, two copies of the pajamas from white felt, and two copies of Nancy's bandage from white felt, as shown below.
*Sew two black buttons onto one of the body pieces to make eyes. Embroider on a mouth.
*Embroider flowers onto the pajamas.
*Sew pajamas onto the body pieces.
*Sew hair onto the body pieces.
*Sew together the two body pieces using a blanket stitch. Leave an opening in the top of the plushie's head for stuffing.
*Stuff and sew closed.
Sunday, May 26, 2019
Flower Crown
Materials:
*Floral wire
*Artificial flowers
*Floral tape
*All purpose adhesive
*Wire cutters
*Ribbon in colors of your choice
Directions:
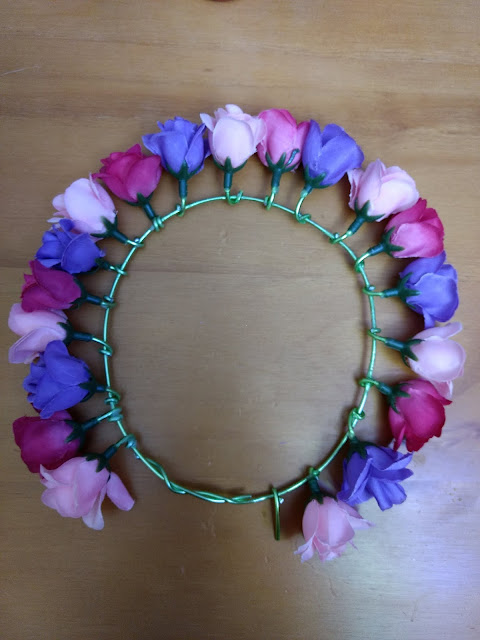
*Create a loop of wire that sits comfortably on your head.
*Add flowers to the loop. If your flowers don't come already affixed to wire, as mine didn't, you can place the flowers on bits of floral wire and use that to attach them to the loop. If the flowers fit loosely on the wire, use a little glue to hold them in place.
*Add as many flowers as you like, leaving some space at the back of the crown for the ribbon.
*Wrap with floral tape.
*Cut a length of ribbon double the length you want it to be on your crown.
*Fold the piece of ribbon in half.
*Place the folded ribbon so that the top of the ribbon (where the fold is) is beneath the crown.
*Pull the ends around the crown and through the loop created between the ribbon and crown.
*Repeat with other strands of ribbon.
Thursday, May 16, 2019
Uranium-238 Decay Series Nail Art
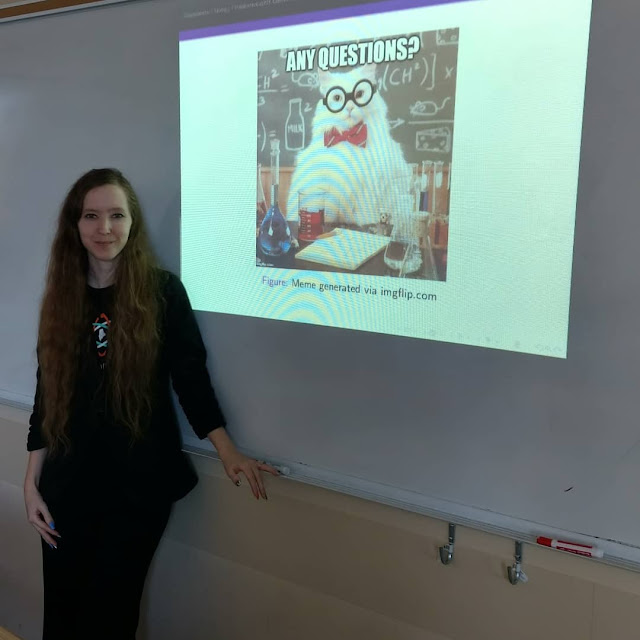
On May 8th I gave my dissertation proposal. Since my proposal was on radiometric dating, I thought it would be fun to style my nails based on the uranium-238 decay series. I was waiting to write the post until after I passed my defense because I can be a bit superstitious and didn't want to jinx myself. I am pleased to report that I did indeed pass, so as soon as I turn in my paperwork, I will officially be a PhD candidate.
Me at the end of my talk.
I tried to match my nail colors to the colors of the elements. However, a lot of the elements in the uranium-238 decay series are gray or silver, so I took liberties in some instances for a wider variety of colors. If you're planning on being somewhere at night with these nails, glow in the dark nail polish could add a fun twist to this manicure.
Materials:
*Nail polish in radioactive colors of your choice
*Nail art pen
Directions:
*Paint your nails in the color scheme that you deem appropriate.
*Using the nail art pen, write radioisotopes of your choice on your nails. Since my dissertation work focuses a lot on lead-210, I chose part of the decay series that would include lead-210, but use whatever part of the decay series that appeals to you.
Thursday, May 2, 2019
"Drink Me" and "Pixie Dust" Pendant Necklaces
Add a subtle touch of Wonderland or Neverland to your style with these necklaces.
Materials:
*Small vial
*Glitter (blue for "drink me" or olive green for "pixie dust")
*Twine
*Glue
*Labels (see this post for instructions on making aged labels)
Directions:
*Fill a vial most of the way with glitter.
*Glue the cork to the vial.
*Glue on a label. (See this post for instructions on making an aged label.)
*Wrap twine around the neck of the vial to form the necklace part. Make sure to use enough twine that the necklace can slip over your head easily.
Subscribe to:
Posts (Atom)


