Showing posts with label Apparel and Accessories. Show all posts

Thursday, October 31, 2024

Happy Halloween 2024


October sure has flown by! It's been a busy month for me. I've been drafting and editing the last few chapters in my third book (only four chapters left to go!) and trying to squeeze in as much Halloween joy as I can. I thought I'd give you a little recap of some of my October highlights.


Halloween costumes are a big part of the Halloween season for me. For the past few years, I've tried to dress up most of the days of October, and one of my go-to costumes is a scarecrow. This year, I was really excited to finally get the chance to take photos in my scarecrow costume in a cornfield. The pictures came out amazingly! 

(As a side note, let me know if you want to see a tutorial for how I do my scarecrow makeup. I thought for sure I posted one already, but when I flipped back through my blog, I couldn't find one.)


Brian and I enjoyed the beautiful fall colors on our lunch walks. Seeing the forest full of vibrant colors is one of my favorite times of the year. If only it lasted longer.


We also had a more unusual opportunity: we got to see the aurora borealis. It was amazing seeing the sky awash in shades of pink and purple!


Another costume I love, my Beanie Baby cat Jinx. You can find my tutorial for making cat ears here, and the tag I printed from this blog.


 October is also Domestic Violence Awareness Month. Brian and I donned purple garb for Wear Purple Day.


We also took part in the 11th annual UMaine March Against Domestic Violence. Here I'm pictured with Nory Jones and Amanda Cost. Nory has been one of the primary forces behind the March since its inception, and Amanda is the executive director of Partners For Peace, a local domestic violence resource center.


On the 20th, I celebrated one year as a published author. My short story "The doll" published in Horrorscope Volume 3, came out on October 20th, 2023. To celebrate, I dressed up as my character Nicole from that story. If you liked the cast from "The Doll," stay tuned, because you might see more of them very soon.


I also continued my pumpkin painting tradition. Last year, I painted a pumpkin to celebrate the release of Horrorscope Volume 3. This year, I did one for Grizzly: A Charity Anthology, which includes my short story "Jane." I also dressed up as the woman with the black veil from that story.


Caught some falling leaves.


Shared new author photos.


And made some Halloween treat bags for our local trick-or-treaters. 

And now the day has finally come! Wishing you and your family a wonderful Halloween!

Tuesday, October 8, 2024

DIY Pokémon Ghost Bow: Pokemonbounding Ep 11


When I saw Pokemon Center's Halloween 2024 merchandise included Sprigatito with an adorable little ghost bow, I immediately wanted one for myself. They don't have any for sale (at least none that I saw), which meant it was crafting time. I couldn't find a good way to make the spider web mesh, so I left that off and just focused on the central bow. 


Materials: 


*Lilac-colored felt

*Black felt

*White felt

*Scissors

*Fabric chalk

*Metal barrette

*All-purpose adhesive 

*Needle and thread (optional)


Directions: 


*Cut a strip of lilac colored felt about as thick as you would like your bow to be (1 1/2" to 2" should work well). 

*Glue the ends of the felt together. 

*Pinch the middle of the ribbon to form a bow shape.

*For me, it was helpful to put a couple of stitches into the pinched part of the ribbon to get it to retain its shape.

*Cut off a thin piece of lilac colored felt. Wind it around the middle of the bow and through the top piece of the metal barrette. Sew or glue the ends of the felt strip together. 

*Draw a ghost shape on the black belt using the fabric chalk and cut out.

*Cut out two little eyes from the white felt and glue to the ghost shape. 

*Glue the ghost to the center of the bow. Let dry.

Wearing my ghost bow in a Sprigatito-inspired look.

One more just for fun! From Sewaddle Community Day.


Thursday, October 3, 2024

DIY Polly Pocket Costume


 The classic 90s Polly Pockets came in many styles, so this costume is highly customizable. Bring along a painted wooden stand for photo opportunities to take this look to the next level.


Materials: 

*10 in or 12 in round wooden plaque 

*Spray paint the same color as the shoes you plan to wear 


Directions: 

*Set up your work in a well ventilated area. Cover the workstation with newspaper or tarp. 

*Following the directions on the spray paint can, paint the wooden plaque. For best results, you may want to do several coats. Let dry.

Monday, September 23, 2024

DIY Candle Flame Headband


Looking for a quick and easy Halloween costume? Why not dress as a candle? This candle flame headband is relatively easy and inexpensive to make, and there are so many different types of candles that you can really make the costume your own. Maybe even match a candle you have, like I did with this bleeding candle. 


Materials: 


*Headband

*One sheet orange felt

*One sheet yellow felt

*Fabric marker or fabric chalk

*Scissors

*All purpose adhesive 


Directions: 


*Fold a sheet of orange felt in half and draw a freehand flame shape using the fabric marker or chalk. The base of the flame should touch the fold line. You'll want the base of the flame to be about an inch thick. 

*Keeping the felt folded in half, cut out the flame shape. Make sure that the base of the flame remains connected. In other words, when you finish cutting out the flame, if you unfold the shape, you should have two flame shapes connected together at the base. 

*Fold a sheet of yellow felt in half and draw a smaller flame shape. This time around, you won't want the two shapes to remain connected, so you may want to draw a little bit above the fold line. 

*Keeping the felt folded in half, cut out the yellow flame. This time around, you should have two distinct flame shapes. 

*Glue the yellow flames to the orange flames. 

*Wrap the flame around the headband such that the base sits against the underside of the headband. Glue the base to the headband and then glue the two halves of felt together, yellow flame sides facing outward. Let dry.

Wednesday, August 14, 2024

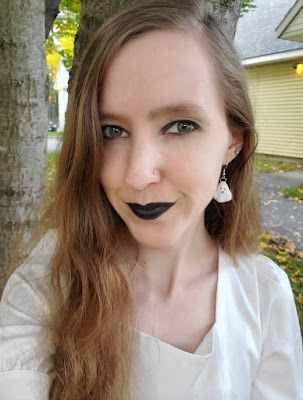
Clay Sheet Ghost Earrings


Add some spooky whimsy to your outfits with these adorable ghost earrings.


Materials:


*White oven-baked clay

*Jump ring

*Toothpick

*Ear wires

*Jewelry pliers 


Directions: 


*Take a small amount of clay and shape it into a thin circle roughly 1.5"-2" in diameter. 

*Shape into a sheet ghost shape. You may find it helpful to drape over the end of a pen or similar object. 

*Embed a jump ring in the top of the ghost's head. Make sure enough of the ring is sticking out so that you can slide an ear wire through.

*Use a toothpick to press a face into the ghost.

*Bake in the oven in accordance with the directions on the clay packaging. Let cool.

*Using pliers, attach ear wires to the ghosts.

Monday, August 5, 2024

DIY Bear Ears


I'm back! Sort of. I still have the tendon injury, which limits how much time I can spend writing. And since I'm a horror writer, I need to spend most my writing time focusing on my fiction. But I've made a number of crafts and DIYs over the past few years, and I miss sharing them with you all. So I hope to pop in from time to time with a new craft.

Since Halloween is on the horizon, I figured today I'd show you how I made these bear ears. I made them for a book release, which I'll tell you more about at the end of the post. But first, the tutorial. 

DIY Bear Ears

Materials:

*Black headband

*Black felt

*Pink felt

*All purpose or fabric adhesive

*Scissors 

*Marker for tracing 

*Bigger cylinder and smaller cylinder for tracing circles (sizes depend on your preferences for the ear size)


Directions: 

*Trace and cut out two larger circles in black felt and two smaller circles in pink felt.

*Center the pink circles on the black circles and glue together.

*Line up the circles along the headband where you would like them positioned and trim off the excess felt that dips below the headband.

*Glue the ears to the headband. Let dry. 


Grizzly: A Charity Anthology


I'm so excited to share that my short story "Jane" was accepted into Grizzly: A Charity Anthology! All proceeds from this anthology benefit Take Back the Night, an organization dedicated to ending sexual assault globally. Inspired by the man vs. bear debate, all of the stories have a bear theme, although in some cases, the bear is central to the story whereas in others, the bear exists in passing mention. The anthology is multi-genre, and my story is horror. I'm including the blurb below, and if you would like to learn more, you can check it out on Amazon or Goodreads. It is only available until September 10th, so if you'd like to have a copy, make sure to pick it up before then. 


The Blurb: 

Boys will be boys.

Bears will be bears…

Brace yourself for twenty mixed-genre tales, all tied together with a neat bear- shaped bow that your mother would be proud of. Guaranteed to make you ‘smile more often’ and rage like it’s ‘that time of the month’.

Written by femme SA survivors for all SA survivors, Grizzly is the charity anthology that aims to give back and bite back.

Sometimes, when you can’t find the strength to roar, a growl will do.

Thursday, December 9, 2021

Making a Life-Sized Holiday Barbie 2021 Dress Part 2: Adding Details to the Bodice


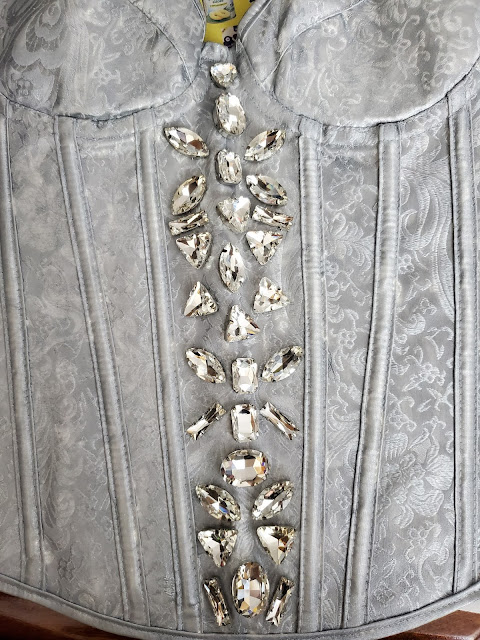
My journey in making my own Holiday Barbie 2021 dress continues.  Last week, I painted the white corset I had chosen for the bodice silver.  This week, I began adding embellishments.  It turns out, sewing on a ton of rhinestones and faux pearl strings is pretty time consuming, so I'll have to update you on the rest of the embellishing in next week's post, but we're making progress.

Materials:

*Silver corset (if you need to paint a corset, see this post)

*The largest rhinestones you can find

*Faux pearl garland

*All-purpose adhesive

*Sewing needle

*White or silver thread

Directions:

Note: The largest rhinestones I was able to find were about 30 mm high.  Thus, I was not able to replicate the pattern on Holiday Barbie's dress.  I used her pattern for some inspiration and then filled in the remaining space with designs of my own.

*Secure a small group of rhinestones to the corset using all-purpose adhesive.  Let dry.

*Sew the rhinestones into place to ensure that they stay on the bodice.  The all-purpose adhesive I use is reasonably sturdy, but for something like a clothing item which you'll be pulling on and off, I definitely recommend securing them with some thread to make sure they stay in place.

*Repeat the gluing and sewing with another small cluster of rhinestones.

*Keep repeating until the central panel is done.

*Next, take your pearl ribbon and glue it onto the corset.  Let dry.

*Sew the ribbon down for extra stability.  I basically sewed every third or fourth string section between pearls.

*The pearl ribbon maps out where the rest of the rhinestones will go.  Arrange your rhinestones, glue down, and sew them in place.

And that's what I've done so far, although the bodice is still far from complete.  Tune in next week to see the next phase of decorating the bodice.

Thursday, December 2, 2021

Making a Life-Sized Holiday Barbie 2021 Dress Part 1: Painting the Bodice


This holiday season, I have a rather large project I'd like to try my hand at.  Instead of doing one grand reveal, I wanted to try breaking it up into smaller pieces and posting about my progress as I go.  This could go really well or the project could go disastrously and then I've documented my failure for you all, but either way, it will be a learning experience.  Also, this way I hopefully won't put it all off until the last minute.  If I need weekly content, I'll presumably have to work on it a little here and there so that I can share something with you.

As a kid, I loved Barbie.  I remember seeing Holiday Barbie in stores in her beautiful dresses and wanting a doll of my own, but I never actually had one.  I also loved the holiday Barbie ornaments, but again, didn't have one.  Well, I ended up stumbling across images of Holiday Barbie 2021, and I was in awe of her dress.  I'm like, I'm a grown adult, I can buy myself a Holiday Barbie AND Holiday Barbie ornament and fulfill a childhood dream.  But then I thought to myself that it would be even cooler to become Holiday Barbie.

I scoured the internet for a dress like Holiday Barbie's, but to no avail.  And then I thought, maybe I could make myself a Holiday Barbie dress.  I spent hours combing the internet for the perfect supplies.  I debated and debated whether it was actually a good idea to take on this project, and eventually I hit submit.  And here we are.

Now I know what you're probably not thinking, but absolutely should be: But Amber, you hate sewing.  And I kind of do.  I don't make a point of this, and I love what sewing can do for me, but the actual sewing process I do not really enjoy.  So why make myself a dress?  Well, once I have an idea in my head, sometimes it's very hard to nix it, and I just could not get over the idea of how cool it would be to have Holiday Barbie's glamorous dress.  This may prove to be a spectacularly bad idea.  Or a great idea.  I'm leaning toward bad idea, based on preliminary results, but only time will tell.

Holiday Barbie's dress has a beautiful silver bodice.  To minimize the amount of sewing I would have to do, I picked up a corset which I will be modifying to make the bodice.  I could not find an affordable silver corset with either a back or side closure, so I ended up buying a white one that I could paint silver.  Today we'll be focusing on that part of the process.

Materials:

*White corset

*Silver paint

*Textile medium

*Paintbrush

Directions:

*Cover your workstation in newspaper or some other protective layer to keep it from getting covered in paint.

*Lay the corset down on the newspaper.


*Mix together the paint and textile medium in the proportions given on the textile medium bottle.  Mine was two parts paint to one part textile medium.  This will essentially turn your acrylic paint into fabric paint.  You're supposed to iron it to set the paint, but I don't think this corset is ironable, so I'll just use the corset very carefully.  Once the rhinestones are on, it will be a challenge to wash anyway.

*Once the front is dry and has been set, paint the back.


 *Optional: Paint the inside of the corset.  I painted the inside of the straps, since I was worried about that portion being visible.

Now we have a silver corset.  It's kind of pretty, but it's not very Holiday Barbie.  Next I'll be adding some rhinestones in hopes that this will make it a little more like Barbie's dress.

The big issue I'm having at the moment is that the corset arrived folded in half, and there is a significant crease in that location.  I should have tried tackling that before painting, but I didn't, and so now I'm trying to press it out using a heavy textbook.  But I have a feeling it's there to stay.  So not super optimistic, but we'll see how that goes.

Wednesday, November 17, 2021

Little Debbie Christmas Tree Cake Earrings


Little Debbie Christmas Tree Cakes are back in stock, which means it's time for yet another snack cake-themed craft.  This year, I decided to add some earrings to my holiday wardrobe.  Need some more snack cake-themed craft ideas?  Check out my Christmas Tree Cake Felt Ornament, Swiss Roll Ornament, Christmas Tree Cake Throw Pillow Technique #1, Felt Gingerbread Ornament, Christmas Tree Cake Dress, Christmas Tree Cake Throw Pillow Technique #2, and Christmas Tree Cake Nail Art.

Materials:

*White oven-bake clay
*Red acrylic paint
*White acrylic paint
*Green acrylic paint
*Ultra fine nail art brush or paintbrush
*Ear wires
*Two sets of jewelry pliers
*Jump rings (optional)

Directions:

*Create two Christmas Tree Cake shapes out of clay.

*Poke holes in the tops of each wide enough for your ear wires to fit through.  I forgot about the curvature of the ear wire loops when I was poking my holes, so mine ended up not being quite wide enough.  Hence the jump rings.

*Bake following the directions on the clay's packaging.  Let cool.  You should end up with shapes something like this:

*If your clay is a little off-white after baking or there are visible specks in the clay, paint white.  Let dry.  If you're happy with the look of your clay shapes, you can skip this step.

*Paint on red bands to mimic the stripes on Christmas Tree cakes.  Let dry.

*Paint on little green specks for the sugar sprinkles.  Let dry.

*Now it's time to add the ear wires.  If you've made the holes large enough, you should be able to open up the ear wire loop, slide it through the earring hole, and close it.  If not, you may need to add a couple of jump rings first, or even slide a headpin through the hole and then bend it into a triangle.

Wednesday, November 10, 2021

Halloween 2021 Wrap Up


I hope you all had a wonderful Halloween season.  I know Halloween has been over for nearly two weeks now, but I thought it would be fun to give you a little window into what Halloween looked like for Brian and me.  Let's start with our day-of costumes.

I went as a scarecrow.  I put together a look similar to this one during October of 2020 (I dress up all throughout October) and liked it so much that I wanted to make it my Halloween day look this year.  Since Brian and I do a couples costume for Halloween day, I needed a corresponding costume for Brian, and I thought a crow would be the perfect counterpart.

This was another costume idea that originated in October 2020.  If you've seen my 15 Halloween Costumes from My Closet post, you may recall that I included a scarecrow and crow couples costume as a bonus idea.  That time, the crow look was fairly simplistic, essentially just a black paper cone beak.  This year, I wanted to make Brian a crow mask.  I freehanded some feathery shapes on black felt and came up with this design.  I'm planning on including the crow mask template and directions in my Halloween 2022 lineup, so if you like this mask and want to make one of your own, keep your eyes out around August or September of next year.  I'll probably include a scarecrow makeup tutorial then as well.

Now let's turn to decorating.

I didn't do a lot of decorating this Halloween season, but I did deck out the front lawn a little to spread some holiday cheer.  When I was little, my dad used to have us paint pumpkins as opposed to carving them because carved pumpkins rot faster.  Also, no pumpkin guts to contend with if you paint.  Last year, I ended up painting a pumpkin for our doorstep as part of a Halloween challenge, and I had enough fun with it that I wanted to try it again this year.

I had this idea of painting a silhouetted nighttime cemetery scene.  I don't really do a ton of art, so I was kind of expecting this to go disastrously, especially since I just kind of winged it.  But I'm pretty pleased with how it turned out.

The other piece of my Halloween setup was my cemetery.  This is my favorite Halloween setup each year.  Six of the headstones I carved myself, and I have tutorials here, here, here, here, and here if you'd like to see how I made them.  It has a special place in my heart, and if I could only set up one thing for Halloween each year, this would be it.

We decided to set out premade Halloween goodie bags again this year.  We placed them in the graveyard this time around and once again, they were a big hit.  We only had four left over at the end of the night.  Even if things are safer next year, I'm thinking about putting the treats outside.  Not everyone likes being social or feels comfortable interacting with strangers, and some folks may worry about being judged for being "too old" to trick-or-treating.  If more people are able to enjoy Halloween this way, I'm all for it.

Let's move on to the treat bags themselves for a sec.


Since we've started making treat bags, I like to include a mix of chocolate, non-chocolate, and non-candy options.  That way, hopefully there's something for everyone.  Here's a look at some of the candy.

And here are some of the non-candy treats.  Aren't they adorable?  I had to keep reminding myself that these were for the trick-or-treaters, not for me.

We also made an instructional sign, since the bags did blend in a bit with the leaves.  I used one of the free templates in Canva, and it took me under five minutes to make.

Here's a close up on the sign.

And that's a wrap!  Hopefully you enjoyed this little tour of our Halloween setup.  I know it wasn't as elaborate as it has been in the past, but hopefully next year I'll be a little less busy and also have the motivation of a Halloween party again.  Also, Halloween is not a one-day affair in our household, so even though I didn't have as much of a setup, I still celebrated all through October with spooky costumes and outfits as well as spooky reads.  And editing my horror novel, which I'm *almost* done with, for now.

How did you celebrate Halloween?  Are you missing Halloween, or are you ready to move on to other holidays?  Things will be taking a Christmas-y turn on my blog here soon, but if you're looking for more Halloween content, I post almost exclusively Halloween content August through October.  Sometimes May through October if I have a spooky-themed birthday party.

Wednesday, October 13, 2021

Harley Quinn Birds of Prey Jacket

 
So this is one of those crafts that I don't want to post a tutorial of my own for because I went about this one in the wrong way.  You see, I bought a mesh jacket for this project, which meant I couldn't adhere the streamers to the sleeves with hot glue.  So I used packing tape.  Which worked for a few pictures, but left a lot to be desired.  So instead, I'm linking you to the tutorial that inspired this project.  If you want to attempt a Harley jacket of your own, definitely check out that tutorial.

I do want to try this jacket again sometime, though.  This iteration was thrown together over the course of a couple of hours the night before I needed it.  Which meant I didn't have the time to fill out the sleeves like I wanted to.  But hey, for a last minute project, it came out okay.  I would just not recommend following my example here.

Any Halloween costume plans yet?  This year I'm trying to put together Halloween costumes, cosplays, bounds, and looks for each day of October.  You can see what I've come up with so far over on Insta @all_of_my_outfits.

Thursday, September 9, 2021

Halloween 2021 Earrings


One of my favorite things to make each Halloween season is a new set of spooky earrings.  I don't always share them with you, because I've already done a tutorial on how to make basic earrings, but I thought you might appreciate seeing the new earrings.  Plus, it's a relatively straightforward craft, so if you're looking for something you can actually make, this is a bit easier than foam tombstones or hand-sewn cosplays.

Since did write a tutorial for making earrings previously (see above link), there isn't a tutorial with this one.  However, I did want to tell you a little more about where I get my Halloween charms.  Joann is my go to, and their Hildie & Jo charms and strung beads feature heavily in my Halloween jewelry.  

Here are the beads, charms, and jewelry I bought from Joann this year.  As you can see, I haven't had a chance to make all of them into jewelry yet.  The tombstone, crow/raven, spiderweb with spider, and skeletal hand charms appear to be new to Hildie & Jo's 2021 Halloween collection.  You can buy them here, and you can see their full Halloween 2021 charm, bead, and jewelry collection here.  There are so many cool pieces this year, and I definitely recommend checking them out if you love Halloween jewelry.  The rounded charms are also from Hildie & Jo.  I bought them last year, but it looks like they have returned this year, and you can find them here.  The charms are already 40% off at Joann, so if you're interested, you'll probably want to grab some asap.

The tarot card charms are from Etsy.  If you do an Etsy search for "tarot charm," you'll turn up all sorts of neat designs, although some are pretty pricey.

Anyway, I just wanted to give you a peek into my Halloween jewelry this year.  Are you planning on making some Halloween jewelry?  I'd love to see what you come up with.

Wednesday, August 11, 2021

DIY Jigglypuff Ears: Pokemonbounding Ep 10


Here's a fun and relatively inexpensive item to make for your next Pokemon-inspired look: Jigglypuff ears.  You can also use this technique for making other ears.  Just modify the ear shape and felt colors to suit your critter.  Otherwise, the steps are the same.

Materials:

*Headband
*Pink felt
*Black felt
*Scissors
*All purpose adhesive
*Fabric chalk or pen

Directions:

*Draw and cut two Jigglypuff outer ear shapes from pink felt.  I think I used my Meowth ear template for this, but you could also freehand the ear shape.

*Draw and cut out two Jigglypuff inner ear shapes from black felt.

*Glue the inner ear pieces to the outer ear pieces.  Let dry.

*Glue the ears to the headband.  Let dry.

Wednesday, August 4, 2021

DIY Ursula Shell Necklace

Ursula's gilded shell necklace is a key piece of her aesthetic.  Both stylish and functional (great for storing voices), this may be the perfect accessory to finish off an Ursula cosplay, costume, or Disneybound.  See this post for one of my Ursula Disneybounds which uses this necklace, as well as more information about Disneybounding.

Materials:

*Oven-bake clay
*Gold paint
*Paintbrush
*Toothpick
* Jump ring
*Knife
*Necklace chain

Directions:

*Roll out clay into a log shape that is thick at one end and thin at the other.

*Beginning at the thin end, wind the clay into a spiral.

*Once you have wound the clay into the desired spiraling shell shape, trim any excess clay with a knife, if needed.

*Insert the jump ring into the top of the shell.  Use the toothpick to smooth over the clay around the jump ring.

*Use a knife or toothpick to score three lines in the clay, mimicking the look of Ursula's necklace.

*Bake clay in accordance with the directions on the packaging.  Remove from the oven and let cool.

*Once the clay is cool, paint gold.  Let dry.

*Slide the necklace chain through the jump ring to finish off your necklace.

Wednesday, July 28, 2021

Clay Tentacle Earrings


Looking for a fun, spooky accessory?  Why not try these clay tentacle earrings?  I've used the purple ones for Ursula Disneybounds, and the green ones give me strong sea monster vibes, so I'll probably be putting together a look based on that at some point.

Here's what they look like on me.  This was one of my Ursula Disneybounds.  I also made the shell necklace, so if you want more details on that, let me know, and I'll make sure to include it in a post.

Materials:

*Oven bake clay

*Nail art dotting tool

*Paint in colors of your choice

*Jump rings

*Ear wires

*Round-nosed pliers

*Fine paintbrush, such as a nail art brush

Directions:

*Form clay into two tentacle shapes.

*Insert a jump ring into the top of the tentacle, covering it halfway in the clay.

*Create small disks from clay.

*Use the nail art dotting tool to attach the disks and give them a suction cup shape.

*Bake in the oven in accordance with the directions on the packaging.  Let cool.

*Paint in a color scheme of your choosing.