Thursday, September 28, 2017

DIY Halloween Potions

     These Halloween potions are easy to make and work with any witch or Harry Potter themed Halloween setup.  Need more potion ideas?  Check out these Pet Sematary inspired potions, glittery potion bottles, Halloween potion pendants, "Magic of Christmas" ornament, and this nebula in a bottle.  Between all of these ideas, you may find some inspiration.

Halloween Potion Labels

If you're not familiar with the process of staining paper with coffee to make it look aged, check out my Halloween potion pendants tutorial to find out how to give paper that aged look.
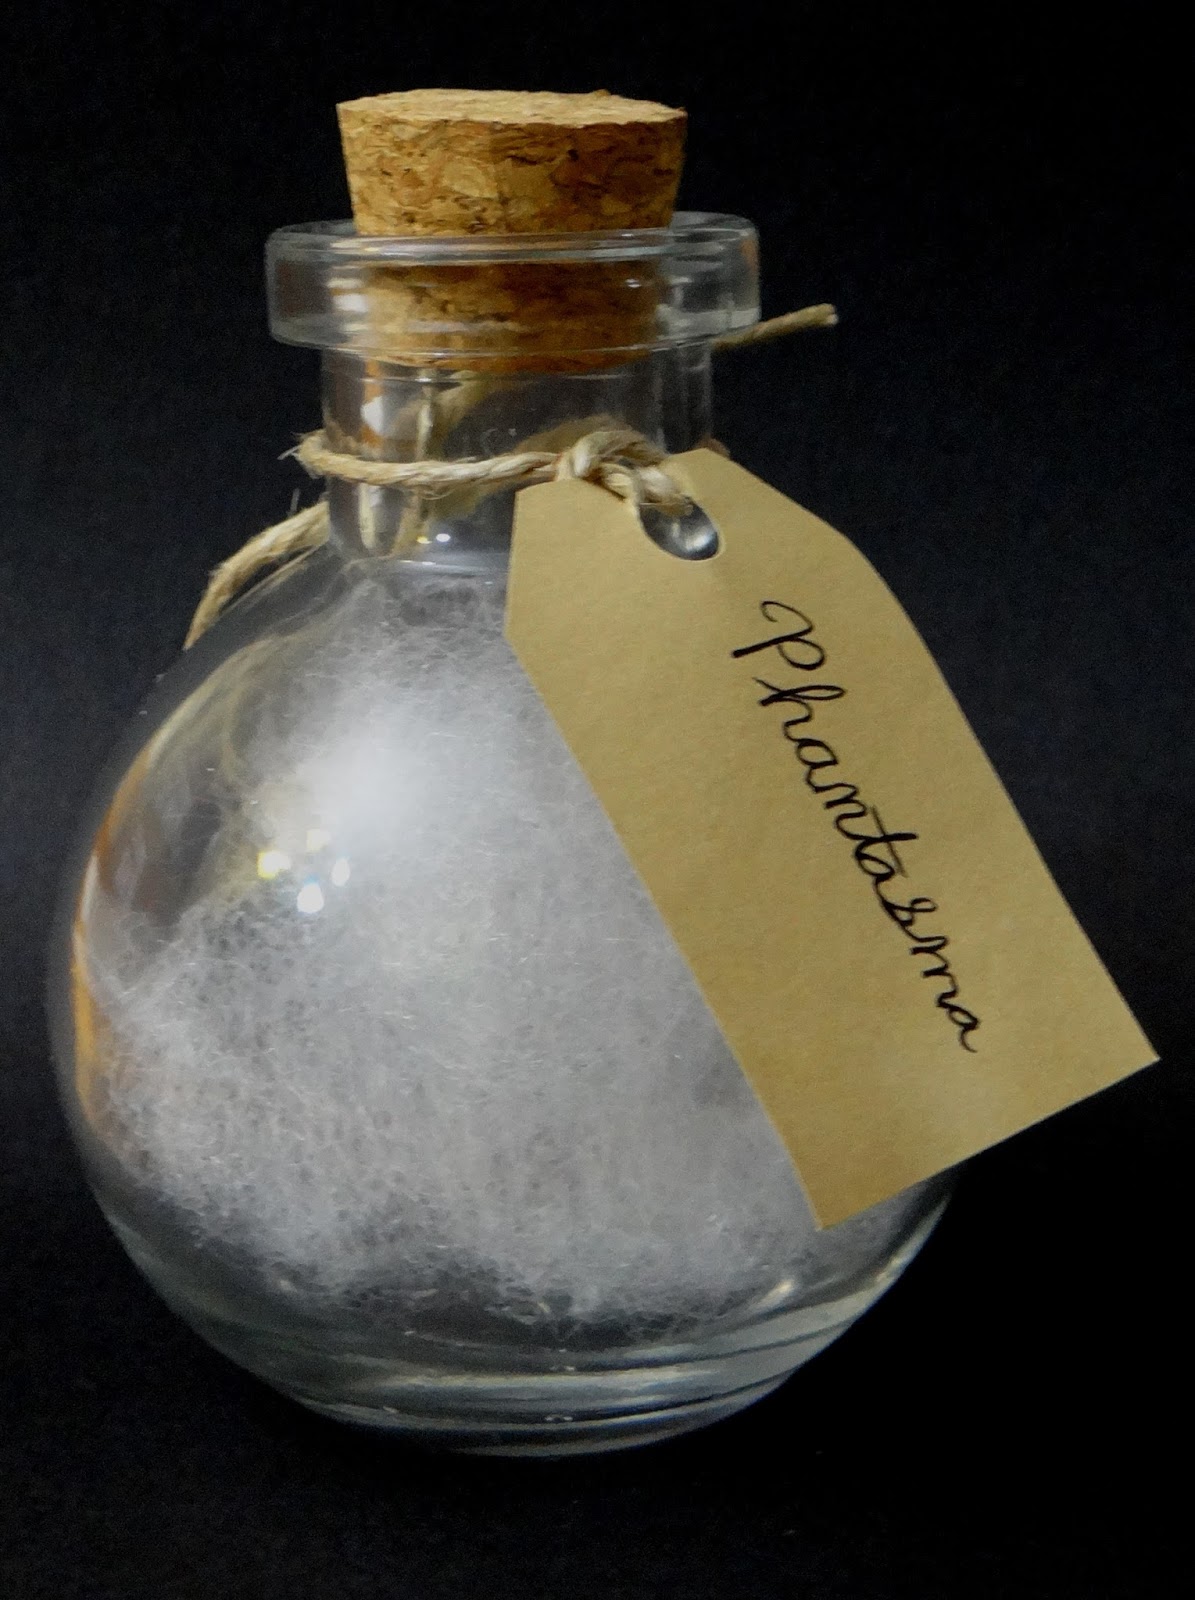
Phantasma


Materials:

*Glass vial
*Stuffing
*Coffee-stained "aged" paper
*Black gel pen
*Hole punch
*Twine

Directions:

*Take a small amount of stuffing and separate it out until it looks wispy.  Place wisps of stuffing into the bottle until it is full and then close off the bottle.

*Cut a tag from the "aged" paper.  Punch a hole in the top.  Label the tag "Phantasma" or "Ghost in a Bottle" or whatever seems fitting.

*Tie the tag around the bottle's neck using twine.

Faerie Skulls


Materials:

*Glass bottle
*Skull beads
*Coffee-stained "aged" paper
*Black gel pen
*Hole punch
*Twine

Directions:

*Pour skull shaped beads into the bottle and then close the bottle.  Try to maneuver the beads such that the hole through the middle is not noticeable.

*Cut a tag from the "aged" paper.  Punch a hole in the top.  Label the tag "Faerie Skulls" or whatever seems fitting.

*Tie the tag around the bottle's neck using twine.

Nightmares


This potion is just a full sized version of the "Nightmares" potion pendant I made a few years back.

Materials:

*Glass vial
*Black glitter
*Coffee-stained "aged" paper
*Black gel pen
*Hole punch
*Twine

Directions:

*Pour glitter into the vial and then cork the vial.

*Cut a tag from the "aged" paper.  Punch a hole in the top.  Label the tag "Nightmares."

*Tie the tag around the bottle's neck using twine.

Love Potion


Materials:

*Glass vial
*White glitter
*Small, heart shaped sequins/spangles
*Coffee-stained "aged" paper
*Black gel pen
*Hole punch
*Twine

Directions:

*Fill the vial about halfway with white glitter.

*Add some heart spangles and shake until the hearts and glitter are well mixed.  Add more glitter and hearts until you have the desired ratio of the two.  Cork the vial.

*Cut a tag from the "aged" paper.  Punch a hole in the top.  Label the tag "Love Potion."

*Tie the tag around the bottle's neck using twine.

Thursday, September 21, 2017

Halloween Costume Contest Cat Trophies


     I originally wasn't planning on making trophies anything like these.  I had seen some skulls on pedestals on Dollar Tree's website and planned on buying some and decorating them, but my local Dollar Tree didn't have any in stock.  The semester is really starting to pick up, so I decided that while I had a few minutes to spare this weekend, I needed to finish the trophies.  I started thinking about what supplies I had around the house and I remembered that I had several cat figurines that I could use.  I thought it might be neat to dress black cats up in costumes.
     I asked Brian what he would dress up as if he was a cat and he said a shark (there's a meme we have on our fridge with a cat wearing a knitted shark hat that says, "sometimes you have to tell yourself "I am a shark" and attack the day).  I remembered the shark cat riding Roomba videos and Brian suggested making the cat's base into a Roomba.  That's how the shark cat trophy came to be.  For the others, I got my inspiration from a "costumes for cats" search on Pinterest.
     I love how these came out, especially the shark one.  I'll have a hard time surrendering them at my Halloween party.

Materials:
*Cat figures
*Jar lids
*Black paint
*Red paint
*Paintbrush
*Hot glue
*Felt, cardstock, and other decorative elements
*Paper
*All purpose adhesive

Directions:

*Glue cats to the jar lids.

*Paint the cats and their bases black.  Let dry.  Apply multiple coats if necessary.

*Paint red eyes on the cats.

*Add costumes.  For the bat/gargoyle creatures, I cut some wing shapes from black felt and glued them to the cat figurines.

*For the Beanie Baby, I punched a red heart from cardstock, wrote "ty" in white gel pen, poked a threaded needle through the cardstock, and tied the tag around the cat's neck.

*Shark cat riding a Roomba I just kind of winged, so I can't explain it quite as well as I'd like.  I cut out two shapes like a quarter of an ellipse from blue felt and sewed them together along the curved edge.  I then cut out a row of teeth from cream colored felt and stitched them to the shark costume's mouth.  I cut a blue rectangle from felt and sewed the shark head hood onto it and then trimmed it down to fit around the cat.  I glued the costume to the cat (just the "belted" part that goes around the cat's belly) and then cut out a fin from blue felt and glued it to the costume.  For the Roomba base, I painted the outer edge black and then painted the inside silver.

*Print out labels for the various awards and glue them to the bases.

Shark cat for "Most Creative" costume award.

Bat cats (or gargoyle cats) for "Best Couple/Group Costume."

Beanie Baby cat for "Best Costume."

Thursday, September 14, 2017

Halloween Mummy Veggie "Meatballs"


     This Halloween snack is almost too cute to eat.  The recipe is from Pillsbury, but made it vegetarian and modified it a little.

Ingredients:

*Veggie "meatballs" (I used Nate's Zesty Italian Meatless Meatballs)
*Crescent roll dough
*Marinara sauce

Tools:

*Knife
*Toothpick

Directions:

*Roll out the crescent roll dough.

*Cut the dough into thin strips.

*Wrap the strips of dough around the "meatballs" to form "bandages."  Make sure to leave a gap between the bandages for the "face."

*Bake in the oven for about 15 minutes, or until the dough is golden brown and the "meatballs" are cooked all the way through.

*Use a toothpick to make marinara sauce "eyes."

*For a dinner, serve with spaghetti and crescent rolls.


Thursday, September 7, 2017

Beware of Werewolf Halloween Display


     Sometimes the scariest things are not what you see, but rather what you don't see.  This Halloween display is disconcerting without any blood or gore.  It's also relatively compact, making it an ideal decoration if you don't have a lot of room to store Halloween props.  I crafted the femur for this display from Model Magic, but you could use plastic skeletal remains as well.

Werewolf Collar

Materials:
*Craft foam
*Empty duct tape roll
*Brown paint
*Paintbrush
*All purpose adhesive
*Scissors
*Aluminum foil
*Iron
*Chain
*Metal links
*Knife

Directions:

*Take a sheet of aluminum foil and crumple it up, then carefully unfold it.

*Place the aluminum foil over the craft foam.

*With the iron on low heat, run the iron over the aluminum foil.  It should melt creases and wrinkles into the craft foam.

*Take the duct tape roll and cut straight across it so that it opens up.

*Cut the foam to fit around the duct tape roll and glue it on.

*Cut holes into the "collar" where you want your chain and metal links to go.  I used a kitchen knife to do this, but there are probably better ways to do this.

*Paint the collar brown and then set aside to dry.

*Once dry, add the metal links and chain to the collar.

"Beware of Werewolf" Sign

Materials:
*Cardstock and printer
*Laminator (optional)
*Long wooden stake
*All purpose adhesive

Directions:

*Print out the sign below on cardstock.


*Laminate the sign (optional, but will make it weatherproof).

*Glue the sign to the wooden stake.