Monday, October 28, 2019

DIY Jack (Torrance) and Coke Couples Costume


     Here's a fun twist on the popular Jack and Coke couples costume.  If you haven't seen it on Pinterest or elsewhere, a commonly featured couples costume involves one partner wearing a Jack Daniels T-shirt while the other wears a Coca-Cola T-shirt or dress.  Brian suggested trying this costume, but with Jack as Jack Torrance from The Shining.  I thought that was a great idea, and so we decided to give it a go.
     I made a video tutorial for this one.  You can watch it below, or head on over to Youtube to see it.  Let me know what you think of the video tutorial format.  I'd potentially like to do more video tutorials in the future, so your feedback is greatly appreciated.  I've also included a written tutorial for the Cherry Coke dress, if you prefer written tutorials.
     Since this project uses removable vinyl, the nice thing is that once you're done with your costume, you can peel off the vinyl and wear your garment again.  Just make sure to test the vinyl first to make sure that it doesn't damage the fabric, and avoid using removable vinyl on delicate fabrics.


DIY Cherry Coke Dress


Materials:

*Dress or shirt in the color that you want your soda can to be
*White removable vinyl
*Green and red removable vinyl (if you're trying to imitate a Cherry Coke can)
*Paper, pencil, and scissors or die cutting machine

Directions:

*Lay the dress or shirt on a flat, clear work surface.

*Optional: cut out Coca-Cola lettering from paper or cardstock and position it on the dress to determine the placement that you'd like for the vinyl.

*Cut out letters from removable vinyl.

*Using a scrap of removable vinyl, press it down on an inconspicuous part of the garment and peel it back up to make sure that the vinyl doesn't damage the garment.

*Replace the cardstock letters (if used) with the vinyl letters.  Since the vinyl is removable, you can peel it up if you make a mistake in laying down the letters, but the vinyl may lose some of its adhesiveness.

*When you're done with your costume, you can peel off the vinyl and wash and wear your garment as you would normally.

Thursday, October 24, 2019

Halloween Creepy Doll Costume Wind Up Key


     I'm not sure if it's because of the new Annabelle movie, but creepy doll costumes are on trend this Halloween season.  They can also be put together relatively inexpensively.  To step up your costume game, why not add a simple gold wind up key to your look?


Materials:

*Foam board  (you could also use cardboard if you don't have foam board on hand)
*Toilet paper tube
*Scissors
*Gold paint
*X-acto knife or box cutter
*1/2" to 1" Elastic
*Optional: acetone based glue

Directions:

*Print out a copy of the wind up key template given below, or design your own wind up key template.  If using the template I designed, you may want to increase the length of the key stem by a couple of inches.  It's better to cut the foam board a little too long and then trim it back later than to cut it too short.


*Trace the template onto the sheet of foam board.

*Cut out the key shape from the foam board using an X-acto knife.  Alternatively, if you don't have an X-acto knife, you could use a box cutter.


*Optional: If your key shape ends up looking a little rough around the edges, you can use a tiny bit of acetone based glue to erode away the excess foam at the edges.  If you do this, work slowly and carefully, and test on a scrap piece of foam board before you try it on your key.

*Slide the key inside the toilet paper tube.  The key should fit snugly.  Trim the end of the key so that it ends about 1/2" from the bottom of the toilet paper tube.

*Cut slits in the toilet paper tube about 1/4" from the bottom of the tube that are wide enough for your elastic to fit through.

*Paint the key shape and the toilet paper tube gold.  If you use spray paint, be careful, because the spray paint may eat at the foam.  Let dry.

*Once dry, place the key inside the toilet paper tube.  You could glue the key in place if you'd like, but I chose not to.

*Cut off a length of elastic about 10" or so longer than your waist measurement.

*Slide the elastic through the slits in the toilet paper tube.

*Tie the ends of the elastic around your waist to fasten the key to your body.  (I forgot to buy elastic, so I'm using ribbon to hold it up in the picture above, so that's why the key looks a little slouchy.)

Wednesday, October 16, 2019

Fast and Easy DIY Halloween Jewelry

     Things have been a little stressful for me lately, so instead of writing up a tutorial for one of my more elaborate Halloween props, I decided to do something easy.  If you would like to make some cute Halloween jewelry, but don't want to spend a ton of money doing so, this tutorial is for you.  I'll also be reviewing the Halloween shrink art kit I picked up from Target's dollar aisle, so check out the end of the post for that.

Easy DIY Halloween Earrings


Materials:

*Halloween charms (such as these ones, which are on sale at Joann)
*Ear wires
*Needle nosed pliers

Directions:

*Remove jump ring from Halloween charm.

*Using pliers, open up the bottom loop of the ear wire.

*Slide charm onto the ear wire.

*Close the loop using the pliers.

*Repeat process to create a second earring.

Easy DIY Halloween Necklaces


Materials:

*Halloween charms (such as these ones, which are on sale at Joann)
*Necklace chain
*Necklace clasp
*Needle nosed pliers

Directions:

*Resize necklace chain to your desired size by opening the link at the end of your desired length with your pliers and pulling off excess chain.

*Place one end of the clasp through open link and then close link with pliers

*Open the link at the other end of your necklace chain with pliers.

*Place the other end of the clasp through the link and close that link.

*Open the jump ring at the end of the charm and slide it through the chain link at the middle of your necklace.

*Close jump ring.

Target's Halloween "Make Your Own Shrink Art Bag Tags" Kit Review


Note that this is a picture of my already shrunk shrink art monsters on top of the empty packaging.  I forgot to get a picture of the kit before I opened it.

     I was at Target the other day when I came across this Halloween shrink art kit and decided to give it a try.  I've never tried my hand at shrink art before, so I figured this would be a good foray into the craft.  Here are my thoughts.
     First of all, I found the coloring to be fun.  There is a fair amount of detail work, so if you are making these with children or other individuals who have difficulty coloring in the lines, this aspect of the craft could pose a little bit of a challenge.  However, if your crafters just like coloring and don't care whether they manage to color in the lines, they will probably enjoy this.
     The shrink shapes were precut, which was nice.  The cooking instructions were relatively straightforward.  I expected that the shrink art might warp a little, and it did, but I didn't expect it to skew in quite the way that it did.  A lot of the shapes ended up slanting a little after cooking.
     I decided to go ahead and make the shapes into keychains.  I did not love the string, as it frayed quickly.  The glow in the dark beads were a fun touch, and I'm sure many crafters, perhaps particularly the younger ones, will get a kick out of them.
     All in all, I would say the kit was worth the $3 for the entertainment value.  It could be good fun for crafters of all ages (or at least ages 5 and up, as the package says).  I know that Target tends not to restock their dollar aisle merchandise after it sells out, so if you haven't picked one up already and want to give it a try, I would recommend checking your Target store as soon as possible.


Before shrinking


After shrinking.

     Have you been doing any Halloween crafting this season?  I'd love to hear what you've been up to.

Thursday, October 10, 2019

My Halloween Party 2019 and New Halloween Trophies

     This past Saturday, Brian and I held our annual Halloween party.  It's been a busy week, so things were a little rushed, but I still had fun, and I hope our guests did as well.  Here's a rundown of our party, plus a look at this year's Halloween trophies.  For more party ideas, check out my 2018, 2017, 2016, 2015, and 2014 party posts, as well as my X-Files, Goosebumps, and The Shining themed birthday party posts.

Snacks


     Due to time constraints, food crafting took a bit of a backseat once again this year.  We had pizza and soda as the main party foods.  However, we did get around to making some spooky cupcakes this year.


     For these bloody cupcakes, we used Funfetti cupcake mix.  Brian made his classic vanilla icing (scroll to the bottom of this post for the recipe).  For the fake blood, I took sea salted caramel sauce and added red food coloring.  I then used a spoon to drizzle it over the cupcakes.
     If you're looking to plan a Halloween party, but are in a bit of a time crunch, I would definitely recommend making bloody cupcakes.  They look spooky, but take very little time to make.  If you're really in a pinch, you could pick up premade cupcakes and add some caramel sauce fake blood to them.  For other Halloween food and drink ideas, check out this post.

Outdoor Decor


     While the outdoor setup was largely the same as last year, I did have a couple additional elements of the setup.  Above you can see a picture of the front door, which, if you've seen last year's post, should look pretty familiar.  Here's how I made the Wayton Manor sign.  The doorbell, which is hanging up on the door, came from Target.  It looks like Target no longer has the exact same doorbell, but they do have a similar one.


     Next up we have the cemetery.  Five of the stones I made.  You can find the tutorials here, here, here, and here.  You can't really see it well in this picture, but I placed my eerie bouquet in front of Emma Lewis's stone.  My cemetery angel is also hanging out in the back of the cemetery against our maple tree's pot.  The fencing, a couple of the stones, and some of the bones came from a cemetery kit I got from Target a few years back.


     My "Beware of Werewolf" setup made a return again this year.


     Now for the new stuff.  While I unfortunately was unable to keep the larger pieces of my Alice in Halloweenland setup from last year (shown in last year's party post, although you'll have to scroll a little to find it), I did hold onto the skel-a-mingos as well as the clay mushrooms.  I decided to add in my zombie garden gnomes for the start of a haunted garden setup.  This was thrown together last minute, so given that, I think it worked out fine.  I would like to expand on this next year, if I have the time.


     Lastly for the outdoor decor, I gave the haunted artifact prop its own space.  I found a handful of the broken pottery shards and plopped them down in front of the sign.  This one isn't one of my favorite setups, but it is a good way to reuse a broken plant pot.

Indoor Decor


     This is what the overall indoor layout looked like.  A lot of the pieces are the same as last year, although the layout was a bit different.  We rotated the couch to open up the space a bit.


     Here's the wall of lenticulars plus my haunted mirror.


     And here's some of my Stephen King DVD art, along with a false window I made that I haven't written about yet on this blog.


     There's the couch, which I covered in creepy cloth again.  You can find out how to make the eyeball throw pillow in this post, and the zombie pin up girl throw pillows in this post.


     Here's my potions shelf.  I have tutorials for most of the items on this shelf, including my creepy rag doll, my Pet Sematary inspired potion bottles, the "monster blood" (which did not fare as well as I had hoped it would in storage), the spell book on the lowest shelf (you have to dig through this post a bit to find the instructions), my gingerbread zombie, our Halloween 2017 "best couples costume" trophy, various potion bottles, the nebula in a bottle (which actually fares pretty well in storage.  I just have to add water each Halloween), my spooky faced candle, our Halloween 2016 "best couples costume" trophy, the alien parasite, and our Halloween 2018 "best couples costume" trophy.


     The last major indoor setup was the creepy doll shelf.  You can find how to make the dolls in this post.  Brian knocked over the middle doll last year and broke her, but luckily that only adds to the creepiness of the setup.
     I also decorated the bathroom as room 217 in The Shining again this year, although I forgot to take pictures.  If you haven't already, you can check out last year's Halloween party post to get an idea of what it looked like.

My Creepy Doll Costume


     I'm excited to present to you my enchanted porcelain wind up doll Halloween costume.  I'll be posting tutorials for the wind up key as well as the toy box prop soon.  I curled my hair by setting it in pin curls over night, which is a great no heat curling mechanism.  While there are contemporary styling products that will help your pin curls retain their shape, I just pinned my wet hair in curls and slept like that over night.  Since I didn't use any styling products, my curls would have lost some of their shape with brushing, so I opted to brush my hair before curling and then to not brush it out the following day.  This left my curls a little frizzy, but I figured that since I was going for a possessed doll look, that didn't hurt.
     To make the cracks on my forehead and jawline, I used a plain black e.l.f. eyeliner pencil.  I had tested drawing the cracks with liquid liner previously, but I had better control with the pencil, so that's ultimately what I chose.  However, the pencil I went with was not waterproof, so by the end of the party, some of the cracks were looking pretty smeared.  I'll probably be trying this look again on Halloween day, so if anyone has any waterproof vegan eyeliner recommendations, let me know!

The Costume Contest


     People showed up wearing a number of clever costumes, so the competition for our costume contest was pretty stiff.  The top row, from left to right is Sarah as a ninja, mom as a unicorn, Brian's mom, dad as a hunter, me as an enchanted porcelain doll, Brian as a dark sorcerer who enchanted me, and Adam.  The bottom row, from left to right is James as a mummy, Katie as Bunnicula, and Jacob.


     James won "best costume" with his handmade mummy costume.


     Katie won "most creative costume."


     Brian and I won "best couples costume."

Halloween Trophies


     My cat trophies tend to be pretty popular, so I decided to go with them again this year.  It's always fun, if a bit challenging, choosing what costumes to give the cats.  For the couples costume, I opted for zombies.  I painted the cats green and then added a couple of coats of glow in the dark paint.  I then painted their eyes red.  I mixed together red and black paint (maybe a little brown as well; I can't remember now) to make a blood color and painted their paws and faces with this "blood."  I used a pickle jar lid to create the base.  I painted it black and then glued on the cats.  I printed a trophy label and glued that onto the edge of the jar lid.


     For the best costume trophy, I went with Pennywise.  I glued the cat figurine to the olive jar lid and then painted the lid and the cat black.  I made a ruffle collar by folding strips of off white paper accordion style and gluing them together.  I then glued the collar around the cat's neck.  I painted the eyes red.  I used the same crimson paint that I used for the zombies to paint on a nose and makeup.  Once the trophy was dry, I glued on a label.


     For the "most creative" costume, I went with the Cat in the Hat.  I glued the cat figurine to the olive jar lid and painted the lid and the cat black.  I then painted the cat's eyes red.  To make the hat, I cut out a circle from red cardstock and punched a hole in the center.  This created the brim of the hat.  I then cut out a strip of red cardstock and rolled it into a cylinder with the same diameter as the hole punch circle.  I glued the cylinder to the brim and glued the circle I had punched from red cardstock to the top.  I then cut off strips of white cardstock and glued them around the hat.  I glued on a label to finish the trophy.

     I hope you've enjoyed a peek at my Halloween party.  For more inspiration, including alternate snacks as well as some activities, check out my 2018201720162015, and 2014 party posts, as well as my X-FilesGoosebumps, and The Shining themed birthday party posts.

Thursday, October 3, 2019

More Cheap and Easy Halloween Costume Ideas

     Halloween is less than a month away, but if you don't have your costume yet, don't worry.  There are plenty of inexpensive costumes that you can make using your wardrobe plus a few additional crafting supplies.  If these ideas don't spark your creativity, check out my Three Cheap and Easy Halloween Costume Ideas post, which remains one of my all time most popular blog posts.  Lisa Frank's Purple Kitten is also a relatively quick costume, as is dressing up as the girl with the yellow ribbon from the scary stories.  If you have a little more time to put together a costume, you could also consider dressing up as "Ricky's Girlfriend from The 'Burbs, Dana Scully or Fox Mulder, or Alice or the Mad Hatter (this is a long post, so you will have to scroll for the costume links).

Jack O'Lantern


This is probably the easiest costume on the list, as well as the fastest one to do in a pinch.


Materials:

*Orange romper (or dress or T-shirt)
*Yellow cardstock or construction paper
*Scissors
*Double sided tape
*Pencil

Note: While I had no trouble peeling the jack o'lantern face off of my romper after I was done with this costume, there is a possibility that the adhesive will stick more permanently to the garment, so you probably should use something that you would not be heartbroken over if it got ruined.

Directions:

*Draw a jack o'lantern face onto a sheet of yellow cardstock or construction paper.

*Cut out the face.

*Use double sided tape to adhere it to your orange garment.

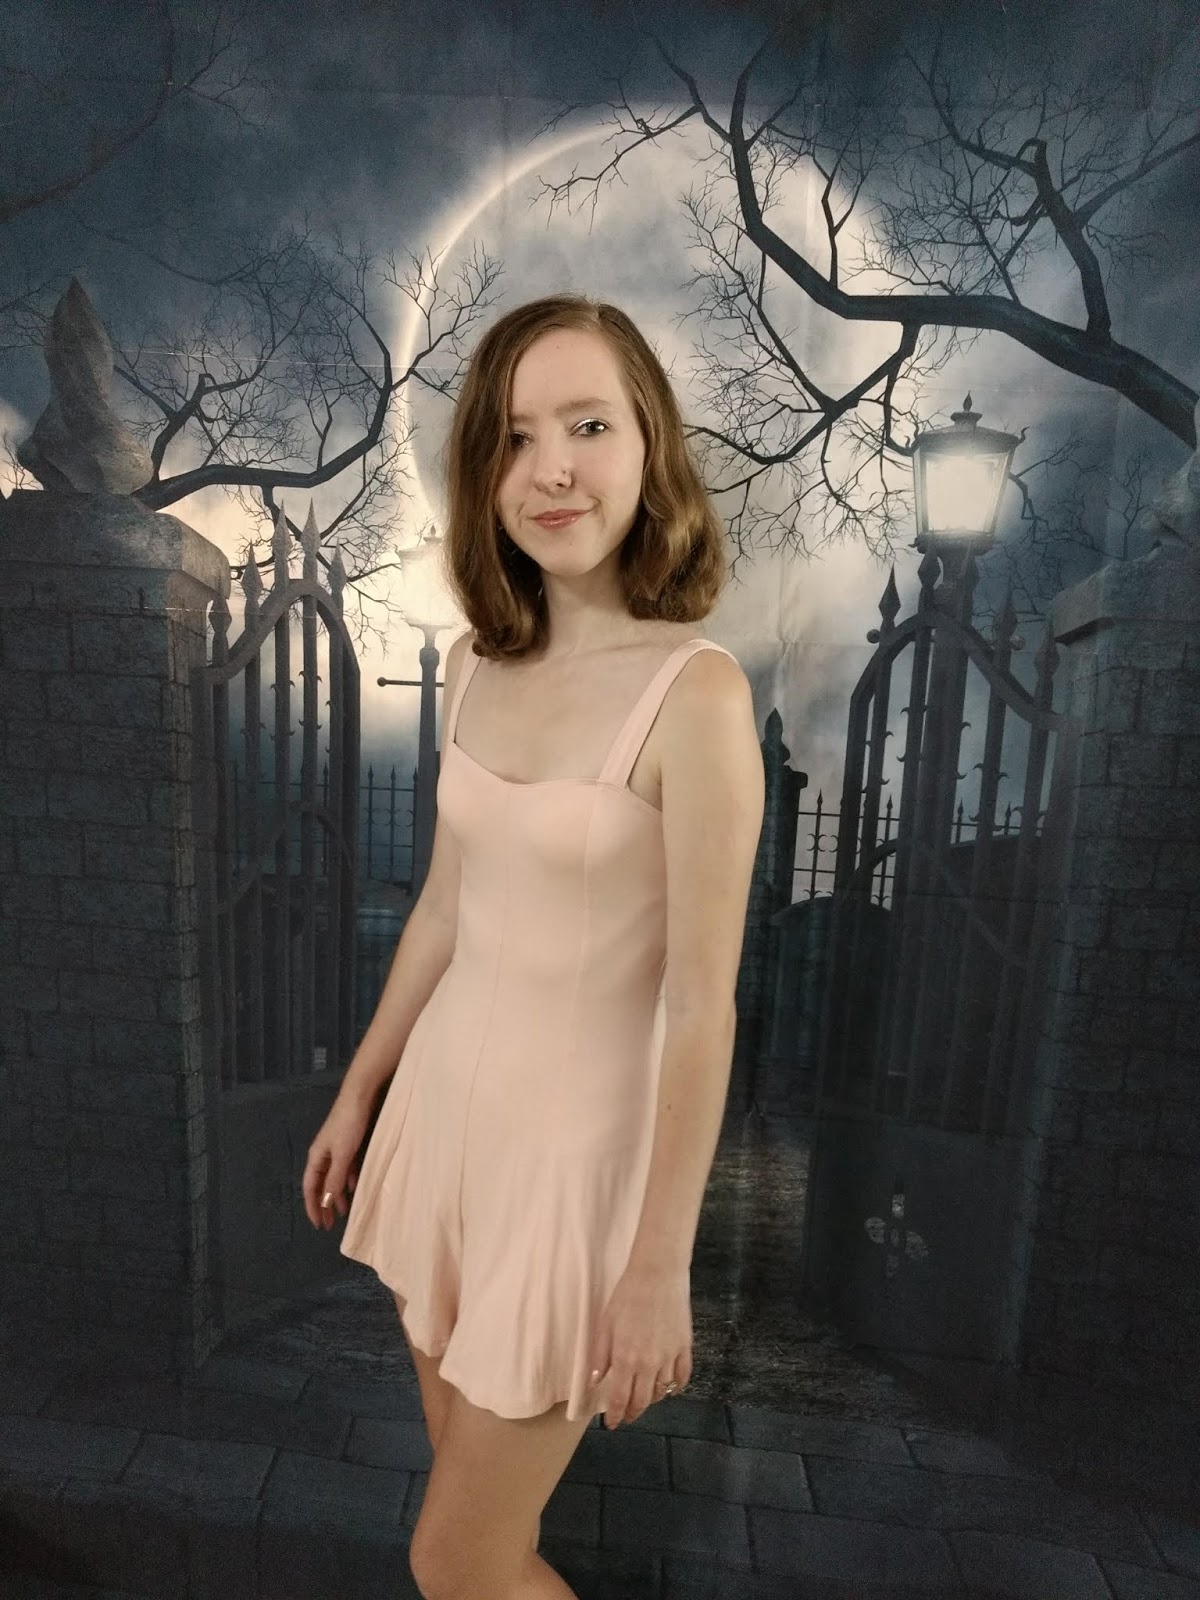
Frances "Baby" Houseman from Dirty Dancing


Dirty Dancing is one of my favorite movies, so of course I had to try my hand dressing up as Baby.  I had a surprisingly difficult time finding high heels for this costume, so I ended up having to go with a pair that I already had, which were less than spot on.


Baby and Johnny, as portrayed by me and Brian.

Materials:

*Pink dress or romper
*Pink high heels
*Bobby pins and hair elastic to fake Baby's long bob.

Directions:

*Put on dress or romper and high heels.

*For a faux bob tutorial, see this post.

Rosie the Riveter


Rosie the Riveter has served as a symbol of women's empowerment in American popular culture for several decades now.  While the iconic "We can do it!" poster was created to encourage women to take up manufacturing jobs left vacant by men who had gone to fight in WWII, in the ensuing years, Rosie's signature pose has come to stand for the strength of women more generally.  This is a look with a lot of versatility - you can go for a 1940s inspired look, like I did, or add a modern twist, like what was done in this photo exhibit.

Materials:

*Red scarf or bandana
*Navy blue top, jumpsuit, or romper

Makeup and Hair in the 1940s


Since there aren't really directions to go with this costume, I figured I would do a bit of a makeup tutorial instead.  Most of what I know about 1940s makeup I learned from this post, so if vintage makeup interests you, I would definitely recommend checking it out.  My look is certainly more vintage inspired than true vintage and is not historically accurate.

Lipstick was the key component of the 1940s makeup look, worn by about 90% of American women.  Red was the color of choice, although a variety of shades of red were worn throughout the decade.  For my 1940s inspired Rosie look, I opted for (WARNING: lipstick name is NSFW, so do not click the following link if you're in an environment where curse words are frowned upon or if you're opposed to seeing curse words) my favorite red lipstick.

Eye makeup wasn't big for daytime looks.  Mascara was frequently worn during the day, although it wasn't as ubiquitous as lipstick.  Eyeshadows were often reserved for evening looks, and were usually in neutral tones and always matte.  Eyeliner was mostly avoided until the end of the decade because it was thought to look too fake.  I couldn't resist using eyeliner anyway, although I tried to go lightly.  I used my standard e.l.f. eyeliner.  For mascara, I went with an e.l.f. mascara in Jet Black, which I can't find on their website anymore.  I'm not sure whether it was repackaged or discontinued.  The eyeshadow came from an e.l.f. palette which I don't think is in production anymore.  I just went with the neutral shade closest to my skin tone.

Foundations and powders were used in the 1940s, but I didn't use anything beyond my e.l.f. HD powder in sheer to make my face look more matte.  Blush was worn sometimes, but it wasn't a required component of the makeup regimen.  I meant to use my e.l.f. blush, but I did this photo shoot right before rushing out the door for my 9 am shift in the physics help center, so the blush slipped my mind.

Nails were often red, although shades like pink, burgundy, and coral could also be worn.  Later in the decade, matching nail polish and lipstick sets became popular.  My purple nails are not historically accurate at all, but I didn't want to undo them and paint them for one day, only to redo them the next.

As for hair, there were a variety of styles that were popular during the 1940s, although most required soft curls or waves.  Pin curls were used to achieve most of the popular looks.  As someone who tries to avoid heat styling whenever possible, I love pin curls.  This was my second time trying them and I was super pleased with how they came out.  Generally you would brush your curls after letting them down to get the softer waves that were popular during this era, but I liked the way the curls looked too much to risk it.  This was probably a wise move, as when I brushed my hair after the photo shoot, the curls did not retain their shape as well as they had during my previous attempt.

Makeup in America during WWII

While in parts of Europe, production of makeup largely halted during the war years due to scarcity of petroleum and other such ingredients, in America, makeup consumption was viewed as an integral part of the war effort.  As women donned masculine uniforms and put in long hours working in the manufacturing industry, makeup was a way for them to retain a trapping of femininity and the smallest semblance of normalcy.  Makeup was viewed as such an essential morale booster that factories were ordered to keep tubes of lipstick in their changing rooms for their employees.  Makeup companies capitalized on the war effort, producing bold lipsticks with patriotic names, further perpetuating the notion that wearing makeup was part of a woman's patriotic duty.

Molly McIntire from the American Girl Series


If you grew up in the 90s, there's a good chance you're familiar with the American Girl franchise, whether through the books or the dolls.  I never did have an American Girl doll, but I loved the books and Molly was my favorite character in the series.  While not the most recognizable costume on this list, bring one of your old American Girl books (or borrow one from your local library) and your costume will be a hit.  My look is based loosely on Molly's sailor style look in Molly Saves the Day.

Materials:

*Vaguely 1940s clothes, ideally ones that resemble one of the outfits Molly wore in one of the books.
*Round rimmed glasses.
*Hair elastics to do braids, or long wig you can braid.
*One of the Molly McIntire books.

Directions:

*Put on your 1940s reminiscent clothes, braid your hair, grab your book, and you're good to go.