Showing posts with label Owls. Show all posts

Thursday, May 25, 2017

Birthday Un-Slumber Party

     As far as parties go, it's hard to beat a sleepover party.  My sister and I used to have friends over whenever possible growing up, and I have fond memories of those days (some of which you'll find at the end of this post).  Living in a one bedroom apartment with no couch, hosting an overnight party is out of the question.  However, there was nothing keeping me from offering the games, activities, and food of a slumber party during the day, and I decided to throw an un-slumber party.
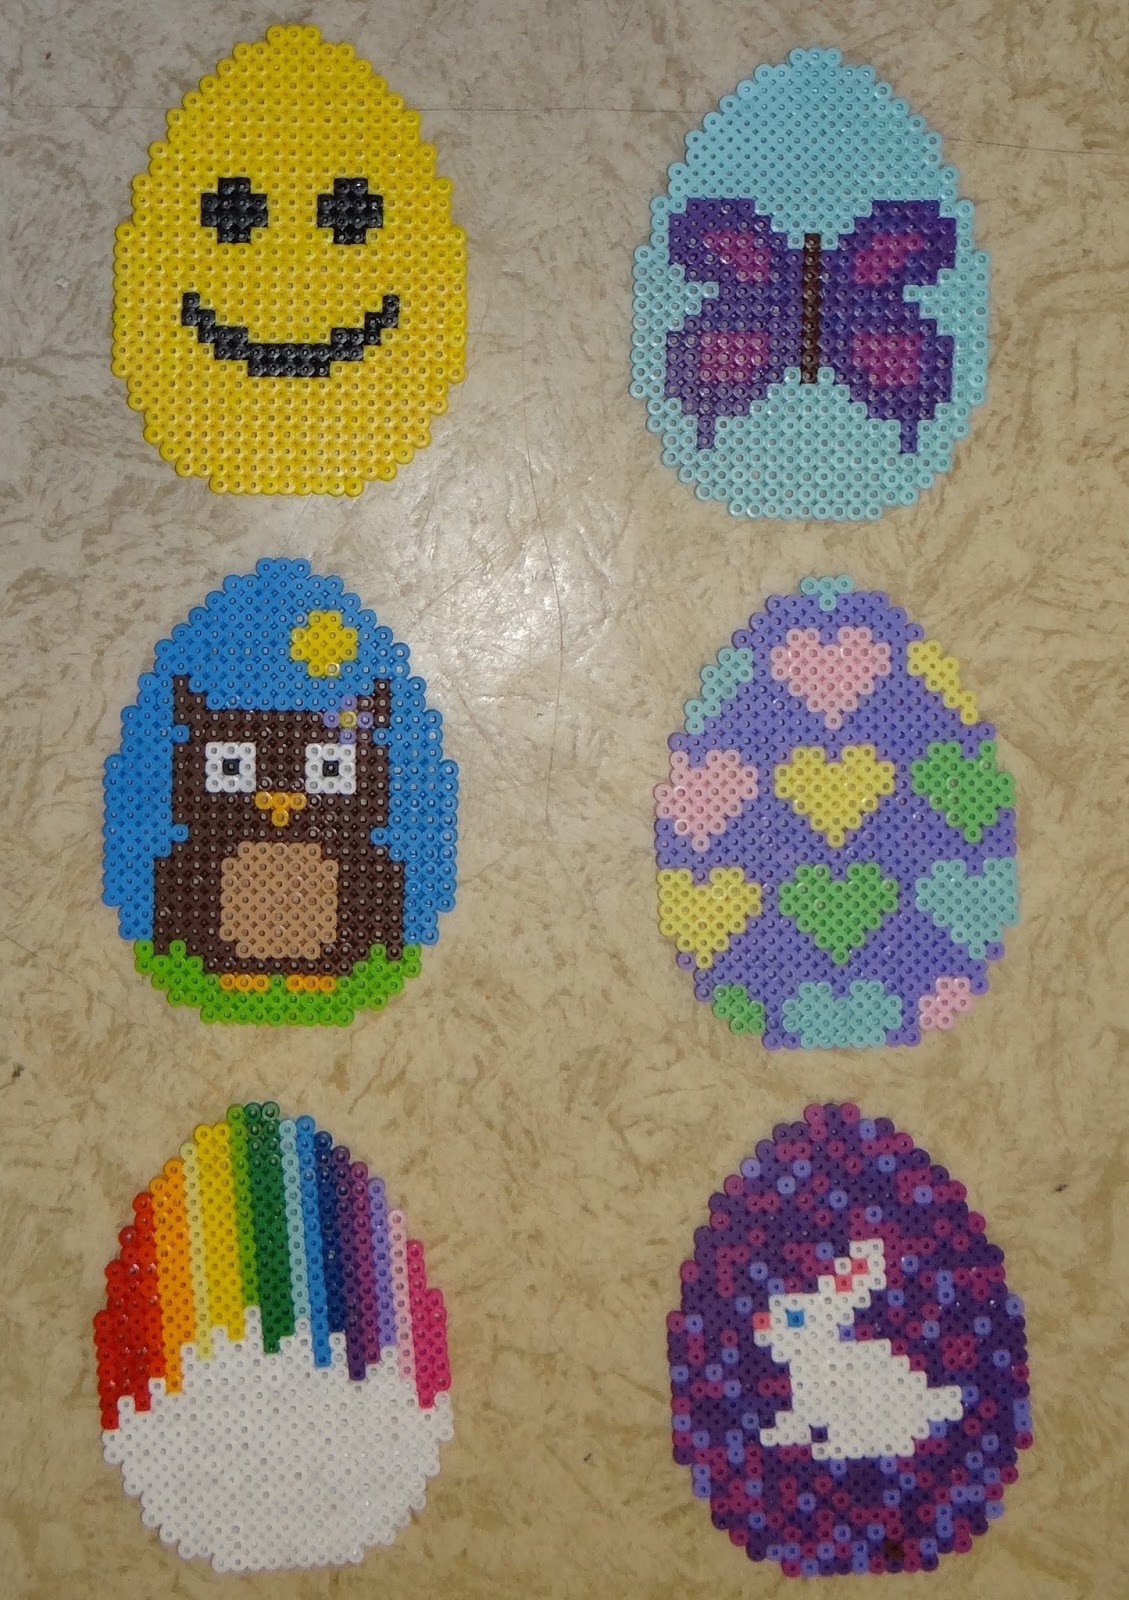
     Over the next few weeks, I'll be sharing the details of how I made the various crafts for this party.  For now, though, here's an overview of the decorations, activities, games, and food I had at my party, plus some memories of sleepovers past.


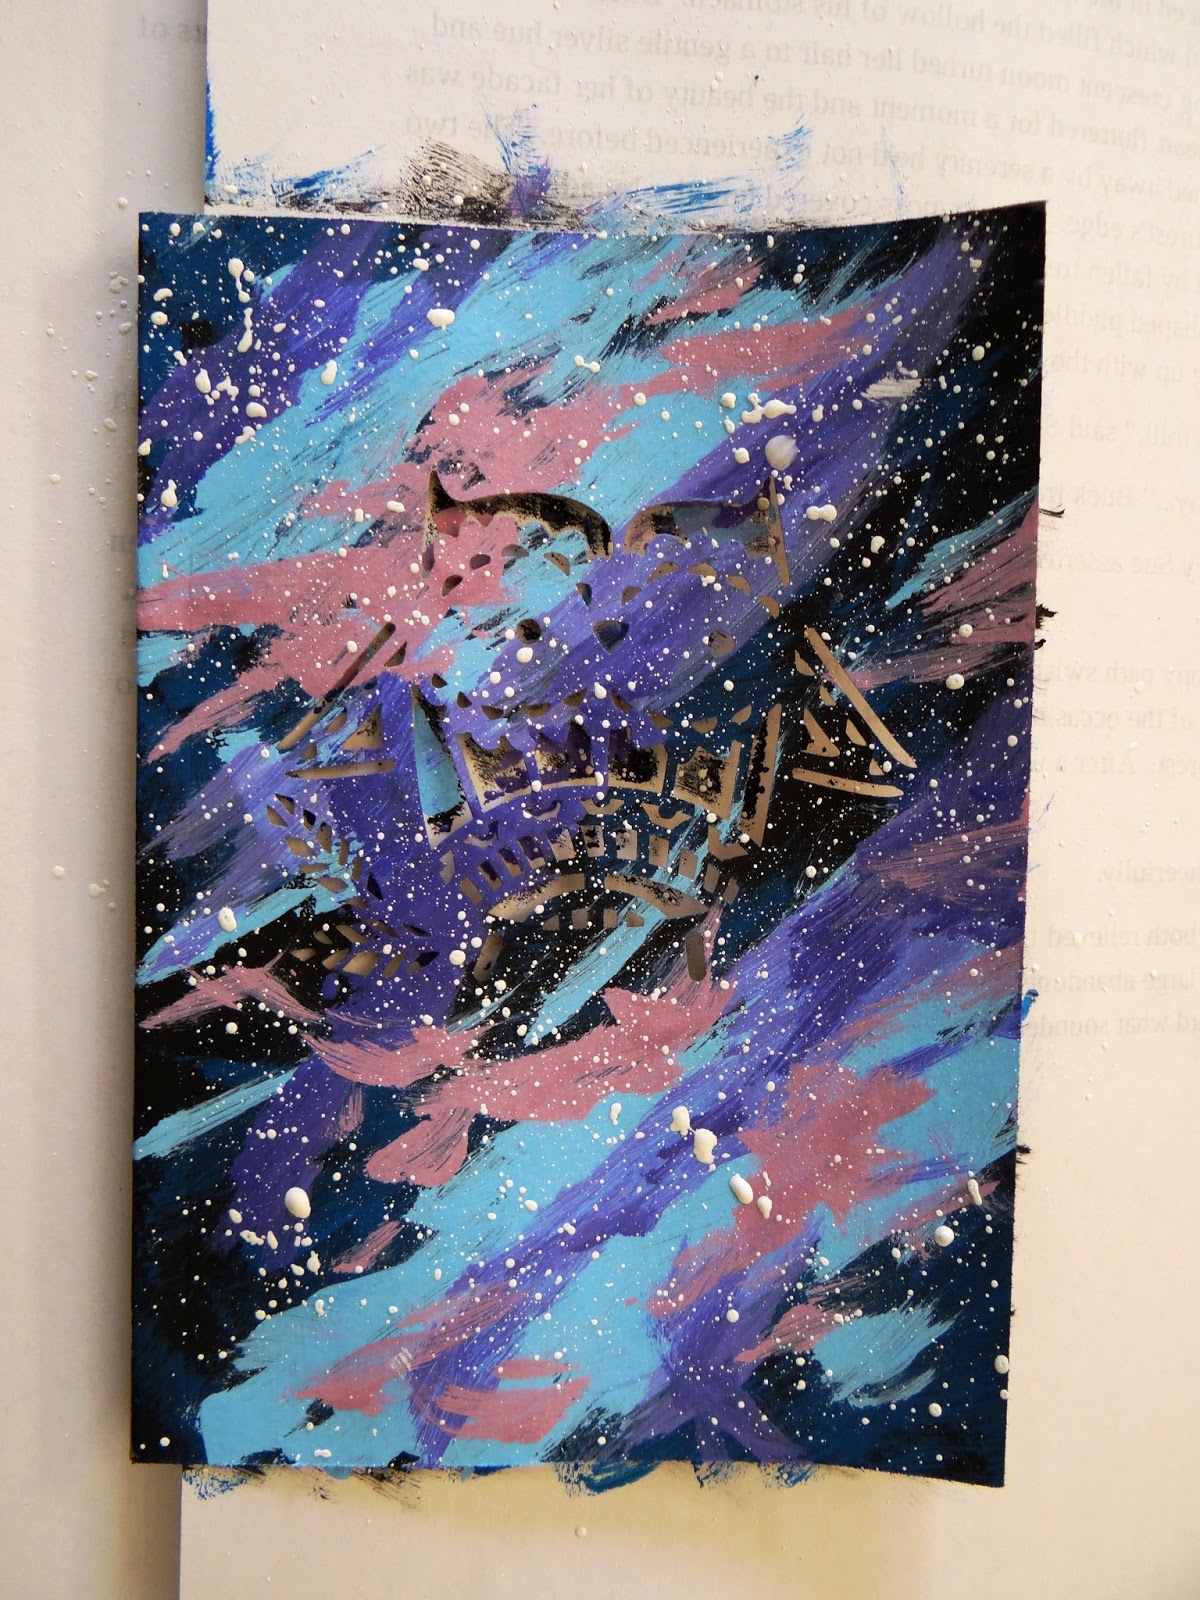
     While in years past I've thrown some elaborately decorated parties, this year I focused a lot more on the games and activities than I did on aesthetics.  As far as themes go, an un-slumber party doesn't have an obvious decorating scheme.  I chose a black and silver color scheme because that reminds me of stars in the nighttime sky.  I made this curtain of streamers to cover the entryway.


     Here are the plates, cups, utensils, etc.  All of the tableware came from Dollar Tree.  I bought plain black party supplies and then decorated the cups and utensils so that things weren't so dark.


     Here's the tablescape.  I bought a plain black tablecloth from Dollar Tree and scattered silver stars across it.  On the table you'll see two of our party activities.  One is a nail polish roulette game I made.  The other is coloring page photo frames which I designed, although you can't really see what's on the pages in this picture.  My plan was to have people color the photo frames and then send them home with the photo frames and a group photo to put in one of the frames as a souvenir.  However, we ended up spending a lot of time on the other activities, so I gave people plain pages to color at home.


     Brian made homemade pizza.  Pictured above are the pickle and cheese pizzas, but he also made Alfredo pizza (cheese pizza with Alfredo sauce instead of tomato sauce) and his "heart attack pizza" (pizza loaded with hamburger and pepperoni).


     Playing nail polish roulette . . .


     . . . and the aftermath of our game.  Some of the colors kind of worked together, and some really didn't.


     Here we are taking a group photo with some of the photo booth props I made.  It's hard to see from this picture, but dad and I tried to give Katie bunny ears simultaneously.  Also, you can see Katie's lovely Stephen King book artwork on the fridge.


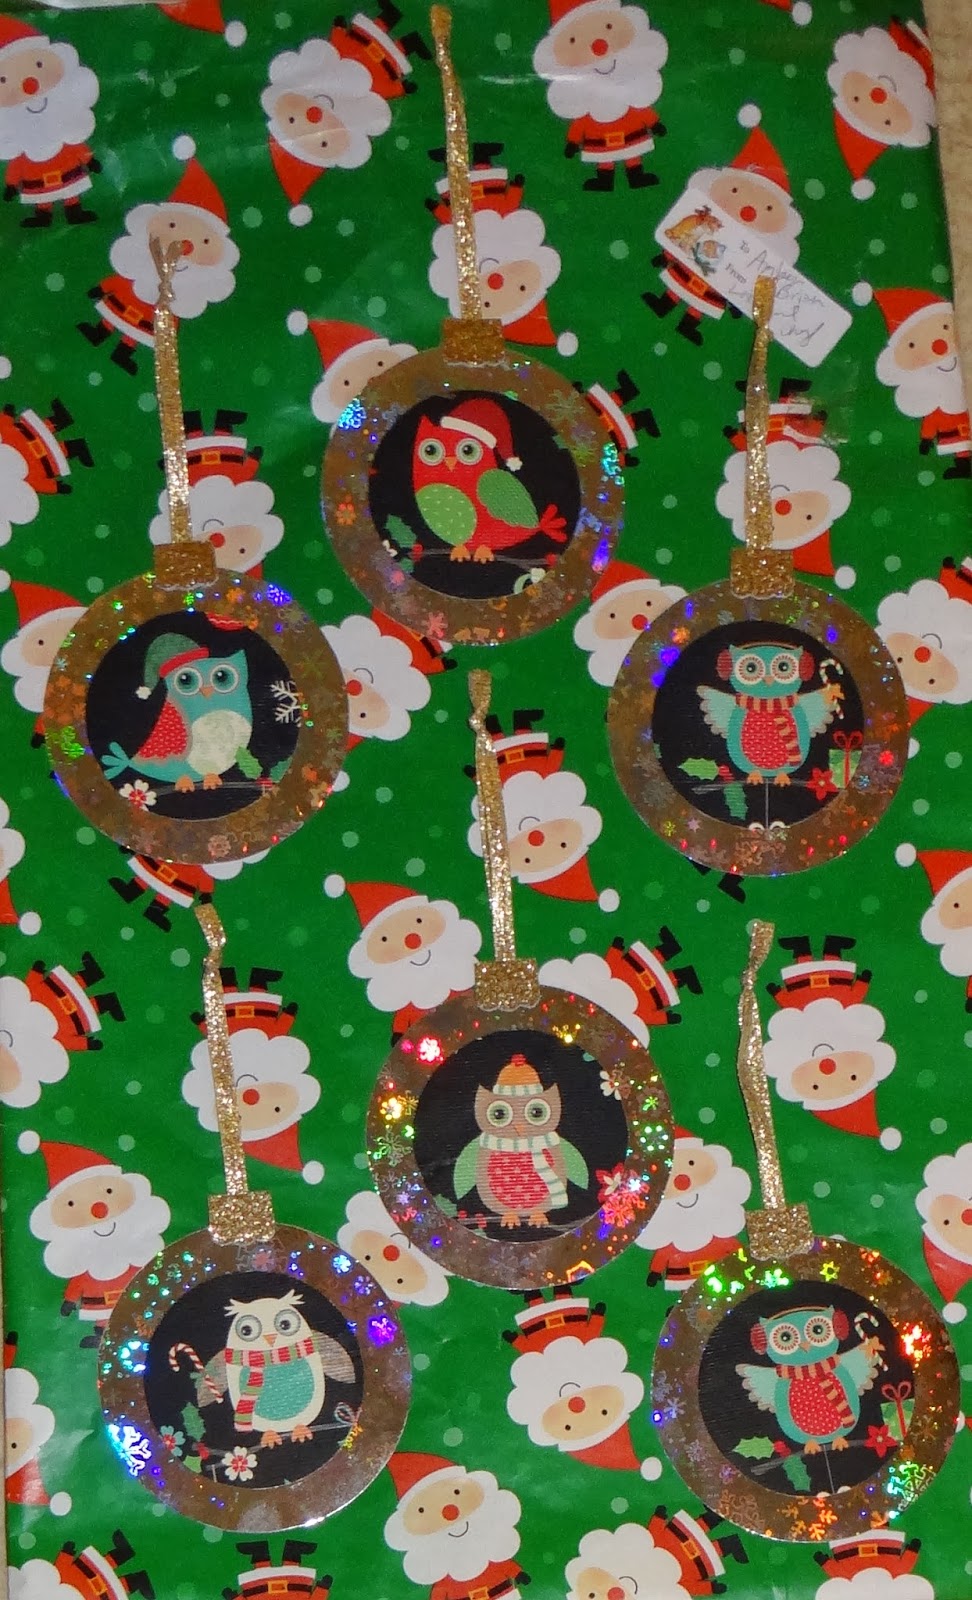
     For my cake this year, we I didn't do a lot of decorating.  I just made that Little Owl cake "topper."  Brian added some icing decorations.  I found the black candles with silver glitter at Party City.
     While eating cake and ice cream, we also played Mad Libs.  There is a free Mad Libs app that you can download for your phone or tablet.  It comes with a handful of free stories, but if you need more than what they offer, you can also buy whole Mad Libs books through the app.


     Aren't these slippers adorable?  They have the cutest little faces.  Brian got them for me for Christmas.  If you're throwing a party for a younger audience (I think the size I have is about the largest they offer) and you can afford to spend some money, these could make for great party favors.


     Dad always gives awesome birthday cards.


     It wouldn't be a Hathaway family function without an attempted murder!


     Failing to give dad bunny ears.  I always underestimate how high I'll have to lift my arm to make bunny ears visible.
     Well, that wraps up another birthday party.  What are your favorite sleepover activities?  Snacks?  Any favorite sleepover memories?  Here are some of the sleepovers that stick with me.  


     Katie, Becky, and I decided to camp out on Becky's porch swing.  We draped sleeping bags over the swing to seal it off from the bugs, but the bugs still got in and had a feast.  Plus it was really cold.
    Another time, we camped out in a tent in Becky's front yard.  Katie had seen one of those true crime shows in which a man cut a hole in the wall of a tent and abducted and murdered a little girl.  Katie was worried that someone was going to cut a hole in our tent and kidnap her, so I had to sleep near the wall of the tent.


     One final memory.  When my mom bought a shed for our house, Katie and I decided that before she started filling it up with boxes, we were going to have a sleepover in it.  She, Breanna, and I grabbed our bedding and junk food and camped out.  One of our neighbors heard about our plan and started banging on the shed.  We were sure we were about to be murdered.


     I can't remember if we barred the door before or after the knocking, but we were not letting any murderers in if we could help it!

Thursday, March 16, 2017

Mini Fairy House


     Wait, don't throw that container out!  Empty plastic bottles such as toothpick containers, rounded makeup containers, and aspirin bottles are perfect for making tiny fairy houses.

Materials:
*Empty plastic container (e.g. toothpick holder)
*Toothpicks
*Gold seed bead
*Lots of teeny pebbles
*All purpose adhesive
*Brown paint
*Gray paint
*Red paint
*White paint
*Paintbrush
*Clay


Directions:

*Paint the container gray.  This way, if you end up with small gaps between rocks that are hard to fill in, it will look like there is grout or cement or something similar between the rocks.

*Snip the ends off of three toothpicks and then cut each toothpick in half.  Paint five or six of these toothpick halves brown and set aside to dry.

*Once dry, glue on the painted toothpicks to form a door.

*Glue a gold seed bead onto the toothpicks for a doorknob.

*Glue rocks onto the container, filling in as much of the space as you can.

*Craft a mushroom shaped roof from clay.  Bake or dry following the directions given on the packaging.

*Paint the roof red and then let dry.  Once dry. paint on white spots.  Set aside to dry.

This is what the two pieces looked like before I glued them together.  The mushroom roof really does add to the fairy house's aesthetic.

*Once the roof is completely dry, glue it to the top of the container.

*To make an owl fairy inhabitant, punch two butterfly shapes from cardstock and glue to the back of the bead such that one wing sticks out on either side of the owl bead.

Thursday, May 12, 2016

Galaxy Print Owl Cutout Notebook


     My sister gave me this adorable owl cutout notebook (I think she got it at Dollar Tree, so if you're looking for the exact notebook I used, that's a good place to check).  The plain brown cover was kind of boring, though, so I decided to spruce it up with some paint.

Materials:
*Owl cutout notebook (this will work for any notebook, but you won't have the owl cutout unless it's already a part of your notebook)
*Black, blue, purple, white, and red paints
*Paint sponge brush
*Regular paintbrush
*Aluminum foil (if your notebook has the cutout)
*Tape or glue (if your notebook has the cutout)

Directions:
*This is what the original notebook looked like:


*Cover your work space in scrap paper and tuck a sheet of paper beneath the cover to protect the top page from paint.


*Paint the cover black and then let dry.  (I took the picture while the cover was still partially wet, so that's why it looks like there are two different shades of paint there.)


*Sponge on patches of dark blue.  I took regular blue paint and added a little bit of black to get this shade.  Let dry.


*Add some light blue paint.  I mixed white and blue together to get this color.  Let dry.


*Add some purple.  You can see here that I used two different shades of purple, regular purple and a lighter purple which I made by mixing purple and white.  Let dry.


*Add some pink.  I made this dusty rose color by mixing a bit of purple with some red and a lot of white.  A more vibrant shade of paint might work nicely, though.  Let dry.


*Dip your paintbrush in white paint and flick it with your finger to create the stars.  You'll want to make sure your work station is well covered for this step.  Let dry.


*Once the cover has dried, pull out the sheet of paper you were using to protect the inside cover.  Tape or glue some aluminum foil behind the owl cutout for a shiny effect.  Alternately, you could use a contrasting color to really make the owl shape pop out from its surroundings.

Thursday, March 10, 2016

Perler Fuse Bead Easter Eggs


     Celebrate Easter and spring's arrival with these fuse bead Easter eggs.  For some fun spring themed fuse bead magnets, check out this post.

Materials:
*Fuse beads (e.g. Perler beads)
*Large square peg board
*Iron

Directions:
Design your fuse bead creations by arranging beads on a peg board, following the patterns given below:

The rainbowy egg is supposed to look like a melted crayon art egg.

I love Easter eggs with faces, so I decided that I had to make one for this craft.


*Cover the designs with a sheet of waxed paper and iron the first side.  Make sure to iron the edges especially well, as the beads may not stick together and may fall off if you don't.
*Remove the fuse bead project from its peg board, cover with waxed paper, and iron the other side.

Thursday, January 29, 2015

Ribbon and Hearts Bookmark


Materials:
*Ribbon
*Scrapbooking paper
*Scissors
*All purpose adhesive
*Stickers

Directions:
*Cut a length of ribbon about an inch longer than you would like your bookmark to be and knot both ends.
*Cut out four heart shapes from the scrapbooking paper.
*Adorn hearts with stickers.
*Glue hearts to the ribbon.

Thursday, January 15, 2015

"I Think I Might Like You More than I Like Zombies" Valentine's Box


Materials:
*Heart shaped box
*White paint
*Paintbrush
*Mod Podge
*Red, pink, and white tissue paper
*Scissors
*Colored pencils
*Glitter glue
*Black permanent marker
*Zombie owl template
*Colored pencils

Directions:
*Paint the box white and set aside to dry.
*Cut out squares of the various colors of tissue paper.  Once the paint has dried, glue the squares to the box using Mod Podge and then set aside to dry.
*Once the box has dried, paint with a coat of glitter glue and then set aside to dry.
*Resize the below owl template to the desired size and print out.


*Color in the owl the desired colors.
*Once the box is dry, glue down the owl and write in the phrase "I think I might like you more than I like zombies" on the box.

Thursday, December 18, 2014

Finals Week Polly Pocket Ornament

     Finals week.  For the past seven years it has been just as much a part of my holiday season as decorating the tree.  In fact, I took my grad physics exam this afternoon, so it's just now finally over.  When I was a kid, I always wanted a Polly Pocket ornament and this ornament gave me the chance to combine that desire with my background in mathematics and physics (notice that Polly's textbooks are on nuclear physics and differential geometry).

Polly's "House"

Materials:
*Wide jewelry box
*Scrapbooking paper
*Felt
*Pencil
*Marker
*Scissors
*Needle
*Thread
*All purpose adhesive

Directions:
*Trace the back, two short sides, and one of the long sides of the jewelry box onto the piece of patterned paper.  Trim as necessary to get them to fit inside the box and then glue into place.
*Trace the lid of the box onto the sheet of felt and cut out.
*Glue one of the long sides of the box inside the lid as pictured.  Set aside to dry.
*Once dry, cut the felt to fit inside the lid to make "carpeting" for the "house."

Blanket
Materials:
*Fabric square
*Needle and thread

Directions:
*Cut out a fabric square the size you would like Polly's blanket to be.
*Sew a blanket stitch around the edges of the fabric square to complete the blanket.

Owl Pillow
Materials:
*Felt in color of choice for owl body
*Orange felt
*White felt
*Black felt
*Needle and thread
*Stuffing
*Miniaturized owl template (can be found here)
*Scissors
*Permanent marker

Directions:
*Print out a miniature version of the owl template given in my Felt Owl Pal post.
*Trace two large circles onto the white felt for eyes, two small circles onto black felt for pupils, a triangle onto orange felt for a beak, and two of the body template onto the desired colored felt for the owls body.  Ignoring the wings and belly pieces, which I did not include because the details were too fine for the scale I was working on, follow the directions for sewing a felt owl pal.

Books
Materials:
*Images to use for book covers
*Plain paper
*Scissors
*All purpose adhesive

Directions:
*Using Paint or a similar program, design textbook covers and print out.  Print one copy of the front cover and two copies of the back cover.
*Cut out 20 or so sheets of plain paper to the same size as the covers.  Add front cover and one back cover to the book.
*Cut the remaining back cover so that it is slightly wider than the thickness of the stack of papers making up the book.  Add adhesive to the back of the strip and then place to form the spine of the book.  The strip of paper should overlap the front and back covers slightly.

Notes/papers
Materials:
*Computer and printer
*Plain paper

Directions:
*Take screenshots of papers you have written (I used pages from my Master's Thesis), shrink to small sizes, and print.

Thursday, December 4, 2014

Recycled Wrapping Paper Christmas/Winter Garland


     Have some leftover wrapping paper scraps from last year kicking around?  Make yourself a fun, seasonal garland.  If you don't have some already, you can wait until after you've opened your presents and either get a head start on next year's holiday crafting or use winter themed paper instead of Christmas specific paper.

Materials:
*Patterned or character wrapping paper
*Large and small circle templates (I traced around a large and small drinking glass)
*Cereal box or similar cardboard
*Holographic self-adhesive laminate (or holographic wrapping paper)
*Scissors
*Ribbon
*Glue
*Pen
*Circular hole punch

Directions:
*Trace the small circle onto the patterned or character wrapping paper such that you end up with 12 circles and then cut out the circles.
*Trace the medium circle template onto the cereal boxes, making 12 circles in total, and cut out the circles.
*Trace the medium circle template onto the holographic laminate or paper to make 12 circles and cut them out.
*Adhere holographic paper to one side of each of the cardboard circles.
*Glue a piece of patterned wrapping paper to the center of each of the cardboard circles over the holographic paper.
*Punch a hole in the top of each circle.
*Align the circles, spacing them out as far apart as you would like them to be for the garland.
*Cut a length of ribbon several inches longer than the span of the aligned circles.
*Slide one end of the ribbon an inch or so through the hole in the last circle in the line and tie it in place.
*Slide on the second to last circle, spacing it the desired distance from the last one, and tie in place.  Repeat with the remaining circles.

Thursday, November 20, 2014

Clay Owl Earrings


Materials:
*Oven bake clay in white, orange, black, and a color of your choice (I used green)
*2 ear wires
*2 head pins
*Wire cutters
*Round nosed pliers

Directions:
*Shape the clay in the color of your choice into two owl shapes.
*Make 4 small circles of white clay for the eyes and add smaller black circles for the pupils.
*Make two small orange triangles for a beak.
*Poke a head pin through each clay owl.
*Bake in the oven according to the directions on the clay packaging.
*Snip off part of each head pin with wire cutters, leaving enough excess to create a small loop.
*Use round nosed pliers to create a loop at the top of each head pin.
*Attach the ear wire to the loop.

Thursday, May 15, 2014

Another Graduation Photo Frame and Tassel Holder


     On Saturday I graduated with a Master's of Arts in mathematics, which meant it was time for me to make another graduation photo frame and tassel holder (you can see my photo frame and tassel holder for my undergraduate graduation here).

Materials:
*Photos
*12" x 12" sheet of plywood
*12" x 12" piece of patterned scrapbooking paper
*Scissors
*Decorative edge scissors
*12" x 12" sheet white cardstock or two 8 1/2" x 11" sheets of white cardstock
*Scraps of brown, black, orange, and white paper (to make the owl)
*Scraps of paper in three corresponding colors (for the owl's feathers)
*Small heart shaped punch (optional)
*All purpose adhesive
*Mounting tape
*Rhinestone
*Hammer
*Small nail
*X-acto knife
*Ruler
*Pencil
*Black thread

Directions:
*Glue sheet of patterned cardstock to the plywood.
*Using an enlarged version of the graduation hat in the graduation owl template (given below), cut out a graduation cap from black paper.  Glue it to the patterned cardstock as in the above picture.


*Hammer a small nail through the center of the graduation cap, leaving a small gap between the head of the nail and the plywood so that the tassel can be hung up on it.  If the nail pokes through the back of the plywood, you can either trim the nail down using wire cutters or cover the pointy end of the nail with a dab of glue so that it won't poke into anything.
*Glue a small rhinestone over the head of the nail.
*Using a ruler, mark out the desired dimensions for the frames for each of the photos.
*Use decorative edge scissors to give the frames a fun shape.
*Carefully cut out the inside of each frame using an X-acto knife.
*Using mounting tape, adhere the pictures to their respective places on the patterned cardstock.
*Glue frames over the pictures.
*To make the graduation owl, print out a small graduation owl template.
*Cut out the body and two copies of the wings from brown paper, two large circles from white paper for the eyes, two small black circles for pupils, and a small orange triangle for the beak.  Cut out or punch out using a heart shaped punch nine hearts, one in each of the three corresponding colors, to make the feathers.
*Glue together the various parts of the owl like this:


*Cut out a short but long rectangle of white paper.  Roll it up and tie it closed with black thread to form the owl's diploma.
*Glue the diploma to the owl's wing and then glue the owl to the patterned cardstock.

Thursday, March 20, 2014

Adorable Owl Heat Pack


Materials:
*Fabric with predominant color brown (make sure it's not highly flammable)
*Brown felt
*White felt
*Orange felt
*Black felt
*Felt in four bright colors (e.g. green, blue, purple, and pink)
*Chalk
*White rice
*Needle and white thread
*Sewing machine

Directions:
*Resize my template, included below, to the desired size, and print.  You may also want to print a copy of what the owl should look like assembled, which is also included below.


*Cut out all of the pieces of the template and then start tracing onto the corresponding fabric or felt using chalk.  You will need 2 copies of the owl's body from the fabric, 4 wings in brown felt, two large circles cut from the white felt for eyes, two small black circles for pupils, one orange triangle for a beak, and four hearts of each of the four bright colors for feathers.
*Stitch together two pairs of wings and repeat for the other two copies.  By sewing together 2 instead of using just one, this gives the wings some stability.
*Sew the eyes, beak, and feathers to one copy  of the owl's body.  When sewing the feathers, start with the bottom row of feathers and work your way upward.
*Place the copy of the owl's body with the face facing up.
*Place the wings on top with the side with the nice stitches facing down.  Position them such that they are at the height that you want the wings to be at and such that a tiny bit of the flat edge of the wing is sticking out over the owl's body on either side.
*Place the other copy of the owl's body pattern side down on top and begin sewing together, leaving an opening to pour in the rice.
*Add rice until your owl reaches its desired fullness.
*Sew closed and your heat pack is ready to use.  Just pop it into the microwave for a few seconds.

Thursday, February 6, 2014

Perler Fuse Bead Zombie Valentine's Owl


     Need another zombie Valentine's craft?  Here's an cute little zombie owl that you can make from fuse beads.  You can also use this pattern to make a non-zombie owl by modifying the eyes.

Materials:
*Fuse bead kit (e.g. Perler beads kit)
*Large square fuse bead pegboard
*Iron

Directions:
*Arrange beads on a large square pegboard in the pattern shown above.  If you would prefer to make a non-zombie owl, you can easily modify the eyes to make a non-zombie Valentine's owl.
*Cover your owl with a sheet of waxed paper and iron the first side, then remove from the peg board, flip over, put waxed paper on top and iron the second side.  You can find more detailed directions here.

Thursday, January 9, 2014

Scrap Wrapping Paper Memory Game


     Here's a great way to recycle some cereal boxes as well as wrapping paper.  Note that these instructions will make 48 memory tiles, but you can easily modify them to make more or fewer.  With this version of the game, you have to match up both the pattern and the color, and game play works the same as with any other memory game.  (If you aren't familiar with the game, you can find instructions here.)  Also, I'd like to give a shout out to Brian for his assistance with this project.  It is a rather time consuming endeavor and I'm grateful that I had another set of hands to help me with tracing, gluing, and cutting out circles.

Materials:
*Six different patterns of wrapping paper or distinct characters on wrapping paper
*Solid colored or holographic wrapping paper
*4 cereal boxes
*8 sheets of paper, each sheet a different color
*Small (about 2.5" in diameter) and medium (about 3" in diameter) circle templates
*Pen
*Scissors
*All purpose adhesive

Directions:
*Trace the small circle onto the patterned or character wrapping paper such that you end up with 48 circles, 8 of each pattern or character, then cut out the circles.
*Trace the medium circle template onto the cardstock, making 6 circles of each color, and cut out the circles.
*Trace the medium circle template onto the cereal boxes, making 48 circles in total, and cut out the circles.
*Trace the medium circle template onto the solid colored (or holographic) paper to make 48 circles and cut them out.
*Glue a piece of solid colored (or holographic) wrapping paper to one side of each cardboard circle and a piece of cardstock to the other side of the circle until you have covered both faces of each circle.
*Glue on your patterned or character paper such that you end up with two or zero tiles of a particular pattern matched up with a given color.  Here's what all of my tiles looked like when I finished:


Thursday, January 2, 2014

Wrapping Paper Ornament Bookmarks


     These pretty recycled wrapping paper bookmarks can double as ornaments.  You may want to make some to give as gifts for next year's holiday season.

Materials:
*Wrapping paper
*Large and small circle templates (I traced around a large and small drinking glass)
*Cereal box or similar cardboard
*Gold paper
*Patterned paper (optional)
*Mounting tape
*Scissors
*Ribbon
*All purpose adhesive
*Pen

Directions:
*Trace and cut out a small circle of wrapping paper in the pattern of your choice.
*Cut out a large circle either from a corresponding wrapping paper or sheet of patterned paper.
*Center the small circle on top of the large circle and adhere together using mounting tape.
*Cut a large circle from the cardboard and adhere to the back of the large circle you cut from wrapping paper or patterned paper.
*Cut out a piece of the gold paper shaped like the top of an ornament and adhere to the top of the bookmark.
*Snip off a length of ribbon about twice as long as you would like the ribbon bookmark to be and knot together the ends.
*Glue the end of the ribbon without the knot to the back of the bookmark.

Thursday, December 19, 2013

Felt Owl Ornament


Making a felt owl ornament requires the same procedure as the felt owl pal.  The only difference is the ornament requires a piece of ribbon so that you can hang it from your tree.

Materials:
*Sheet of felt in the color of your choice for the owl's body
*Felt and/or fabric in colors of your choice for the owl's wings, belly, beak, and eyes
*Embroidery floss
*Needle
*All purpose adhesive
*Stuffing
*Chalk
*Scissors
*Ribbon

Directions:
*Print out an owl template approximately the size you would like your owl ornament to be.  Here's the one I made for my owl:


*Cut out the pieces of the template.  Using chalk, trace the pieces onto the chosen felts and fabrics.  You will need two copies of the owl's body, two large circles for the owl's eyes, and two small circles for the owl's pupils.
*Using a running stitch, sew on the owl's belly, then sew on the owl's wings.
*Cut off about 2 1/2" of ribbon and fold in half to create a loop.  Sew to the back piece of the owl's body.
*Using a blanket stitch, sew together the owl's body, leaving an opening large enough for you to add the stuffing.  Insert stuffing into your owl until it reaches the desired fullness, then sew closed.
*Glue on the owl's eyes and beak.

Friday, November 29, 2013

Perler Fuse Bead Ornaments


Materials:
*Fuse bead kit (e.g. Perler beads kit)
*Scissors
*Iron
*Gold or silver thread

Directions:
*Select the appropriate peg board for the ornament you would like to make.  Both the owl and the penguin require a large square pegboard, the candy cane uses the small heart pegboard, the shoe needs only a small square pegboard, and the ornament takes a small circle pegboard.
*Arrange beads on the peg board in the desired pattern.  I forgot to take pictures of the arrangement of the beads for the owl ornament, but here are the other ones:


*Cover your beaded project with a sheet of waxed paper and iron the first side, then remove from the peg board, flip over, put waxed paper on top and iron the second side.  You can find more detailed directions here.

Wondering why I made a shoe ornament?  I am rather fond of shoes and so for the past couple of years I have received shoe ornaments for Christmas.  I decided to make the shoe ornament a tree tradition and plan to add a new one each year, starting with this fuse bead shoe.  Does your family collect a specific type of ornaments for your tree?  Try making one out of fuse beads.  You can find fuse bead patterns online for almost anything, or you could always design your own .

Also, if you're looking for more fuse bead ornament patterns for your tree, check out my snowflake designs in this post.