Showing posts with label Apparel and Accessories. Show all posts

Wednesday, June 23, 2021

Our Vow Renewal


When Brian and I got married in May of 2020, we had to significantly change our plans due to the pandemic.  We initially hoped to have a small ceremony in 2020 and then a bigger event in 2021, but with the pandemic still an active threat, we had to scale back our plans for the vow renewal too.  However, we still had a lovely day, and I wanted to take a moment to share it with you.

Thanks so much to Corey Butler of Revolution Summer Photography for these lovely photos.  If you're in northern New England and are looking for a wedding or engagement photographer, I highly recommend checking him out.  Click here to go straight to his site.  You can also find him on Facebook at Revolution Summer Photography and on Insta @rsummerphoto.

My sis Katie and Brian had to put on my heel covers for me because they have more muscles than I do.  You can see the card soldiers I made for my wedding in the backgroun.  There was a very strong chance of rain this time around, so I kept the card soldiers at home, but I made sure they still had a part in the day.

Putting the finishing touches on my makeup.

Katie fastening my belt.  My wedding dress was a DIY project that I threw together.  Basically, I took an old romper of mine and created a belt and a tulle overskirt to make it more gown-like.  You can learn more about it in this post.  I had made the belt with snap closures, but on the wedding day, the snaps popped open any time a bent down or moved in just the wrong way.  I ended up making a new belt for the vow renewal by sewing hook and bar closures to a piece of ribbon, and that worked really well.  The belt stayed closed this time.

Entering the gardens.

Now that we're vaccinated, dad was able to walk me down the "aisle."  Also, here you can see my DIY bouquet, which you can learn more about in this post.

Brian winging his vows.

Me reading my vows.

Yay, we're still married.

Chatting with grammie.  This ended up being one of my favorite pictures of the day.  Grammie couldn't be there in person for our wedding, but I was glad she could be there for the vow renewal.

For health and safety reasons, as well as to comply with our venue's policies, we had to severely restrict the guest list, inviting only in state family members.  But we were able to include a few people who couldn't be there in person for the wedding, which was nice.

This is another one of my favorite pictures.

The flowering trees are one of my favorite things about the gardens.  I love when they are in full bloom, so it was nice to be able to snag some pictures with them.

If I had to pick a favorite picture from the day, this one is probably it.  It looks like we're in an enchanted forest.

And one more picture with flowers.

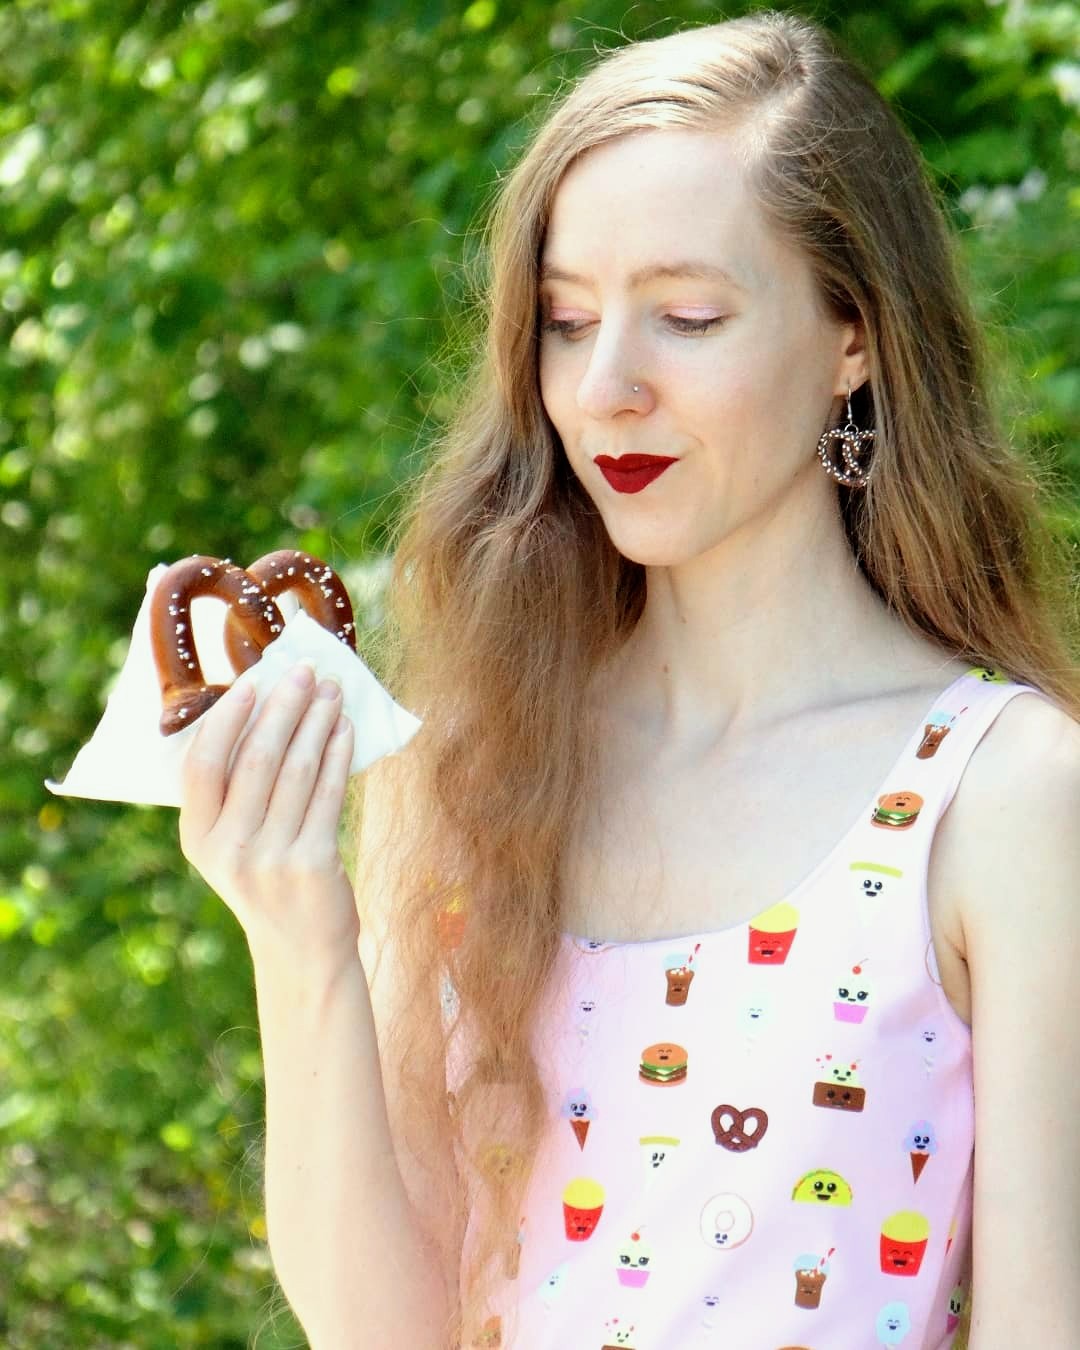
We had Subway for dinner with Little Debbie Birthday Cakes for dessert.

One of our friendly neighborhood squirrels, Chip, decided to stop by for a treat.
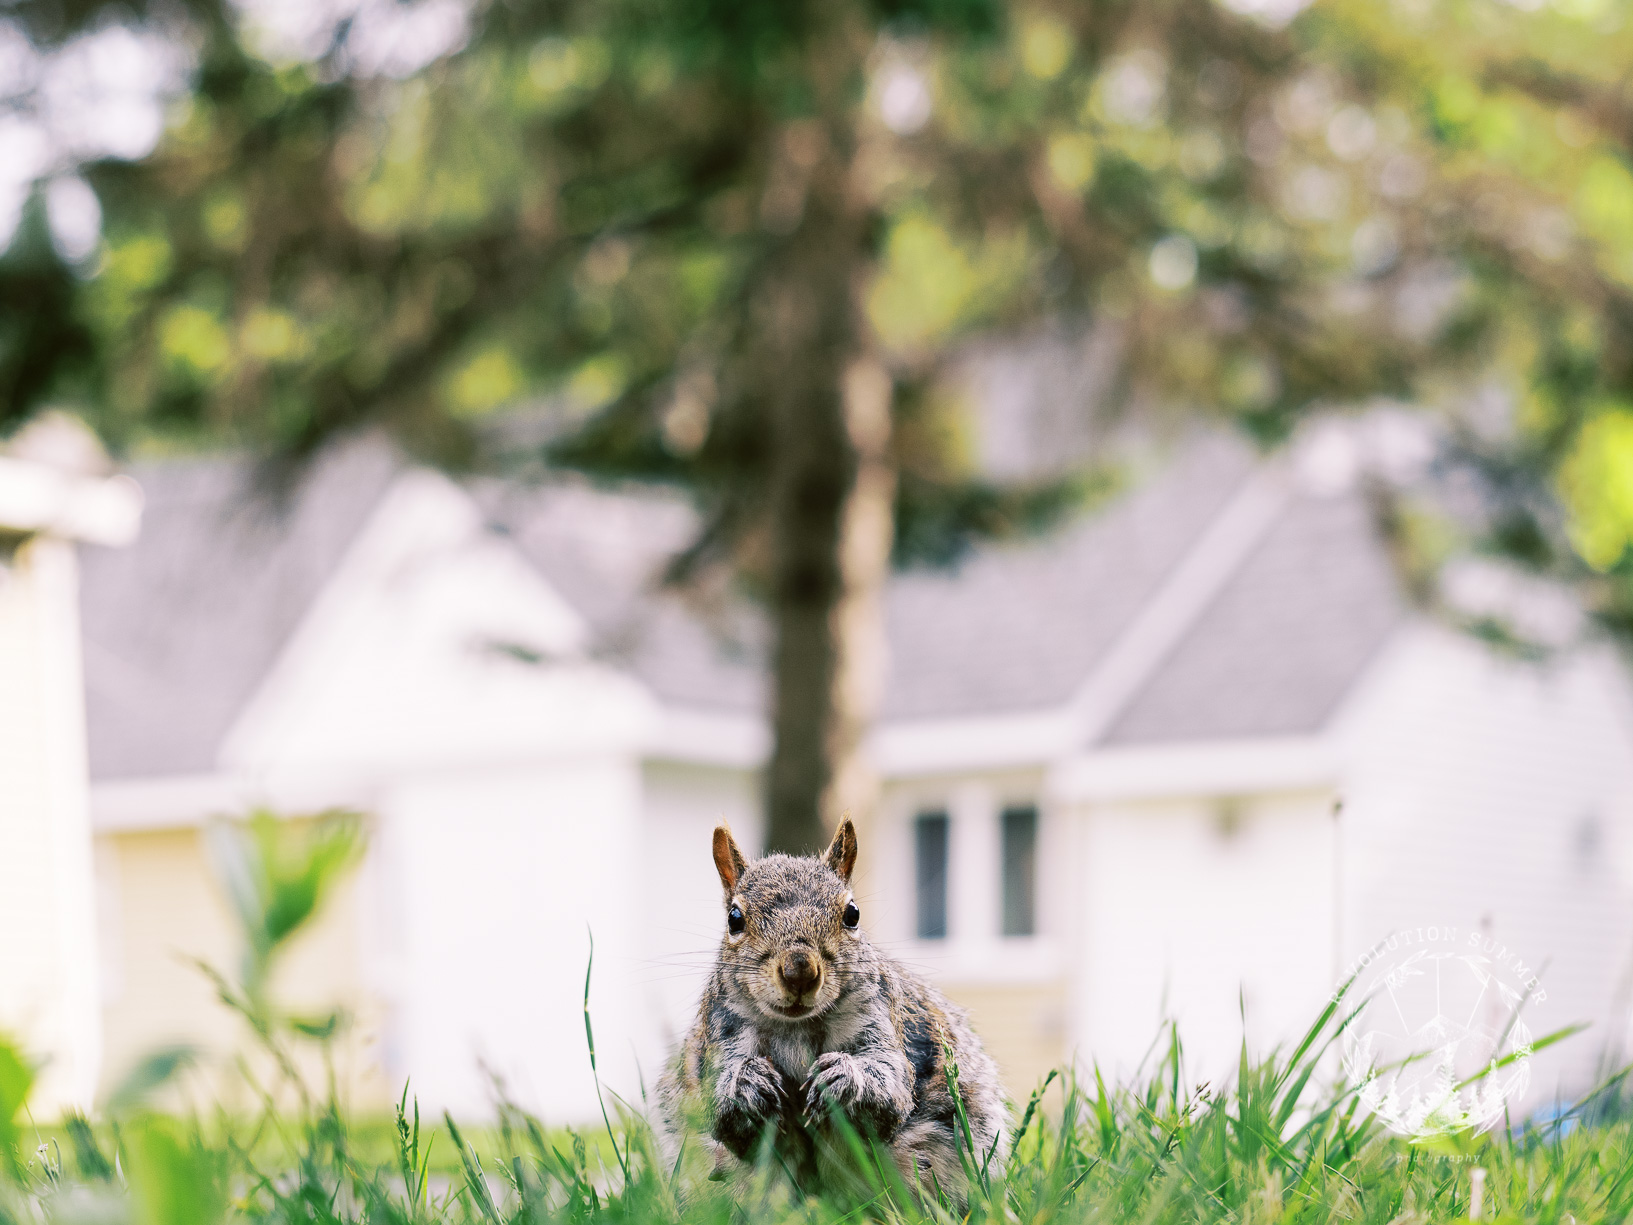
A close up of Chip.

And that's it.  I hope you enjoyed this peek into our vow renewal.

While this wasn't the wedding I had envisioned when I first started wedding planning in 2019, it was actually preferable in a lot of ways.  The only thing I would have changed would have been the guest count.  I wish we could have had more friends and family members there to celebrate with us.  But everything else about the day was just right.

Is there anything else you want to know about our wedding and vow renewal?  The pandemic has made wedding planning even more challenging, so if there are any insights you'd like from my experiences, I'd be happy to share.  Drop your questions in the comments, and I'll address them if I can, either in a reply to your comment or in a follow up post.

Next week, we'll be switching gears completely and diving into Halloween season.  I'm close to having four months of spooky crafts planned out for you all (but not all of them made yet, of course), and I can't wait to share them with you.

Wednesday, June 16, 2021

Pretzel Friends Clay Earrings


Love snacks?  These adorable clay pretzel friends earrings may be just for you.  I made these as a last minute craft idea to match the Food Friends dress Brian made for me (see pictures below).  If you'd like a Food Friends dress, leggings, or skirt of your own, Brian is selling them in his shop, Wayton Designs.  You can also follow him @wayton.designs on Instagram to be the first to know about his latest designs.

I have a tutorial explaining how I made these earrings at the bottom of this post, so if you want to get straight to that, skip to the end.  But first, I have some pretzely photos I wanted to share with you.

Pretzel Friends Photos

Here I am wearing the pretzel friends earrings and Food Friends dress, with an actual pretzel on hand for the photos.

Here you can see the earrings a little better.  They're pretty eyecatching in my opinion.

And one last picture with our pretzel friends.  Now on to the tutorial.

Pretzel Friends Clay Earrings Tutorial

Materials:

*Oven bake clay

*Brown acrylic paint

*Black acrylic paint

*White acrylic paint

*Pink acrylic paint

*Ultra fine nail art brush

*Nail art dotting tool

*Ear wires

*Jump rings

*Jewelry pliers

*Acrylic sealer (optional)

Directions:

*Roll out clay into a long, thin strip.

*Shape the strip of clay into a pretzel.

*Carefully push jump rings into the tops of the pretzel shapes.


*Bake according to the directions on the clay packaging.  Remove from the oven and let cool.

*Once cool, it's time to paint the earrings.  If you used any color of clay other than brown, the first thing you'll want to do is paint the earrings brown.  If your clay is already brown, then move on to the next step.

*Now it's time to paint the face.  Use a dotting tool and black paint to create two eyes and the ultra fine nail art brush to create a mouth.

*Use the dotting tool and pink paint to create pink cheeks.  Let dry.

*Use the nail art brush and a tiny bit of white paint to add white highlights to the eyes.  This step was really tricky for me, as I had to hold the pretzel inside my focal length to do it, which made the image I was seeing a little blurry.  Feel free to skip this step if you're happy without the white highlights.

*Use the nail art brush and white paint to paint on salt crystals.  Let dry.

*Optional: Once the paint is dry, you can seal it with an acrylic sealer to protect the paint from chipping.

*Use the pliers to open the bottom of the ear wires.  Loop one ear wire through each earring and clamp shut with the pliers.

Wednesday, June 9, 2021

Pokemon Trainer Misty: Pokemonbounding Ep 8

This week I'm participating in a set of Pokemonbounding challenges over on Instagram, so I figured this would be the perfect time to add another post to my Pokemonbounding series.  Tuesday's theme was Pokemon trainer, so I decided to go with a look inspired by Misty.

Misty's main look consists of a yellow crop top and blue denim shorts, so that was my starting point for this outfit.  She also has red suspenders, which I do not have.  I used some red stud earrings (not really visible in the photos, unfortunately) for the red color and borrowed Brian's bracers to get the suspender look.  My shorts don't have interior buttons, so I had to tuck the bottom edges into my shorts and hope for the best.  This was fine for pictures, but if you're shooting for a more wearable bound, you'll probably want to omit the suspenders if you don't have ones that clip onto your shorts.

Misty wears red and white sneakers.  I don't have those either, so I had to choose between black sneakers or red heels.  Black sneakers felt more Misty's vibe, so I went with those even though the color didn't match her scheme.  She often wears her hair in a side ponytail, so I did just that.  Lastly, I added a Pokeball stress ball to finish off my Pokemon trainer look.

Misty's favorite Pokemon is Togepi.  I don't have a Togepi plushie, so this is where Pokemon GO AR came into play.  I was able to snag some Togepi pictures without having a physical version of Togepi.

Keep scrolling for a few more pictures of this look, including one featuring real-life Pokemon, Chip.

It's mini Togepi!  Sometimes, when placing a Pokemon using AR, the resulting Pokemon image ends up much larger or smaller than it should be.  This mini Togepi image was a fun "blooper."

I also managed to hatch a flower crown Togepi from a Pokemon GO event, so I snagged a couple of pictures with him as well.

Smeargle decided a photo bomb was in order.

Chip, our friendly neighborhood squirrel, decided to drop in for a visit.

I hope you enjoyed today's post.  If you'd like to see more crafts and outfit ideas, click here.  If you have any suggestions for my Pokemonbounding series, I'd love to hear them.  I have a few ideas for Pokemon I'd like to bound as, but I'm open to suggestions as well.

Wednesday, May 26, 2021

Alice in Wonderland Disneybound Ideas


As you may have noticed if you've been following my blog for any length of time, I love Alice in Wonderland.  In fact, my wedding was Alice in Wonderland themed, and my bridal look was inspired by Alice.  I thought it would thus be fitting to close out my Disneybounding series with a peek at some of the Alice Disneybounds I've put together this past year.

Classic Alice

This one is more of a costume/cosplay than a bound, but I've used for bounding challenges and it's one of the more crafty looks I've put together.  You can find a tutorial for crafting the pinafore apron here and one for assembling a hair bow here.  For accessories, I went with pearl earrings and a key-shaped pendant.  This pendant was a gift from my Aunt Cheryl, but I made my sister a similar necklace as her MOH gift.  You can find that tutorial here.

Puff Sleeved Alice Bound

Here's a look that is close to my classic Alice look, except it's more of a true bound because it doesn't use more costume-like elements, such as the pinafore.  You'll notice that my DIY hair bow makes an appearance here too.  It's my signature Alice piece, and it makes an appearance in almost all of my Alice looks.

Bridal Alice Look

This is an Alice look more fitting for a fancy occasion, such as a wedding or prom.  This is not the exact look I wore on my wedding day (I didn't have the bow because it broke on me, and I wore a different pair of heels), but it does use my wedding dress and bouquet.  If you want to learn more about how I transformed one of my favorite rompers into my wedding dress, check out this post.

Poolside Alice Bound

This one is a super casual bound.  Even though Alice's main colors are blue and white, I tend to use blue and black more often, in part because I have lots of black garments but few white ones.  However, a pair of white shorts paired with black sandals would make this look more recognizably Alice.

I have in some flamingo earrings and I added a flamingo straw to my drink, which has a "drink me" tag wrapped around the neck.  You can find a tutorial for the "drink me" bottle here.  In the beginning of Alice's Adventures in Wonderland, Alice wonders to herself what good a book without pictures is.  I thought a grown up Alice might thus appreciate a graphic novel, hence my choice of "beach" read.

Keyhole Blouse Alice Look

If you've been following my craft blog for a very long time, you may recognize this top from my Alice in Wonderland birthday party years ago.  I didn't yet know that Disneybounding was a thing, but that look was probably my first Disneybound.  The structure of the top has sort of Victorian vibes, which I thought was fitting for Alice, and the keyhole cutout seemed like the perfect nod to Wonderland.  It's hard to see in this picture, but inside the keyhole I have that same key shaped pendant as in the first picture.  I also am wearing key shaped earrings.  That white rabbit is actually a purse, sort of.  The pocket in its back is too small to hold even my phone, so it's not the most functional, but it's a cute prop.

Tim Burton's Alice

There are many different representations of Alice.  This look I put together based on some of the promotional images for Tim Burton's Alice in Wonderland which showed Alice holding a white rabbit.

Artistic Alice

This rendition of Alice is based on a gorgeous drawing by Deanna Davoli.  You can see my inspiration piece here.  I matched the items pretty well, the tutu, the corset, the "drink me" vial, etc., but I didn't really capture the Gothic vibes of the original.  I'd like to redo this look sometime to better match the aesthetic of the artwork.

Steampunk Alice

Alice in Wonderland was written during the Victorian era, so a steampunk inspired Alice look seemed like a natural choice.  I'm accessorizing with a prop pocket watch and key earrings.

Goth Alice

I participated in a series of aesthetic challenges back in January, and one of the prompts was goth.  If you've seen my Alice in Halloweenland/dark Alice look, this is a slight variation on that basic idea.

Dark Academia Alice

Another of the aesthetic prompts was dark academia.  I used a navy plaid skort with light blue accents and a black sweater as the base of this look.  To make it more recognizably Alice, I added my Alice bow.  I also have on a cat pearl necklace to represent Dinah and the Cheshire Cat.  My book stack consists of Alice in Zombieland, two different editions of Alice's Adventures in Wonderland, and Alice in Wonderland and Philosophy.

Soft Girl Alice

The soft girl aesthetic is laden with pastels, especially pink.  While I could have tried to piece together a soft girl look using light blue, I decided instead to envision Alice in pink.  I swapped out the black bow for a pink one, added a pink belt with hearts (for the Queen of Hearts), and used a cameo necklace with a heart charm, a black bow, and a pink rose.

This concludes my Disneybounding series.  I hope you enjoyed it.  Would you like to see more Disneybounding?  Bounding that's not Disney?  I have a bunch of spooky and bookish looks I've put together for my book reviews (which you cann find on my writing Insta, @amber_hathaway_writes) and various spooky challenges.  Maybe I'll do a round up of those ideas as we move into Halloween season.

Thursday, May 20, 2021

Cherry Headband for Lilo and Stitch Chocolate Cake Disneybound

Disneybounding is not limited to Disney characters.  It extends to all things Disney (as well as Disney-owned franchises such as Star Wars and MCU).  In one of my favorite Disney movies, Lilo and Stitch, Lilo gives Stitch chocolate cake to try to reduce his "badness level."  The cake in question has white frosting and cherries on top.  While you could create a Disneybound by simply using items in red, brown, and white, I wanted to go a bit more whimsical and literal, and I thought a cherry headband would be perfect.

This hair accessory could also be great for a Halloween costume.  There are plenty of sweet treat looks that would go well with a cherry on top.

Materials:

*White oven bake clay
*Rose-shaped silicone mold
*Artificial cherries
*Headband that matches your hair color or cake theme
*Glue

Directions:

*Place the clay into the rose mold and create five rose shapes.  Press a cherry into each one to create an indentation.  These are going to be dollops of decorative icing.

*Remove the cherries from the clay and bake the clay in accordance with the directions on the packaging.  Remove from the oven and let cool.

*Once cool, glue the cherries into the center of the clay rose shapes.  Let dry.

*Once dry, glue to the headband.  I ended up only using five of these on the headband.

Lilo and Stitch Chocolate Cake Disneybound

Here are a couple of pictures of the completed look.  I don't look exactly like a cake, but I think this look still has strong cake vibes.

To complete the look, I added a brown dress, a white belt, and white heels.  The brown is supposed to represent the chocolate, although unfortunately I didn't have any clothes that were the right shade of brown for that.  The white belt is the icing through the middle of the cake.  I didn't have brown shoes in the right shade, so I went with white shoes instead.

Have you been enjoying this series?  I'm curious to know what you think.  Tune in next week for the final post in our Disneybounding series.

Thursday, May 13, 2021

Disney Princesses: Belle and Rapunzel


In today's installment of the Disneybounding series, I'll be showing you a couple of Disneybounding ideas for Belle and Rapunzel.  I'll also be linking to some crafts I've made on this blog that could help pull these looks together.  If you've seen my Halloween Costumes from My Closet post, then you've seen the Belle ideas before, but I thought they would fit nicely in this series as well.

Belle's Blue and White Outfit

This is one of Belle's more iconic outfits, second only to her yellow ball gown in terms of popularity.  It's also my personal favorite.  In the film, she is wearing a blue dress with a white blouse underneath.  I used a blue romper and white top as the base of this outfit.

Belle is well-known for her love of reading, so I had to add some bookish accessories.  You can't see my pendant well in this picture, but I'm wearing a book pendant with a little red rose on the cover (another nod to Belle).  Check out this post to find out how to make a book pendant of your own.

I also added a book bag which I painted the cover of.  I don't have a tutorial for that one, since it was a bit of a disaster (I used leather paint on faux leather, which is not as breathable, so the paint is still a little tacky), but hey, it looks nice.

Belle's Yellow Ballgown

One key element of Disneybounding is wearability.  I used a yellow romper as a stand-in for Belle's yellow ballgown.  Not as fancy, but far more convenient for my day-to-day activities.  I paired it with the same book pendant and some artificial roses I had on hand.

Rapunzel Look 1

Rapunzel really has one signature look, namely her purple dress.  I used a lavender romper as the base of this look, but to make it a little fancier, I added the overskirt that I made for my Gastly Pokemonbound over top (You can find that tutorial here).  The gold belt is mostly just there to hide the black elastic on the overskirt.

For accessories, I had this funky brooch that looked a bit like the sun symbol from Rapunzel.  I attached it to a necklace to make it into a pendant temporarily.  I also added a flower crown for the flowers that Rapunzel has in her hair.

Rapunzel Look 2

Here's a second take I did on Rapunzel's purple dress.  As you can see, I used a lot of the same elements, like the flower crown and the sun pendant.  Instead of the lavender romper, I opted for a light purple skirt and corset.  I have done a flower crown tutorial on here before, if you're interested in making one of your own, but honestly, they're so cheap online that it's probably not cost effective to make one unless you have a large store of artificial flowers on hand.

And that's a wrap for this week.  Stay tuned for more Disneybounding posts.