Showing posts with label Zombies. Show all posts

Friday, February 24, 2017

Zombie Paper Snowflake


     Here in Maine, we're still in the throes of winter, with no end in sight, so I figured I might as well make something wintery.  I was scrolling through Pinterest when I saw this zombie snowflake.  It looked really neat, but also like it would require amazing fine motor coordination to make without the aid of a paper cutting machine.  While I do have my trusty Silhouette CAMEO, I know many who read my blog don't, and I wanted to see if it would be feasible to make a zombie snowflake by hand.  Here are my results.

Materials:
*Printer paper
*Scissors
*X-acto knife
*Pencil

Directions:

*Cut out a circle the size you would like your snowflake to be and fold it into sixths, following the directions in six-pointed paper snowflake tutorial.

*Draw on your zombie design.


*Cut out what portions you can using scissors.


*Use an X-acto knife to cut out fine details, which in this case was the x-eyes.  I also decided to add some more details after the fact, so that's why there's a new pencil line on this picture.


Thursday, February 2, 2017

Mini Clothespin Zombie Heart


Materials:
*Red cardstock
*Black marker
*Scissors
*Mini clothespin
*All purpose adhesive
*Pencil

Directions:

*Draw a small heart sized to fit along your clothespin on the red cardstock and cut out.

*Draw a zombie face on the heart.

*Cut the heart in two pieces, following the mouth line.

*Glue the two halves to the top and bottom parts of the clothespin such that when the clothespin is closed, the two halves of the heart align.  Let dry.

*Once dry, your zombie is free to begin chewing away.


Thursday, January 26, 2017

Zombie Fortune Valentine's Card


     Got a friend who is always wondering when they'll find love?  Help them figure it out with this handy wheel of fortune card.  Who knows, the zombie apocalypse may come sooner than we think!

Materials:
*Pink cardstock
*Red cardstock
*White cardstock
*Brad
*Hole punch
*Pen
*Mounting tape or other adhesive

Directions:
*Come up with a list of twelve zombie apocalypse love forecasts.  I've included mine at the end of this post if you need some inspiration.

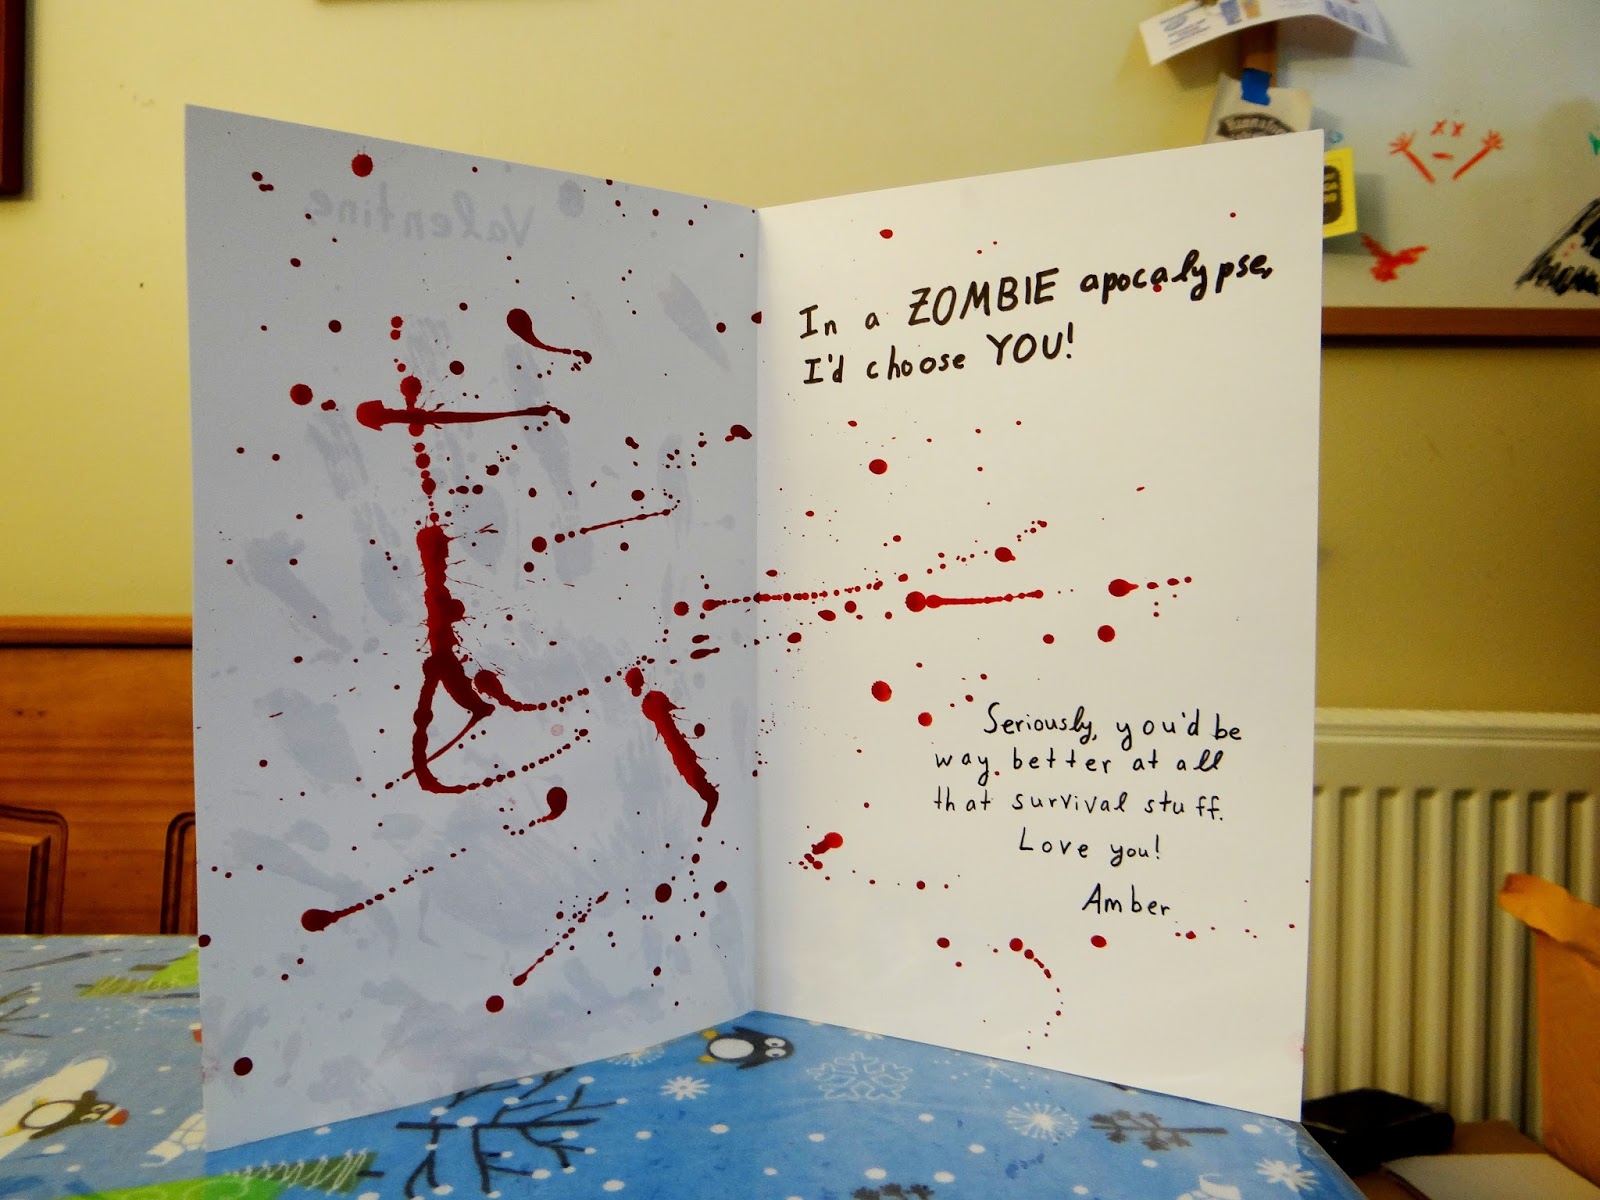
*Either type up and print or hand-write the fortunes on the inside of the card.  Include your Valentine's Day message on the opposite page.


*On the front of the card, write at the top: What will your love live be like during the zombie apocalypse?

*On the bottom of the front of the card, write: Spin the wheel and then find the corresponding number inside.

*Make sure to leave enough space between the text at the top and bottom to fit your wheel.

*To construct the wheel, print out a copy of the wheel template below on white cardstock.


*Cut out the wheel and fold it in half along one of the black lines.

*Very carefully punch out a half circle shape from the center of the wheel and then unfold and smooth out the spinner.

*Draw a spinner on red cardstock, decorating as you wish, and then cut out.  Punch a hole toward the bottom of the spinner.

*Slide the brad through the holes in the spinner and wheel and flatten out the prongs at the end, taking care not to flatten too close to the end of the brad.  You want the spinner to be able to move freely.

*Adhere the spinner to the front of your card.  Give the spinner a few test spins before you glue it down to make sure it's functioning as intended.

Not sure what to write for your fortunes?  Here are the ideas I came up with:

1. You'll meet a partner who'll love you for your brains!

2. Someone will steal your heart - literally!

3. You'll have a fighting chance at love.

4. You'll have little trouble chasing someone down.

5. You'll be single, but it's for the best.  The pickings are slim.

6. You won’t be able to hold down a partner for long.

7. You'll bunker down with the last person you texted.

8. You'll be the most sought after person in town.  Too bad everyone sees you as a piece of meat.

9. There’ll be plenty of eye candy, but nothing lasting.

10. You’ll have lots of chances for a dinner date.

11. You’ll find someone who travels at your own pace, which is now very, very slow.

12. Your flings will be short lived.

Thursday, January 28, 2016

Felt Gingerbread Zombie


     Looking for something cuddly and sweet to give your valentine?  Search no further than this craft ;).

Materials:
*Brown felt (for a more gingerbready aesthetic) or green felt (for a more zombie-like look)
*Gingerbread person template (I traced around a cookie cutter)
*Chalk
*Scissors
*Red and white (or black) fabric paint
*Needle and thread
*Stuffing

Directions:
*Trace two gingerbread person shapes onto your felt with chalk and cut out.
*Decorate one of your gingerbread cut outs with fabric paint to make it look zombie-like.  A few years ago, Brian and I made gingerbread zombie cookies for a Halloween party and I decided that I wanted to make mine resemble that, but you can also go for a more gruesome look.  Set aside your zombie to dry.

     The zombie gingerbread person that served as the inspiration for my zombie gingerbread plushie.

*Using a blanket stitch, sew the together the two zombie halves, leaving an opening large enough for you to add the stuffing.  Insert stuffing until your zombie reaches its desired fullness and then sew closed.

Thursday, January 21, 2016

Zombie Valentine's Heart Banner


Materials:
*Cardstock
*Silhouette CAMEO (or heart template and a pen)
*All purpose adhesive
*Thread

Directions:
*If you have a Silhouette CAMEO, import the below template into Silhouette Studio and have it cut out the hearts for the banner.  (For more detailed instructions on using the Silhouette CAMEO with my templates, see this post.)
*If you don't have a Silhouette CAMEO, you can print out a heart template and trace 27 hearts (or 21 if you want to leave out the zombie bit) and hand write letters.
*Space out hearts as desired and then glue them to the thread.  Let dry.

Thursday, January 14, 2016

"Bloody" Handprint Zombie Valentine's Card


     Valentine's Day is one month away, which means it's time for me to liven (or deaden, I suppose) up this holiday with some zombies!

Materials:
*Blood colored paint (I added a small amount of black paint to red paint)
*Tap water
*Paintbrush
*White cardstock
*Pencil
*Black marker

Directions:
*Fold paper in half to create a card.
*Cover your workstation in newspaper or other scrap paper and place the card at your workstation.
*Paint your palm with the blood colored paint and then place your hand at about the center of the front of the card to create a "bloody" handprint.
*Use your fingers to smear streaks of paint along the card.
*Add some blood splatters using the paintbrush.  I had to water down my paint a little to get it to splatter.
*Once the front of the card is decorated to your liking, set it aside to dry.
*When the outside of the card has dried, add some bloodstains to the inside and then let dry.  Make sure to leave some white space for your Valentine's message.
*Write your Valentine's message in pencil to make sure you get the desired spacing and then trace over it with black marker.


     The inside of the card says: In a ZOMBIE apocalypse, I'd choose YOU!  Seriously, you'd be way better at all that survival stuff.

Thursday, January 22, 2015

Zombie Valentine's Lotto Ticket


    Here's a slightly different take on the Valentine's lotto tickets I've seen floating around online.  Instead of having prizes underneath each scratch off heart so that your loved one is guaranteed to be a winner, add zombie images under some of them.  You can still think up a prize to correspond to the zombies if you would like, but don't tell your valentine about that beforehand.  Keep them in suspense as they play the zombie Valentine's lottery.

Materials:
*Zombie lotto ticket printout (either my template or your own design)
*Pink cardstock
*All purpose adhesive
*Acrylic paint
*Liquid soap
*Pencil
*Paintbrush
*Scissors

Directions:
*Print out zombie lotto ticket, either my design (pictured below) or make your own design.


*Glue template onto pink cardstock.
*Write/draw/paste in your zombies and prizes.  I used photos of my sister Katie, Brian, and me dressed up as zombies (as well as a photo of zombie gingerbread) for the zombie hearts.  You can use whatever ratio of zombies to hearts you would like.  Since I'm rather cruel, I stacked the odds against Brian, adding five zombies and four prizes:


*Take a strip of contact paper and trace nine hearts onto the back.
*Mix one part liquid soap with two parts acrylic paint.
*Paint the soap/paint mixture across the contact paper.  Set aside to dry,  Add a second coat if necessary.  (Full disclosure: I didn't have any contact paper, so I used packing tape instead.  I stuck each end of the tape to the bottom of a drinking glass and then painted it.  Once the paint was dry, I traced hearts onto the paint using a black permanent marker, ending up with the situation pictured below.  It worked, but it was a lot more challenging than I imagine using contact paper would be.)


*Once dry, cut out the hearts and stick them over the text/image hearts.  Now you're ready to pass it off to a loved one to play.

Unfortunately for Brian, he ended up with a zombie.  Somehow he survived the encounter and I told him he could scratch off until he won a prize.  After a second close encounter with the zombie kind, he finally won a kiss.


Thursday, January 15, 2015

"I Think I Might Like You More than I Like Zombies" Valentine's Box


Materials:
*Heart shaped box
*White paint
*Paintbrush
*Mod Podge
*Red, pink, and white tissue paper
*Scissors
*Colored pencils
*Glitter glue
*Black permanent marker
*Zombie owl template
*Colored pencils

Directions:
*Paint the box white and set aside to dry.
*Cut out squares of the various colors of tissue paper.  Once the paint has dried, glue the squares to the box using Mod Podge and then set aside to dry.
*Once the box has dried, paint with a coat of glitter glue and then set aside to dry.
*Resize the below owl template to the desired size and print out.


*Color in the owl the desired colors.
*Once the box is dry, glue down the owl and write in the phrase "I think I might like you more than I like zombies" on the box.

Thursday, February 13, 2014

Printable Zombie Valentine's Cards


     If you are a fan of zombies and are looking for some printable Valentine's cards, you have come to the right place.  Below are 5 different printable zombie Valentine's card designs, which I based on the stone "conversation" hearts I made last year.  I left them blank so that you could decorate the cards however you saw fit.  I also have included heart templates so that you could cut hearts out of patterned paper and glue them over the three hearts on the to-from half of the card if you so choose.

Materials:
*Printed zombie Valentine's
*Colored pencils, crayons, markers, etc.
*Colored cardstock or patterned paper (optional)
*Scissors
*Double sided tape

Directions:
*Print out some zombie Valentine's cards.


*Color in the cards however you wish.  Alternately, you could leave the cards blank so that your recipients can decorate them.
*If you so choose, cut hearts out of the patterned or colored paper and layer them on top of the three hearts on the to-from half of the card.
*Fold the card in half along the solid black line and tape together so that one face of the card is the to-from page and the other is the Valentine's message.

     What are your plans for Valentine's Day?  Brian and I are planning on watching the 1970's zombie movie Messiah of Evil.

Thursday, February 6, 2014

Perler Fuse Bead Zombie Valentine's Owl


     Need another zombie Valentine's craft?  Here's an cute little zombie owl that you can make from fuse beads.  You can also use this pattern to make a non-zombie owl by modifying the eyes.

Materials:
*Fuse bead kit (e.g. Perler beads kit)
*Large square fuse bead pegboard
*Iron

Directions:
*Arrange beads on a large square pegboard in the pattern shown above.  If you would prefer to make a non-zombie owl, you can easily modify the eyes to make a non-zombie Valentine's owl.
*Cover your owl with a sheet of waxed paper and iron the first side, then remove from the peg board, flip over, put waxed paper on top and iron the second side.  You can find more detailed directions here.

Thursday, January 30, 2014

(Zombie) Valentine's Tic Tac Toe Board


     Have an empty sour cream (or similarly shaped) container kicking around?  Use it to make a portable Valentine's Day tic tac toe board.  The lid becomes the board and you can use the container to store the pieces when not in use.  Looking for more (zombie) Valentine's crafts?  Check out my pom pom creatures and my stone "conversation" hearts from last year.

Materials:
*Wide sour cream container (mine had a diameter just over 4" at its widest point)
*5 red and 5 pink plastic heart gems (you can find them at Dollar Tree)
*Cardstock
*Mounting tape
*Scissors
*Black permanent marker
*Marker or printer
*Optional: stickers, patterned paper, or other supplies you can use to decorate the outside of the container.

Directions:
*Draw or digitally design a tic tac toe board to fit the lid of your container and tape it to the lid.
*Draw faces onto the heart pieces, either zombie faces (see above) or happy faces (see below), depending on what you prefer.


*Decorate the outside of the container however you wish.  I used self-adhesive holographic laminate to decorate mine.


Another idea:
*For a slight modification of this craft, you could use zombie pom pom creatures (or non-zombie critters) for game pieces.


Thursday, February 7, 2013

Valentine's Day Zombie Stone "Conversation" Hearts


Materials:
*Stone hearts (or hearts from another material such as foam)
*Permanent marker

Directions:
*Look up zombie Valentine's phrases.  Some examples include "I love you to pieces," "I love you this munch," "I love you for your brains," and "my love for you won't die."
*Using your permanent marker, write zombie phrases on your hearts.  You can also add an illustration to the hearts if you would like.
*If you're not interested in zombies, make stone "conversation" hearts using traditional Valentine's Day phrases.

Thursday, January 31, 2013

Valentine Zombie (and Non-Zombie) Pom Pom Creatures


Zombie Pom Pom Creatures


Materials:
*Large pink and red pom poms
*Small pink and red pom poms (twice as many as the number of large ones)
*Red and black fabric paint
*Red and pink foam
*Heart stencil or template
*All purpose adhesive
*Scissors
*Pen
*Optional: written or printed zombie valentine saying

Directions:
*Trace heart stencil or template onto the foam, then cut out the heart shape.  This heart will serve as the feet for your pom pom zombie, so size accordingly.
*Glue large pom pom onto the heart shape.
*Glue small pom poms onto the large pom pom to make ears.
*Draw x-shaped dead eyes using the black fabric paint.  If zombie is pink, add a bloodstained mouth using red fabric paint.  Set aside to dry.
*Glue a zombie valentine message to the bottom of your zombie's feet, if desired.

Googly Eyed Pom Pom Creatures

Materials:
*Either a kit for glittery pom pom critters (which is what I used)

OR:

*Large red and pink pom poms
*Googly eyes
*Red and pink foam
*Large heart template
*Small heart template
*Pipe cleaners
*Scissors
*Pen
*All purpose adhesive

Directions (if not using a kit):
*Trace one large heart and two small hearts onto the foam, then cut out the hearts.
*Glue a pom pom to the large heart.
*Cut off two sections of pipe cleaner slightly longer than the length you would like your critter's antennae to be.  Glue a small heart to each length of pipe cleaner.
*Glue googly eyes to the pom pom, then add the antennae.

I came across this song when looking for zombie Valentine's Day ideas and thought I would share it.  It's a fun song for a zombie themed Valentine's Day: The Zombie Song by Stephanie Mabey

Friday, October 19, 2012

Three Cheap and Easy Halloween Costume Ideas

     Halloween is rapidly approaching.  If you are looking for a Halloween costume for yourself or for your children but don't have a lot of money to spare, here are a few costume ideas that are inexpensive and require little time to construct.
 
Zombie
 

Materials:
*Light colored shirt
*Scissors
*Red food coloring or red marker
*Leaves
*All purpose ashesive
*Red undershirt (optional)

Directions:
*Take your light colored shirt and cut holes in it to make it look ragged and torn.
*Take the shirt outside and rub in the dirt or grass to make the shirt look dirty.
*Using red food coloring or a red marker, color around the holes to make it look like you have been bleeding.  Add some splotches of food coloring or marker to other places on the shirt as well.
*Glue on some leaves.
 
The Paper Bag Princess
 

If you have never heard of the Paper Bag Princess before, she is a character from a children's book by Robert Munsch.  For more information about the book, see Amazon or the book's Wikipedia page.

Materials:

*2 paper bags
*Cardboard cereal box
*Gold permanent marker or paint
*Scissors
*Tape

Directions:
*Take one of the bags and cut along the side seams, then cut out the bottom of the bag.  Discard the bottom of the bag.  Your paper bag should now be in two pieces.
*Take the second paper bag and cut about halfway up the side seams, starting from the opening of the bag.
*Slide the two halves of the first paper bag into the second paper bag and adjust until the two bags are the appropriate length to fit the intended recipient of the costume.  Tape the bags together.
*Cut out arm holes.  If the slits along the side seams of the bag do not reach the arm holes, cut the slit up to the arm holes.
*Cut out a neck hole.  Add slits going diagonally from neck hole to the corners of the bag so that the costume will slide over the head of the costume wearer.
*Once the costume recipient is wearing the costume, she or he may find it helpful to tape the sides of the costume together.
*To make the crown, take a cardboard cereal box and cut out the front side.  Only the front piece is needed for this project.
*Flip the piece over so that the side with the pictures faces the table.
*Draw a rectangle as long as the cereal box is tall and add triangles or other shapes resembling the spikes of a crown to it.
*Color the crown shape gold using a permanent marker or paint.
*Cut out the crown and tape the ends together.
 
Decade costumes
 
(Photo taken by Rachel Hirsch)

     This one isn't really a craft, but it is a great idea for an inexpensive costume.  Start by searching your own closet.  Do you have any wardrobe pieces that resemble clothing from a decade or so ago?  It turned out that I had 70's attire right in my closet.  If you can't find anything that works or don't have anything that you want to wear for a decade costume, check out your local thrift shops.  You can usually find tons of great clothing items from previous decades there.

Thursday, December 22, 2011

Patterned Paper and Bookmarks

Patterned Paper
     There are a number of different ways of making patterned paper, but this one is relatively easy and inexpensive, as long as you have access to a computer and a black ink printer.

Materials:
*Solid colored 8 1/2 x 11 sheet of scrapbooking paper
*Paint or similar drawing program
*Computer
*Printer

Directions:
*Draw black and white images using your drawing program.  I drew stick figure zombies for a Halloween page
*Print them onto the solid colored scrapbooking paper

Bookmarks
Materials:
*Patterned paper
*Small images
*Scissors
*Adhesive (such as mounting squares)
*Ruler
*Pencil
*Laminator (optional)

Directions:
*Determine the size you want to make your bookmark
*On the back of the sheet of patterned paper, trace out a section of patterned paper that is the right size for your bookmark, then cut it out
*Arrange the images on the section of paper, then adhere the images to the paper
*If you have access to a laminator, you can laminate your bookmark

Suggestion:
*To further personalize your bookmark, use patterned paper you've designed yourself