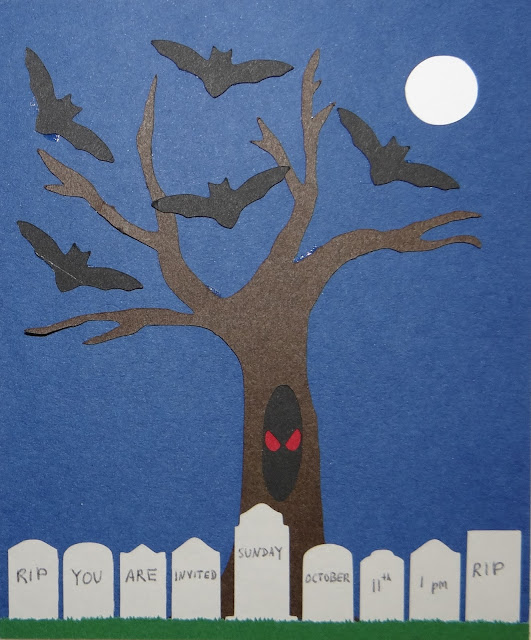
Materials:
*Cardstock in red, black, dark blue, gray, green, brown, and white
*Scissors, pencil, and printer or Silhouette CAMEO
*Pen or gel pen
*Glue
Black and White and Color Templates
Cutting by Hand Directions
*Resize the invite template to the desired width for your invites and print.
*Cut out the various pieces of the template. The grass portion (the one with all the jagged bits) may be a little time consuming for hand cutting, so feel free to smooth it out if you wish.
*Using the color-coded template guide, trace the shapes onto their respective sheets of cardstock and cut out (the moon here is yellow to distinguish it from the background, but I used white paper for it).
*Write out the party info on the tombstones, if it will fit. Alternately, you could use a white or silver gel pen to write the info off to the side of the tree after you've settled your design.
*Taking a piece of dark blue cardstock cropped to the appropriate size, align the various pieces of the invite in accordance with the invite photo at the top of the page. I left the roots on the tree in case you wanted to use the template for other projects, but for this you'll have to trim them a bit to get the tree to fit properly in the design.
*Glue down the various pieces of the invite.
Silhouette CAMEO Directions
*Download the black and white invite template to your computer and run the Silhouette Studio program.
*From the File menu, select "Import" and then "Import to Library" and then select the template from wherever on your computer you started. Now the template will show up in your library.
*Set the page settings to the dimensions of your cardstock and then drag the template onto your page and resize the template to your desired size.
*Click on the button that opens the trace window (it looks kind of like a blue butterfly with a yellow background and if you hover your mouse over it, it says, "Open the Trace Window").
*Click on the "Select Trace Area" button and draw a blue rectangle around the part of the template you want to cut out first, say the tree. At this point you should see a yellow outline around the tree.
*Adjust the High Pass Filter until the tree is entirely yellow and then click the "Trace" button under the "Apply Trace Method" section. You should now have a red outline around your tree.
*Drag the red outline to the upper left corner of the screen. Copy it as many times as you need invites and line them up so that they don't overlap. DO NOT delete the template from the page. The CAMEO will only cut out the red outlines and if you delete the template, it could make it difficult to size the rest of the pieces of the template so that they line up exactly.
*Following the color coded template guide (the moon is in yellow to distinguish it from the background, but I used white paper for it), align the appropriate colored sheet of paper on the cutting mat and load it into the machine.
*Click on the "Cut Settings" button and under material type, select cardstock, then click the "Send to Silhouette" button.
*Delete the red outlines from the page in Silhouette Studios. Go back to the trace window, select the next part of the template you would like to use, and trace it, using the same procedure as outlined above. Peel the pieces off the cut mat, place the next sheet of cardstock on and load the mat, and cut out as before. Repeat this process for each of the different pieces.
*Write out the party info on the tombstones, if it will fit. Alternately, you could use a white or silver gel pen to write the info off to the side of the tree after you've settled your design.*Taking a piece of dark blue cardstock cropped to the appropriate size, align the various pieces of the invite in accordance with the invite photo at the top of the page. I left the roots on the tree in case you wanted to use the template for other projects, but for this you'll have to trim them a bit to get the tree to fit properly in the design.
*Glue down the various pieces of the invite.


No comments:
Post a Comment