Here is another wedding craft that we didn't get to use. I've included a video tutorial below. I made it last year before the world went to heck, and I had much higher hopes for my wedding crafting then. I never got around to making the SVG files, but I do have some PNG files.
Here are the templates I made. You'll note that the circular base is not included b/c I didn't get around to making a PNG template for it, but you just have to cut a circle larger than the base of the numbers and cut a slit in the middle to insert the number through.
Here's one of the crafts I made with the intention of using for our wedding last spring that we did not get to use, thanks to a certain virus. I was hoping that we would have some sort of celebration this year instead, but that's looking pretty improbable at this point in time. However, I still wanted to share some of these craft ideas with you, in case you might find inspiration from them for your celebration. I've included a video tutorial of how I made these glittery letters below.
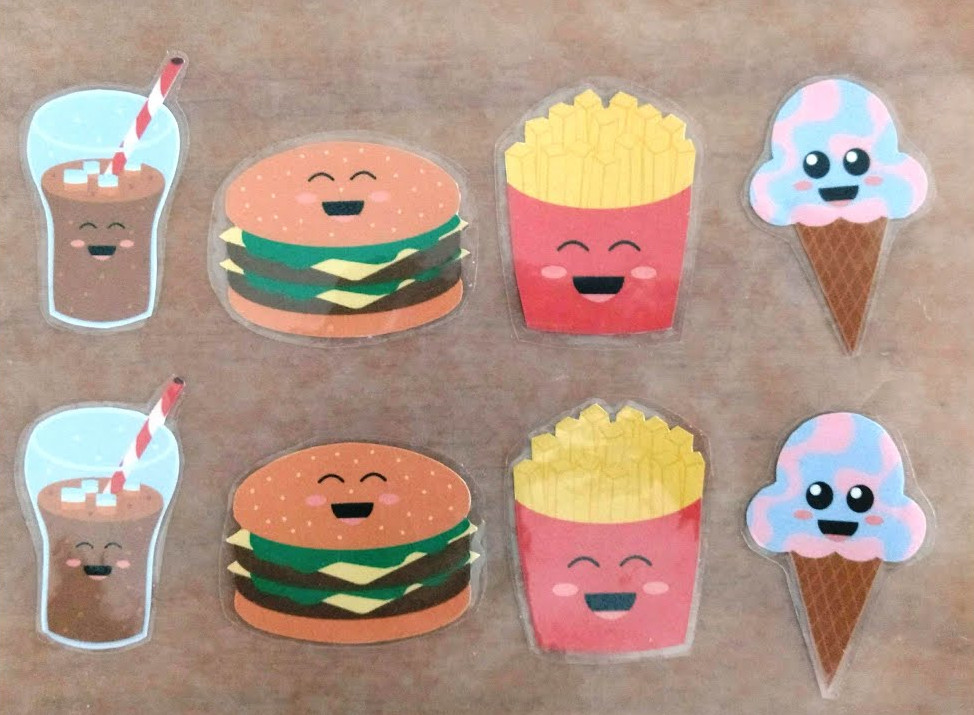
Adorable stickers are one of the surest ways to put a smile on someone's face. This craft is suitable for crafters of all ages (perhaps with supervision in some cases, as it does use scissors), and you don't need anything fancy to make them. I've included a video tutorial below, and keep scrolling for a written tutorial.
Also, if you love these cute little foods, Brian designed them. He sells a pair of leggings with this print on his Etsy store, Wayton Designs. He has also promised me a dress with this print, so that should be coming at some point in time.
Materials:
*Parchment paper
*Waxed paper
*Designs (either hand drawn or printed)
*Glue stick
*Packing tape
*Scissors
Directions:
*Cut out the designs you would like to use for your stickers.
*Attach a strip of packing tape to a piece of parchment paper.
*Glue your sticker designs on top of the packing tape. If the stickers are bigger than a single strip of packing tape, you can layer another piece of packing tape immediately below the first before gluing down your sticker designs. Let dry.
*Use another strip or strips of packing tape to seal in your sticker designs so they are less likely to get damaged.
*Cut around your stickers, leaving about 1/4" of excess tape along all sides. This will help keep your sticker designs sealed in and minimize the likelihood of damage. Peel the parchment paper backing off, and your stickers are ready to use.
*If you're not ready to use your stickers yet, you can place them sticky side down on a sheet of waxed paper until you're ready to use them. The stickers may stick to the waxed paper a bit, but I found that this was a better option for long term storage, as the stickers tend to fall off parchment paper.
Love books? Why not try some bookish nail art? I thought this design was reminiscent of the spines of old, leather bound books. I'd like to try this design again some time, but instead of painting all of my nails the same crimson color, I'd like to add in some other colors, like blue or green, for a little more variety.
Materials:
*Crimson nail polish
*Gold acrylic paint
*Nail polish base coat
*Clear nail polish top coat
*Ultra fine nail art brush
Directions:
*Paint nails with nail polish base coat. Let dry.
*Paint nails crimson (or other bookish color). Let dry.
*Use the nail art brush to paint on stripes with gold paint. I tend to freehand my lines, but if freehanding is not your strong suit, they make nail art guides you can use for creating lines. Painter's tape can also work for this purpose.
*Seal in the design with a clear nail polish top coat. Let dry.
Looking to add a touch of spookiness to you day? These bloody-eyed sheet ghosts are the perfect mix of creepy and cute. These were inspired by a dress the character Kira (aka Creepy Doll) wears in the book Bunny, but hence the bleeding eyes. However, you can use this same process to create ghosts with undamaged eyes.
Materials:
*Sky blue nail polish or other base nail polish color
*Nail polish base coat
*White acrylic paint
*Red acrylic paint
*Black acrylic paint
*Brown acrylic paint
*Ultra fine nail art brush
*Nail art dotting tool
*Clear nail polish top coat
Directions:
*Paint on your base coat. Let dry.
*Paint on your base color. Let dry.
*Use white acrylic paint to draw sheet ghost shapes on your nails.
*Use some black acrylic paint and a dotting tool to make mouths for your ghosts.
*Mix together red, black, and brown paints to create blood colored paint.
*Use a dotting tool to dot on blood red eyes. Or, if you don't like the bleeding eye aesthetic, you could dot on eyes using black paint.
*Use the nail art brush to draw little blood drips coming from the ghosts' eyes.
*Seal in the paint with a clear top coat. Let dry.
Sunday was Roselia Community Day in Pokemon GO. I had spaced on which weekend February's Community Day was happening, so I had to adjust my plans when someone posted in my local Pokemon GO chat about it. I didn't have the supplies on hand for a proper Roselia bound, but I threw together a look with a green romper and a clip on rose I have on hand. For a last minute bound, I would say this one was not too bad.
Someday when I have more time, I'd like to make a Roselia crown and maybe some oversized paper roses to finish off the look. Let me know if you'd like to see me try this.
Here are a few more pics from Roselia Community Day.
Shout out to Brian for taking the time to pose Roselia on my shoulder. It made for some adorable pictures.
Here's the AR photo bomb with one of my shiny Roselias. I didn't have the time to play for the whole event, but in the hour that I did play, I ended up with six new shinies. Since I mainly play Community Day for the shinies, I was pretty pleased.
I know this is a short post, but hopefully you still enjoyed it. If you'd like to see more Pokemon crafts, including the other looks in my Pokemonbounding series, click here. If you have any specific Pokemon you'd like to see me create a look based on, let me know. I'm super swamped right now, but I'm hoping to get back to my monthly Pokemonbounding this summer.
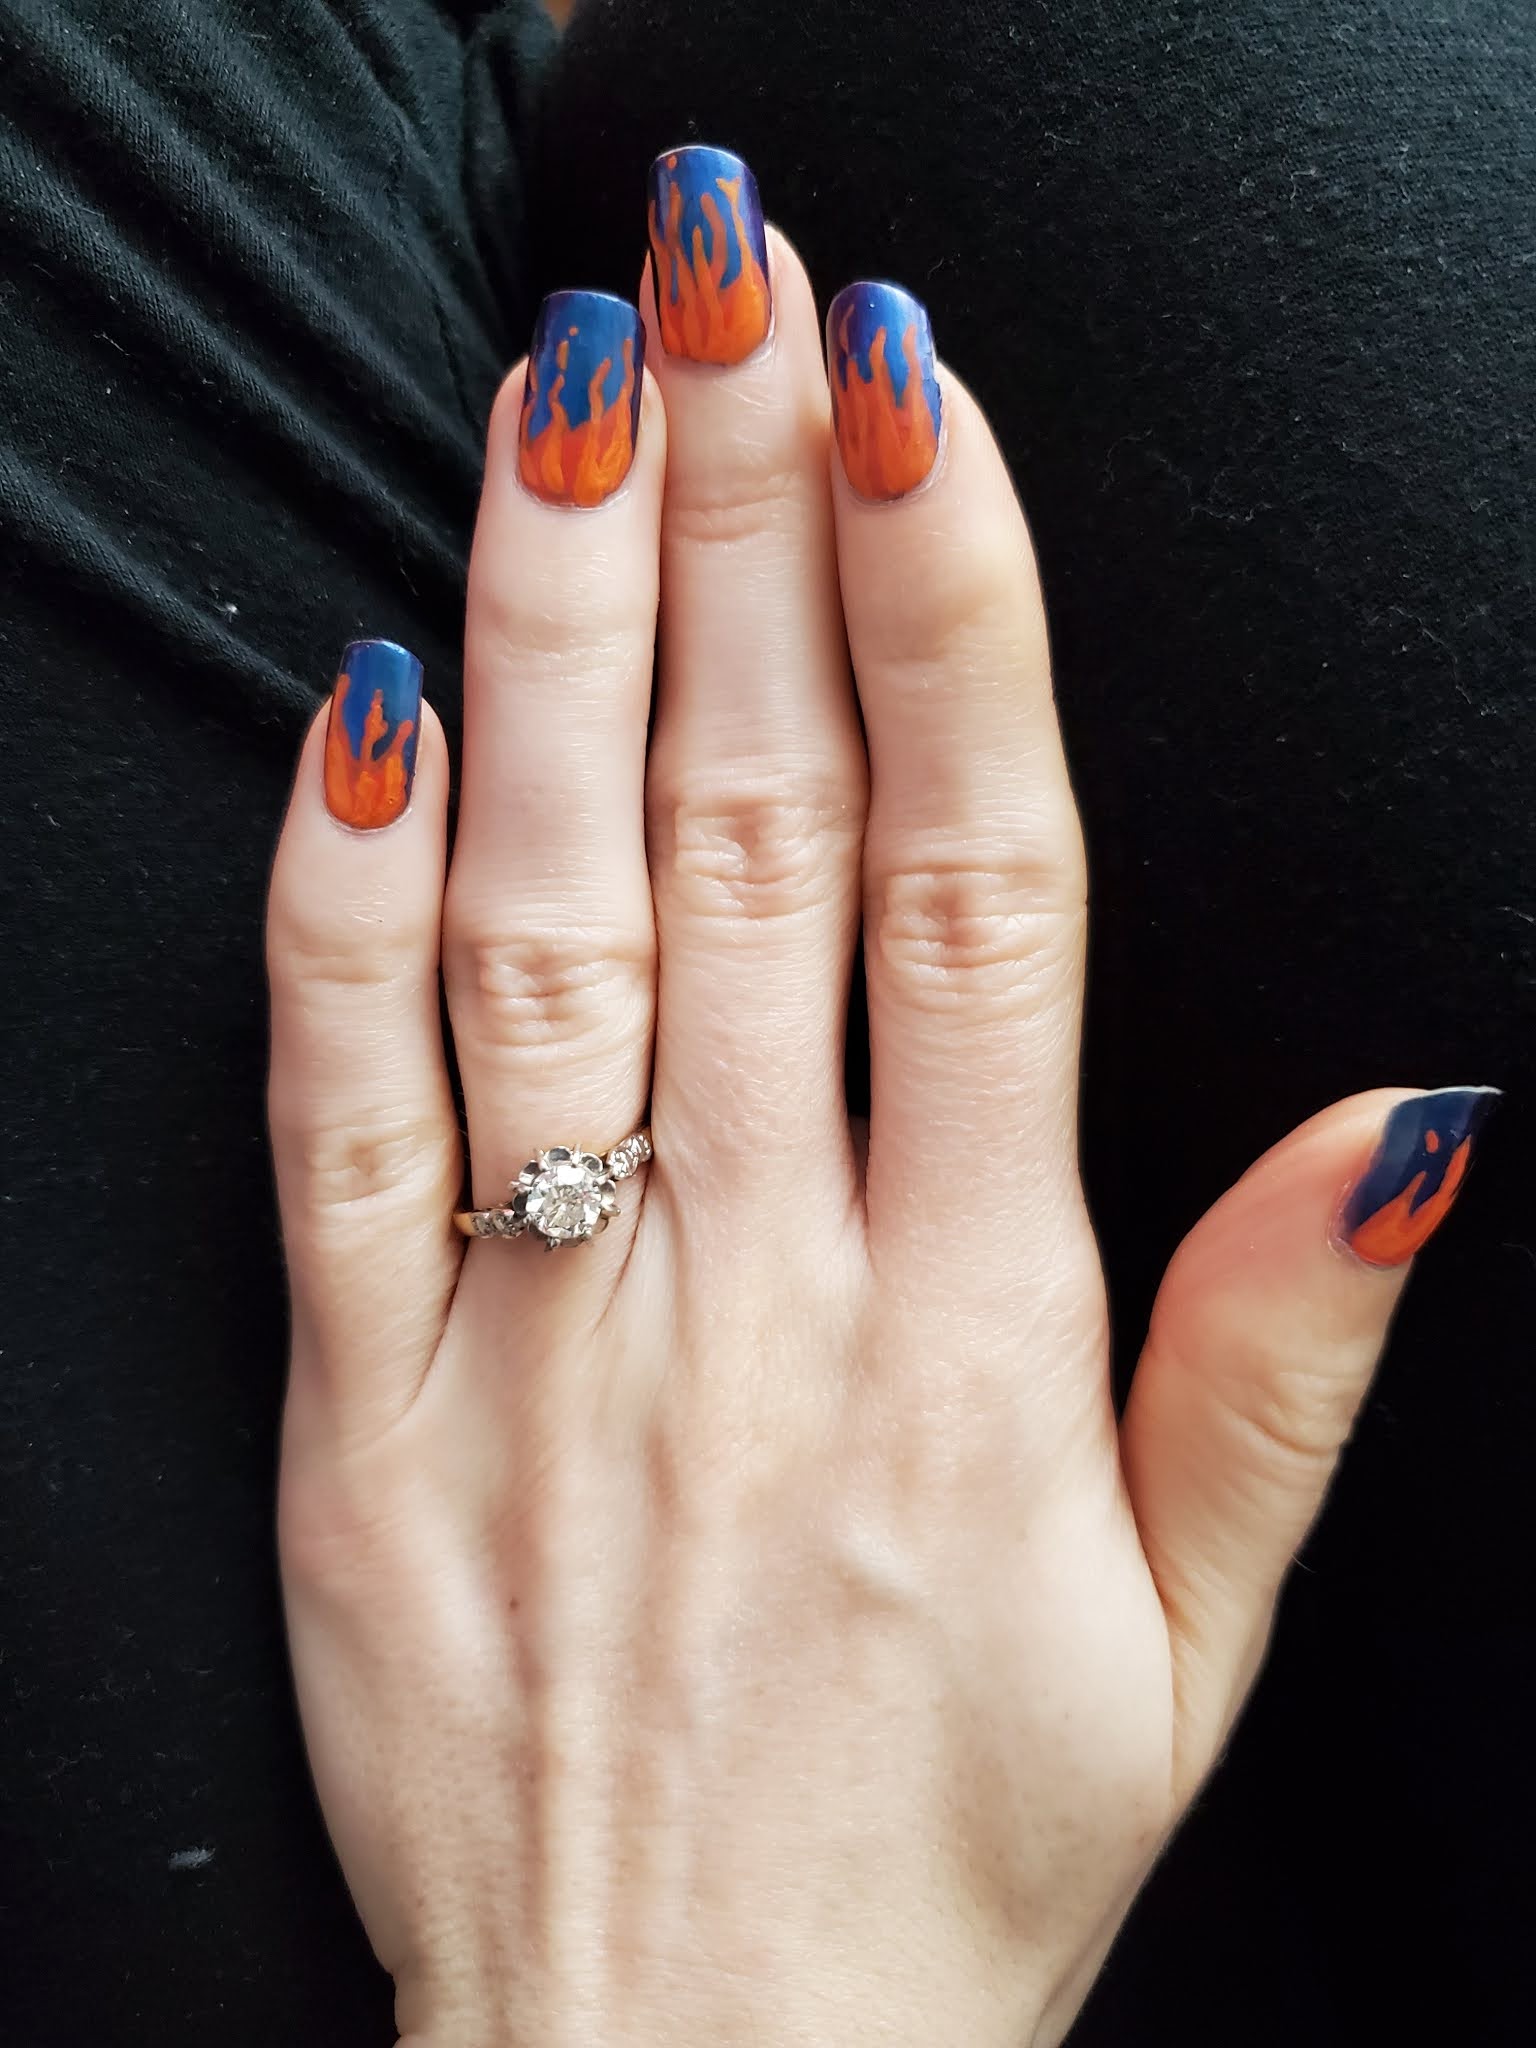
Want nails that are lit? Why not try this fiery nail art?
Materials:
*Nail polish base coat *Nail polish base color (I went with a multichrome blue) *Red acrylic paint *Orange acrylic paint *Yellow acrylic paint *Nail polish top coat *Ultra fine nail art brush
Directions:
*Apply nail polish base coat. Let dry.
*Apply nail polish base color. Let dry.
*Add a bit of orange acrylic paint to red acrylic paint to create a red orange color, and paint flame shapes on your nails. I started by drawing some wiggly lines for the peaks of the flames, and then filled in the bottom of the nail with some more paint.
*Next, take some orange paint, and use it to add definition to your flames.
*Add some orange to a bit of yellow paint to create a yellow orange color. Use this paint to add further layering and detail to your flames.
*The last thing I did was I used a teeny amount of the red-orange paint and brushed it along the nails in a few places to add some more flames.
In case you were wondering, here's how my right hand (which I had to paint with my non-dominant hand) turned out:
I didn't go for as much detail on this one because I have a harder time with fine motor coordination with my left hand, but I still think they turned out all right.