Wednesday, March 3, 2021

DIY Stickers - No Sticker Paper Needed!


Adorable stickers are one of the surest ways to put a smile on someone's face.  This craft is suitable for crafters of all ages (perhaps with supervision in some cases, as it does use scissors), and you don't need anything fancy to make them.  I've included a video tutorial below, and keep scrolling for a written tutorial.

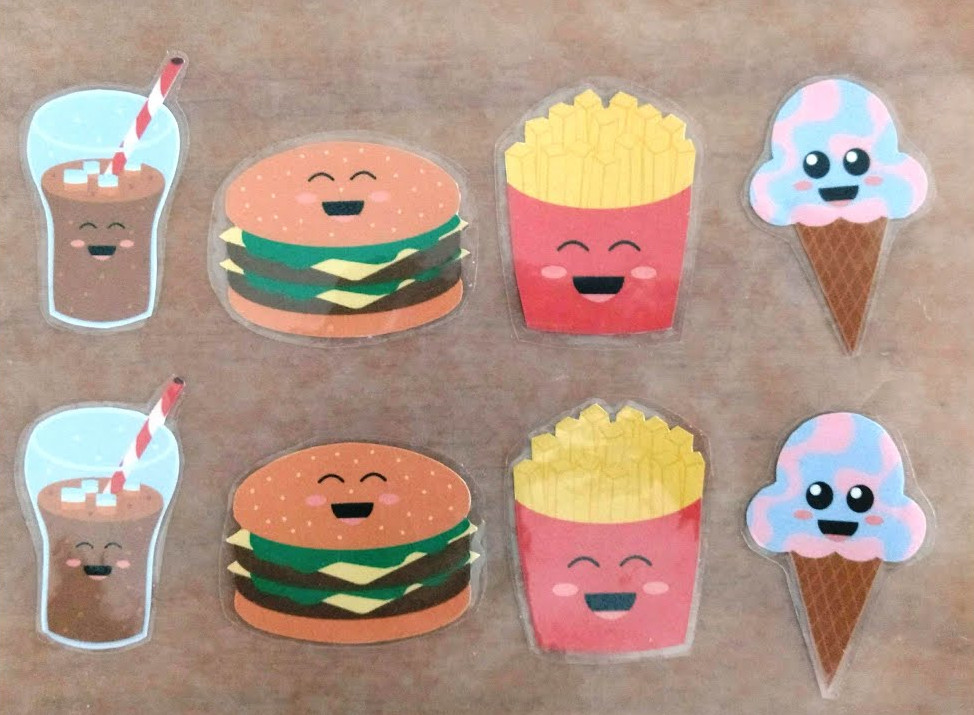
Also, if you love these cute little foods, Brian designed them.  He sells a pair of leggings with this print on his Etsy store, Wayton Designs.  He has also promised me a dress with this print, so that should be coming at some point in time.


Materials:

*Parchment paper
*Waxed paper
*Designs (either hand drawn or printed)
*Glue stick
*Packing tape
*Scissors

Directions:

*Cut out the designs you would like to use for your stickers.

*Attach a strip of packing tape to a piece of parchment paper.

*Glue your sticker designs on top of the packing tape.  If the stickers are bigger than a single strip of packing tape, you can layer another piece of packing tape immediately below the first before gluing down your sticker designs.  Let dry.

*Use another strip or strips of packing tape to seal in your sticker designs so they are less likely to get damaged.

*Cut around your stickers, leaving about 1/4" of excess tape along all sides.  This will help keep your sticker designs sealed in and minimize the likelihood of damage.  Peel the parchment paper backing off, and your stickers are ready to use.

*If you're not ready to use your stickers yet, you can place them sticky side down on a sheet of waxed paper until you're ready to use them.  The stickers may stick to the waxed paper a bit, but I found that this was a better option for long term storage, as the stickers tend to fall off parchment paper.

Wednesday, February 24, 2021

Book Inspired Manicure


Love books?  Why not try some bookish nail art?  I thought this design was reminiscent of the spines of old, leather bound books.  I'd like to try this design again some time, but instead of painting all of my nails the same crimson color, I'd like to add in some other colors, like blue or green, for a little more variety.

Materials:

*Crimson nail polish

*Gold acrylic paint

*Nail polish base coat

*Clear nail polish top coat

*Ultra fine nail art brush

Directions:

*Paint nails with nail polish base coat.  Let dry.

*Paint nails crimson (or other bookish color).  Let dry.

*Use the nail art brush to paint on stripes with gold paint.  I tend to freehand my lines, but if freehanding is not your strong suit, they make nail art guides you can use for creating lines.  Painter's tape can also work for this purpose.

*Seal in the design with a clear nail polish top coat.  Let dry.

Wednesday, February 17, 2021

Sheet Ghost Nail Art

Looking to add a touch of spookiness to you day?  These bloody-eyed sheet ghosts are the perfect mix of creepy and cute.  These were inspired by a dress the character Kira (aka Creepy Doll) wears in the book Bunny, but hence the bleeding eyes.  However, you can use this same process to create ghosts with undamaged eyes.

Materials:

*Sky blue nail polish or other base nail polish color

*Nail polish base coat

*White acrylic paint 

*Red acrylic paint 

*Black acrylic paint

*Brown acrylic paint

*Ultra fine nail art brush 

*Nail art dotting tool

*Clear nail polish top coat


Directions:

*Paint on your base coat.  Let dry.

*Paint on your base color.  Let dry.

*Use white acrylic paint to draw sheet ghost shapes on your nails.

*Use some black acrylic paint and a dotting tool to make mouths for your ghosts.

*Mix together red, black, and brown paints to create blood colored paint.

*Use a dotting tool to dot on blood red eyes.  Or, if you don't like the bleeding eye aesthetic, you could dot on eyes using black paint.

*Use the nail art brush to draw little blood drips coming from the ghosts' eyes.

*Seal in the paint with a clear top coat.  Let dry.

Wednesday, February 10, 2021

Roselia Community Day: Pokemonbounding Ep 7


Sunday was Roselia Community Day in Pokemon GO.  I had spaced on which weekend February's Community Day was happening, so I had to adjust my plans when someone posted in my local Pokemon GO chat about it.  I didn't have the supplies on hand for a proper Roselia bound, but I threw together a look with a green romper and a clip on rose I have on hand.  For a last minute bound, I would say this one was not too bad.

Someday when I have more time, I'd like to make a Roselia crown and maybe some oversized paper roses to finish off the look.  Let me know if you'd like to see me try this.

Here are a few more pics from Roselia Community Day.

Shout out to Brian for taking the time to pose Roselia on my shoulder.  It made for some adorable pictures.

Here's the AR photo bomb with one of my shiny Roselias.  I didn't have the time to play for the whole event, but in the hour that I did play, I ended up with six new shinies.  Since I mainly play Community Day for the shinies, I was pretty pleased.

I know this is a short post, but hopefully you still enjoyed it.  If you'd like to see more Pokemon crafts, including the other looks in my Pokemonbounding series, click here.  If you have any specific Pokemon you'd like to see me create a look based on, let me know.  I'm super swamped right now, but I'm hoping to get back to my monthly Pokemonbounding this summer.

Wednesday, February 3, 2021

Fire Nail Art

Want nails that are lit?  Why not try this fiery nail art?

Materials:

*Nail polish base coat
*Nail polish base color (I went with a multichrome blue)
*Red acrylic paint
*Orange acrylic paint
*Yellow acrylic paint
*Nail polish top coat
*Ultra fine nail art brush

Directions:

*Apply nail polish base coat.  Let dry.

*Apply nail polish base color.  Let dry.

*Add a bit of orange acrylic paint to red acrylic paint to create a red orange color, and paint flame shapes on your nails.  I started by drawing some wiggly lines for the peaks of the flames, and then filled in the bottom of the nail with some more paint.

*Next, take some orange paint, and use it to add definition to your flames.

*Add some orange to a bit of yellow paint to create a yellow orange color.  Use this paint to add further layering and detail to your flames.

*The last thing I did was I used a teeny amount of the red-orange paint and brushed it along the nails in a few places to add some more flames.

In case you were wondering, here's how my right hand (which I had to paint with my non-dominant hand) turned out:

I didn't go for as much detail on this one because I have a harder time with fine motor coordination with my left hand, but I still think they turned out all right.

Wednesday, January 27, 2021

Tombstone Valentine's Chocolates


If you saw last week's post on repurposing a Valentine's chocolate box to give it a spookier touch, you may be wondering what you should fill your creepy chocolate box with.  Why not make some tombstone chocolates?  If you don't have any spooky molds on hand, keep an eye out around Halloween season.  I got the silicone tombstone molds I used from this project from Joann this past fall.

Materials:

*White chocolate baking chips
*Black candy melts
*Silicone tombstone molds
*Microwavable bowl
*Spoon

Directions:

*Pour some white chocolate baking chips into a microwavable bowl and add some black candy melts.  The black candy melts can be pretty overpowering, color-wise, so I'd recommend only putting in about a quarter as much of the black candy melts as you did the white chocolate.

*Microwave for about 1 minute, then take out and stir.  The candy melts and baking chips will likely not be completely melted yet.

*Pop back in the microwave for another 40 seconds, and then pull out and mix.  My chocolate was completely melted at this point in time, but if yours isn't, pop it back in for another 30 seconds.  Be careful not to over microwave, though, or the chocolate will harden up and won't pour correctly.

*Pour melted chocolate into molds.  Tap against a hard surface to minimize air bubbles and get the chocolate into the crevices of the mold.

*Freeze for 10 minutes.

*Pull the chocolate out of the freezer and pop it out of the molds.  Now you've got some spooky candy for yourself, or to give to someone special.

Wednesday, January 20, 2021

Pop Up Anatomical Heart Chocolate Box


Over the cutesy red chocolate boxes that are everywhere this time of year, but still love the chocolate?  Why not give your box a ghoulish makeover?


Materials:

*12" x 12" sheet of scrapbooking paper in spooky paper pattern of your choice
*Red 8 1/2" x 11" sheet of cardstock
*Printer
*White printer paper
*Scissors
*Double sided tape
*Glue
*Pencil

Directions:

*Trace the shape of your chocolate box onto the back side of your scrapbooking paper.


*Cut out the heart shape.


*Tape the heart shaped scrapbooking paper to the front of the box.

*Print out your favorite anatomical heart image onto red cardstock.  You can find several different free options from the Graphics Fairy.


*Cut out the heart shape.

*Now we need to fold the paper supports that will make the heart pop out.  Cut four strips of plain white paper about 1/2" thick and 8 1/2" long.  Take two and place them perpendicular to one another, taping the ends together.


*Fold one strip over completely, so you still have a right angle, but now that strip is facing the opposite direction.  Do the same for the second strip.  Repeat the process, alternating which strip you're folding over.  This site has a bit better of an explanation of the technique, if you need more details.


*When you've folded your two strips as much as possible, glue the free ends together.  Trim any excess.  You should end up with something like this:


*Repeat the process with the other two strips of paper.

*Tape the two paper columns to the center front of the box, and attach your heart to them.  Now your heart should pop out from its surroundings.