Thursday, June 20, 2019

X-Files Dana Scully and Fox Mulder Halloween Costume or Cosplay


     Before I get into today's post, I just wanted to let you know that this marks my 400th blog post on Amber's Craft a Week Blog!  It's been almost 8 years now since I started this blog and I've managed to keep up with only an occasional missed post through the end of my undergrad career, through my master's, and now into my PhD.  I'm excited and proud, and I hope to keep bringing you craft ideas for many years to come.
     What better way to celebrate my 400th post than by presenting you all with a costume idea I've been trying to find a way to do for years, namely Dana Scully?  When I was little, I think I related to Mulder the most.  I wanted to believe in all things spooky.  However, now as and adult and as a scientist, it's Scully's logical, scientific approach that I've come to appreciate.  We didn't really go all out on Brian's Mulder look, so this post is mostly about Scully, although I do have a few Mulder costume suggestions in places.
     The big obstacle preventing me from coming up with a Scully costume has been the hair.  My hair is long and not red and I didn't want to permanently alter it for a costume, but decent looking red wigs are surprisingly hard to come by.  This is where Colorista Hair Makeup in bronze/auburn comes into play.  It's a temporary hair color that washes out after about one shampoo as long as your hair isn't a pale color.
     It is important to note that this shade will NOT work for most people if you want a color close to Dana Scully's.  If you look at the packaging, there's this one light brown range of colors where you get reddish look, but for darker or lighter hair colors, it looks like you'll get a pinker look.  So if you have light brown hair, you may get good results, but if your hair is a different shade, it may not work so well.  I would definitely recommend testing it on a section of your hair in advance to make sure it looks close enough to what you're envisioning.

Dana Scully Temporary Red Hair (for Dark Blond or Light Brown Hair)

Materials:

Colorista Hair Makeup in bronze/auburn

Directions:

*Starting from the roots of your hair, add a very thin layer of hair makeup to clean, dry hair.  You want as little color as possible, because if you layer it on too thick, it will have a bit of a pinkish/raspberry color to it.

*When you're done with your costume, wash your hair as normal.  I shampooed twice, but the color was almost all gone after the first shampoo.

Dana Scully Faux Bob

Materials:

*Hair elastic
*Bobby pins
*Hair spray (optional)

Directions:

*I mostly followed this video, although I skipped the teasing part and I also didn't use hair spray (the Colorista Hair Makeup hardens up a bit on its own).  My hair certainly did not come out as nicely as hers, especially in the back, but it worked well enough.


Dana Scully or Fox Mulder Badge


Materials:

*Free printable Scully or Mulder badge (such as from here)
*Laminator (optional)
*Hole punch
*Lanyard
*Pen
*Double sided tape

Directions:

*Print out your badges.
*Sign the badges if they are not already signed to make them look realistic.
*Fold in half and tape wrong sides together.
*Laminate if you would like.
*Punch a hole in the top of the badge and attach to the lanyard.

Clothing Ideas


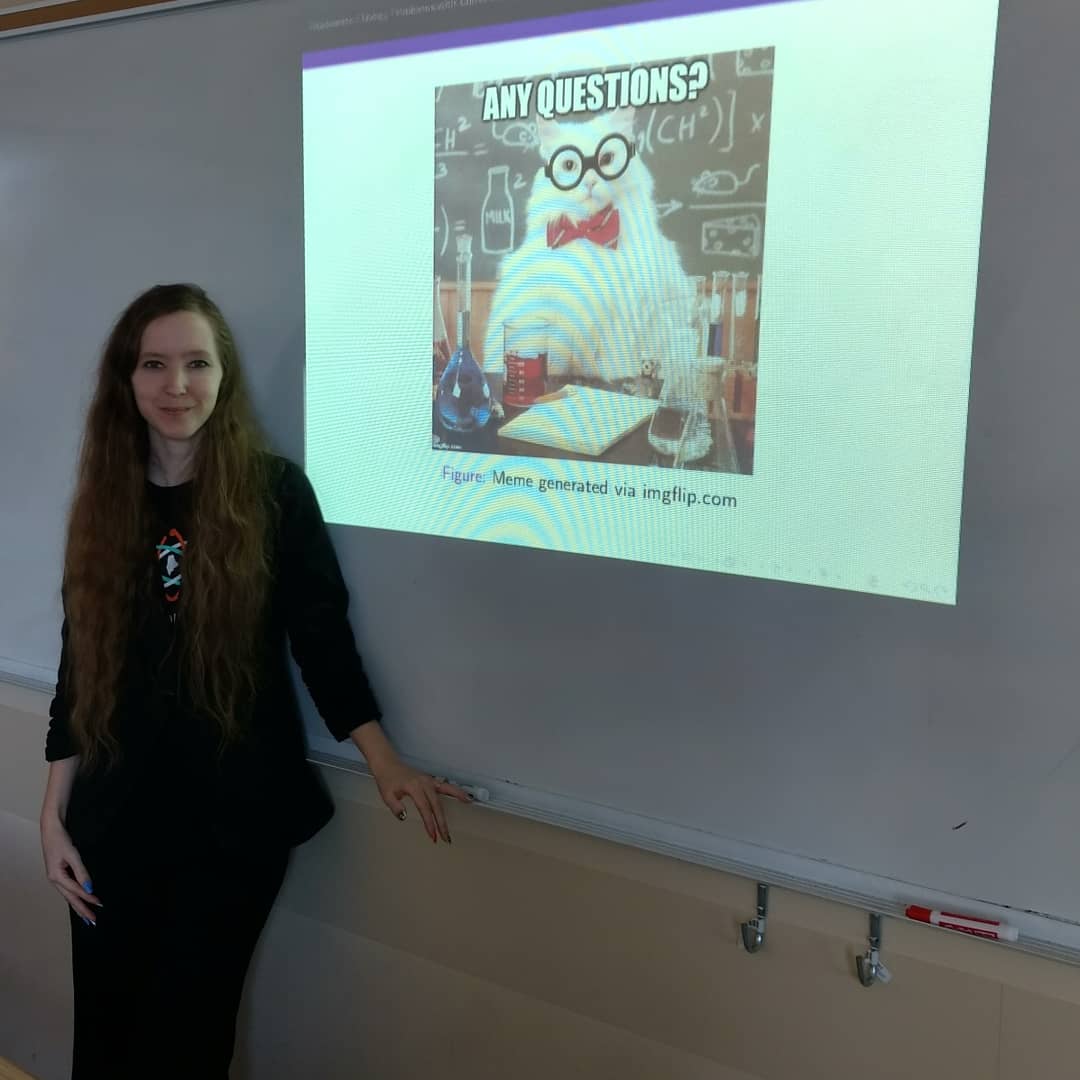
     Scully wears a lot of suits, so a suit is a safe bet.  I went with black pants, a black blazer, and a teal tank because that was what I already owned that looked like something she would wear, but a lot of people use a dark colored skirt suit and white button down shirt.  For Mulder, a suit will work fine.

Makeup

     For my makeup, I decided that earthy tones best fit Scully's vibe.  For primer, we opted for e.l.f. tone correcting primer and e.l.f. eyelid primer.  Brian used Temptu's Porcelain foundation for my skin and Temptu's Pebble eyeshadow along my lids.  Brian went over the Pebble shadow with a rose gold colored shadow from e.l.f (it was in a palette with lots of different colors, so I'm not sure what it was called).  He used e.l.f. liquid eyeliner in black for my upper lash line and an e.l.f. black pencil liner for my lower lash line.  The mascara he used was also from e.l.f., although I'm not sure what it was called.  For my lips, I used e.l.f. lipstick in Praline.

Thursday, June 13, 2019

X-Files Darkness Falls Cake


Materials:

*Cake mix of your choice
*Green frosting of you choice
*White baking chocolate
*Green sugar crystals
*Skeleton mold
*Marshmallows


Directions:

*Prepare and frost the cake.

*Melt the white chocolate according to the package directions and pour into the mold.  Let harden.

*Once hardened, pop the white chocolate skeleton pieces out of the mold.

*Melt a marshmallow slightly and pull apart to get spider web like strands of marshmallow.  Wind these around the pieces of the skeleton.  I was using vegan marshmallows, so they didn't melt super well and I only managed to create a few strands, but if you're using non-vegan marshmallows, you'll probably have better luck.

*Place the skeleton stop the cake.

*Sprinkle green sugar crystals over the skeleton to create little green bugs.

Thursday, June 6, 2019

X-Files Darkness Falls Birthday Party


     The X-Files has been one of my favorite shows since I was a kid.  I have a memory of watching it with my my dad when I was about nine or so while my sister hid in the laundry corner with mom.  I've always liked the monster-a-week standalone episodes better than the alien ones, and my favorite episode is "Darkness Falls," wherein luminescent mites exsanguinate people at nightfall.  I've thought about hosting an X-Files themed party for a while now, but this was the time I finally got around to it.  If X-Files seems a little creepy for a birthday party theme, you could also use this idea for a Halloween party.
     I hosted my party this past Saturday.  I've been a bit busy this summer so far, so I didn't get a chance to decorate as much as I would like to have.  Instead, I decided to focus on my favorite episode, "Darkness Falls," and picked some key elements from that episode to recreate.
     Over the next few weeks, I'll be showing you how I made the decorations, costumes, and cake for the party.  But for now, here's a brief overview of the party.


     As far as decorations went, I only made two for the party: a cocooned skeleton and green vinyl mites.  In the episode, Scully and Mulder happen upon a giant cocoon, only to discover an exsanguinated human corpse inside.  The culprits behind this cocoon are little green bugs.  While they are present during the day, they remain inactive until the lights go out.  The cocoon and the bugs are the two details from the episode that stick out the most to me, so those were the things I attempted to replicate.


     Brian and I dressed up as Scully and Mulder for the party.  I've been wanting to dress as Dana Scully for a while, but her hair has always been an obstacle.  She's known for her signature red bob, whereas my hair is long and not red.  I finally found a way to pull it off.


     For food, we had a lot of pizza, as well as cake and ice cream.  I had found some vegan marshmallows and was planning on making smores as an activity, but it slipped my mind.  I didn't plan any activities this year, so we mostly just hung out, but it was a lot of fun anyway.


     I hope you enjoyed this post.  Stay tuned for more!

Friday, May 31, 2019

Horror Pocket Pals: A Nightmare on Elm Street Nancy Thompson Plushie


     Nancy Thompson from A Nightmare on Elm Street is one of my favorite protagonists, so naturally I had to make a plushie of her.  I chose Nancy's look from her final showdown with Freddy, the scene in which she vanquishes him - at least temporarily.  In that scene she's wearing pajamas with floral embroidery.  I couldn't replicate the actual embroidery on her pajamas, so I decided to go with some fairly simplistic flowers to give a similar vibe.  I also included the bandage she had been wearing since she burned herself in her dream.  You'll notice I have her streak of gray hair in my template, but not on my plushie.  I intended to include it, but forgot to.  For this reason, it's not mentioned in the tutorial, but you could easily make it using gray felt or embroidery floss.

Materials:

*Brown felt
*White felt
*Peach felt
*Black buttons
*Black embroidery floss
*Pink embroidery floss
*Yellow embroidery floss
*Green embroidery floss
*Sewing needle
*Brown thread
*White thread
*Peach thread
*Metallic marker
*Scissors
*Stuffing

Directions:

*Print out the template given below:


*Cut two body pieces from peach felt, the two hair parts from brown felt, two copies of the pajamas from white felt, and two copies of Nancy's bandage from white felt, as shown below.


*Sew two black buttons onto one of the body pieces to make eyes.  Embroider on a mouth.

*Embroider flowers onto the pajamas.

*Sew pajamas onto the body pieces.

*Sew hair onto the body pieces.


*Sew together the two body pieces using a blanket stitch.  Leave an opening in the top of the plushie's head for stuffing.

*Stuff and sew closed.

Sunday, May 26, 2019

Flower Crown


Materials:

*Floral wire
*Artificial flowers
*Floral tape
*All purpose adhesive
*Wire cutters
*Ribbon in colors of your choice

Directions:

*Create a loop of wire that sits comfortably on your head.

*Add flowers to the loop.  If your flowers don't come already affixed to wire, as mine didn't, you can place the flowers on bits of floral wire and use that to attach them to the loop.  If the flowers fit loosely on the wire, use a little glue to hold them in place.

*Add as many flowers as you like, leaving some space at the back of the crown for the ribbon.


*Wrap with floral tape.

*Cut a length of ribbon double the length you want it to be on your crown.

*Fold the piece of ribbon in half.

*Place the folded ribbon so that the top of the ribbon (where the fold is) is beneath the crown.

*Pull the ends around the crown and through the loop created between the ribbon and crown.

*Repeat with other strands of ribbon.

Thursday, May 16, 2019

Uranium-238 Decay Series Nail Art


     On May 8th I gave my dissertation proposal.  Since my proposal was on radiometric dating, I thought it would be fun to style my nails based on the uranium-238 decay series.  I was waiting to write the post until after I passed my defense because I can be a bit superstitious and didn't want to jinx myself.  I am pleased to report that I did indeed pass, so as soon as I turn in my paperwork, I will officially be a PhD candidate.

Me at the end of my talk.

     I tried to match my nail colors to the colors of the elements.  However, a lot of the elements in the uranium-238 decay series are gray or silver, so I took liberties in some instances for a wider variety of colors.  If you're planning on being somewhere at night with these nails, glow in the dark nail polish could add a fun twist to this manicure.

Materials:

*Nail polish in radioactive colors of your choice
*Nail art pen

Directions:

*Paint your nails in the color scheme that you deem appropriate.

*Using the nail art pen, write radioisotopes of your choice on your nails.  Since my dissertation work focuses a lot on lead-210, I chose part of the decay series that would include lead-210, but use whatever part of the decay series that appeals to you.

Thursday, May 2, 2019

"Drink Me" and "Pixie Dust" Pendant Necklaces


    Add a subtle touch of Wonderland or Neverland to your style with these necklaces.


Materials:

*Small vial
*Glitter (blue for "drink me" or olive green for "pixie dust")
*Twine
*Glue
*Labels (see this post for instructions on making aged labels)

Directions:

*Fill a vial most of the way with glitter.

*Glue the cork to the vial.

*Glue on a label.  (See this post for instructions on making an aged label.)

*Wrap twine around the neck of the vial to form the necklace part.  Make sure to use enough twine that the necklace can slip over your head easily.