Thursday, March 10, 2016

Perler Fuse Bead Easter Eggs


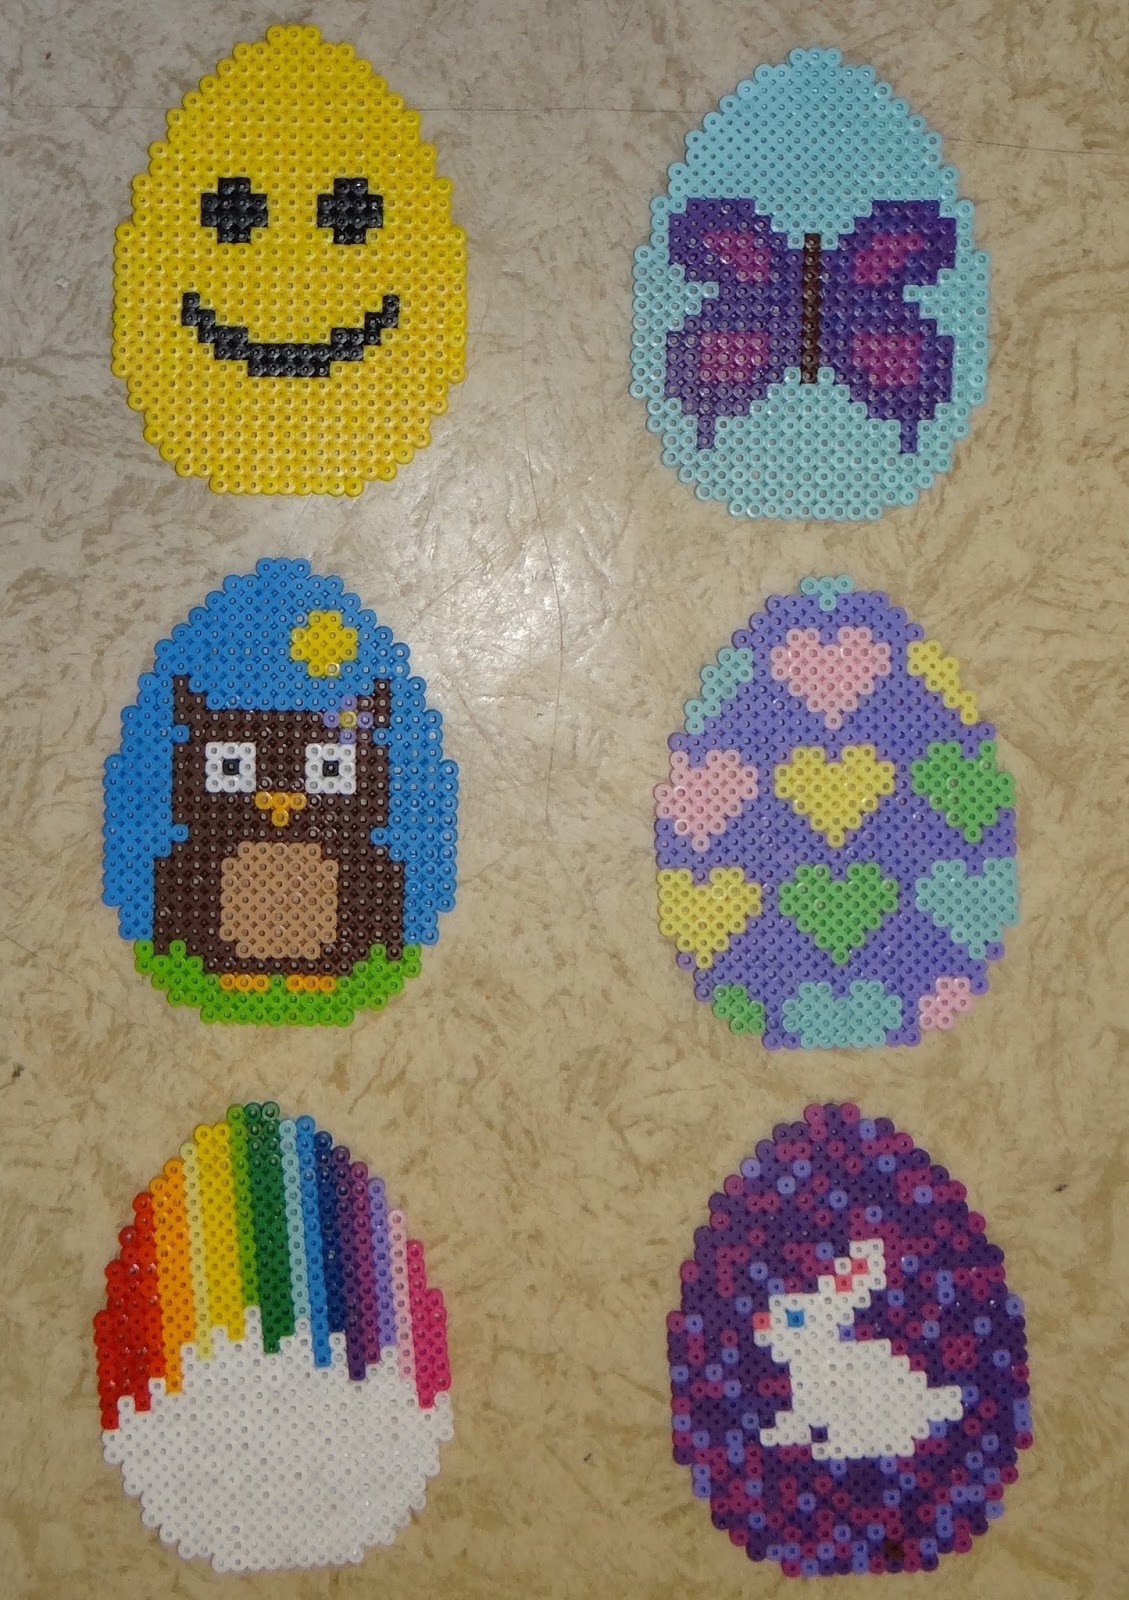
     Celebrate Easter and spring's arrival with these fuse bead Easter eggs.  For some fun spring themed fuse bead magnets, check out this post.

Materials:
*Fuse beads (e.g. Perler beads)
*Large square peg board
*Iron

Directions:
Design your fuse bead creations by arranging beads on a peg board, following the patterns given below:

The rainbowy egg is supposed to look like a melted crayon art egg.

I love Easter eggs with faces, so I decided that I had to make one for this craft.


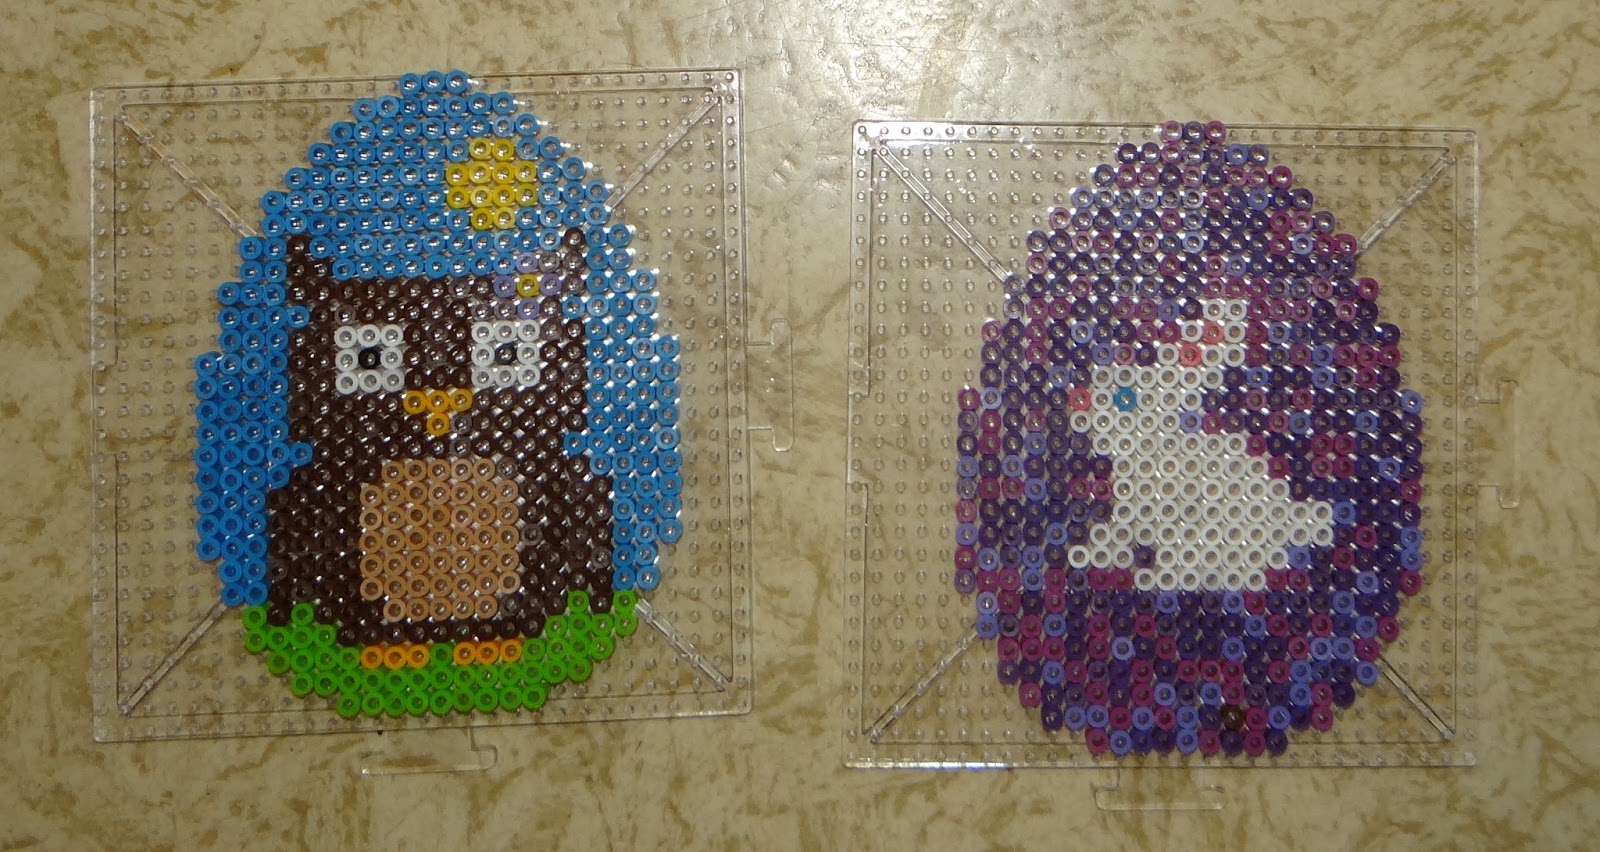
*Cover the designs with a sheet of waxed paper and iron the first side.  Make sure to iron the edges especially well, as the beads may not stick together and may fall off if you don't.
*Remove the fuse bead project from its peg board, cover with waxed paper, and iron the other side.

Thursday, March 3, 2016

DIY Doodle Frame


Materials:
*Picture frame
*White spray paint (if frame isn't already white)
*Permanent markers

Directions:
*If your frame isn't already white, paint it white, following the instructions printed on your particular spray paint.
*Once your frame has dried for the requisite amount of time, draw doodles on it with a black permanent marker.  I asked my awesome partner Brian, of Maineiac Coloring fame, to draw doodles for me.  Aren't they neat?  (Note that the red marker is from me.  I had already started coloring when I realized that I should probably get a picture of Brian's design.)


*Let the black marker dry for a while.  I left mine overnight, but it probably doesn't require that much drying time.
*Once the black marker has dried, color in your designs.

Thursday, February 25, 2016

Easy Accessory Holder


     It really doesn't get much easier than this craft.  The cost is minimal too.  If you're looking for a way to store your accessories, this may just be the craft for you.

Materials:
*Coat hanger
*Shower curtain rings
*Washi tape (optional)

Directions:
*To jazz up a plain coat hanger, wrap in washi tape, if you'd like.
*Clip shower curtain rings around the coat hanger and hang your accessories from these rings.  That's it!
*Depending on the weight of your accessories, you may want to use a nail to hold it up, but I've actually gotten by just fine using a thumbtack.

Thursday, February 11, 2016

Easy Duct Tape Bookmark


     Don't throw away those old envelopes.  Turn them into bookmarks with a little duct tape.  If you liked my monster bookmarks and heart bookmark tutorial, this craft may be right up your alley.

Materials:
*Duct tape
*Envelope
*Scissors

Directions:
*Cut off a strip of duct tape and place it diagonally across one corner of your envelope.  This should be fairly straightforward if you're using solid colored duct tape, but if you are using patterned duct tape and want a particular part of the tape on the bookmark, it gets a little trickier.  I left the very tip of my bookmark untaped so I could fit the whole owl on there.
*Trim off excess duct tape, making sure not to cut open the sides of the envelope.
*Cut the corner of the envelope off along the bottom edge of the duct tape to create your bookmark.
*For a double sided bookmark, add a second strip of duct tape to the back of the bookmark and then cut off the excess tape.  You can use the same duct tape as you used for the front side or you can mix things up by adding a different color or pattern.

Thursday, February 4, 2016

Bobby Pin Duct Tape Bow


Materials:
*Duct tape in two different colors/patterns
*Bobby pin
*Scissors

Directions:
*Cut off a piece of duct tape as long as you would like your bow to be in the color that you want your bow to be.


*Fold tape in half.


*Cut off a piece of duct tape in the second color as the first and then cut off a strip of that piece about 1/2" in thickness.


*Place this strip along the center of the strip that is to become the bow.


*Cut off another strip, also about half an inch in width, and set it aside.
*Pinch the duct tape in the center as demonstrated in the picture below to create the bow shape.


*Wrap the strip of duct tape around the center.


*Cut off a shorter, thinner strip of tape and secure the bobby pin to the back of the bow.  Make sure it is well secured (or perhaps use glue or some other method of adhering it.  I tried glue first, but could not get it to work as I wanted it to, so I went with duct tape), as the last thing you want is duct tape stuck in your hair.


Thursday, January 28, 2016

Felt Gingerbread Zombie


     Looking for something cuddly and sweet to give your valentine?  Search no further than this craft ;).

Materials:
*Brown felt (for a more gingerbready aesthetic) or green felt (for a more zombie-like look)
*Gingerbread person template (I traced around a cookie cutter)
*Chalk
*Scissors
*Red and white (or black) fabric paint
*Needle and thread
*Stuffing

Directions:
*Trace two gingerbread person shapes onto your felt with chalk and cut out.
*Decorate one of your gingerbread cut outs with fabric paint to make it look zombie-like.  A few years ago, Brian and I made gingerbread zombie cookies for a Halloween party and I decided that I wanted to make mine resemble that, but you can also go for a more gruesome look.  Set aside your zombie to dry.

     The zombie gingerbread person that served as the inspiration for my zombie gingerbread plushie.

*Using a blanket stitch, sew the together the two zombie halves, leaving an opening large enough for you to add the stuffing.  Insert stuffing until your zombie reaches its desired fullness and then sew closed.

Thursday, January 21, 2016

Zombie Valentine's Heart Banner


Materials:
*Cardstock
*Silhouette CAMEO (or heart template and a pen)
*All purpose adhesive
*Thread

Directions:
*If you have a Silhouette CAMEO, import the below template into Silhouette Studio and have it cut out the hearts for the banner.  (For more detailed instructions on using the Silhouette CAMEO with my templates, see this post.)
*If you don't have a Silhouette CAMEO, you can print out a heart template and trace 27 hearts (or 21 if you want to leave out the zombie bit) and hand write letters.
*Space out hearts as desired and then glue them to the thread.  Let dry.