T-shirt to Tube Top

 After
After

Before

Materials:
*T-shirt
*Sewing machine or needle and thread
*Scissors
*Chalk
*Tube top that fits you well
*Ruler
Directions:
*Turn the T-shirt inside out and lay it out on a flat surface.
*Using a ruler, draw in chalk a horizontal line running just underneath the armpits of the shirt. Make sure before you cut that this will not interfere with any part of an image or saying that you want to have on the tube top. If it does, try laying the tube top atop the shirt and centering it so that it will include all of the image that you want, then trace around the shirt as described below.
*Carefully cut along the line, discarding the top portion of the shirt.
*Turn the shirt right side in. Fold about a quarter of an inch of the fabric at the top toward the inside of the shirt and sew down so that the top of the tube top will not fray.
*Turn the shirt inside out again and lay flat. Place the well fitting tube top on top of the shirt, lining up the top of the tube top with the top of the shirt.
*Trace around the tube top, leaving about 1/4" of space between the tube top and the piece of chalk.
*Cut along the chalk lines, then sew together the two sides of the shirt.
*Turn the shirt right side in. Fold about 1/4" of fabric at the bottom of the shirt toward the inside of the shirt and sew down.
Here are some common garment issues and some ways to fix them.
Pants Zipper that Won't Stay Up:
Materials:
*Small key ring
Directions:
*Take the key ring and wind it through the zipper like so:


*Zip up the zipper, then loop the key ring over the button like this:

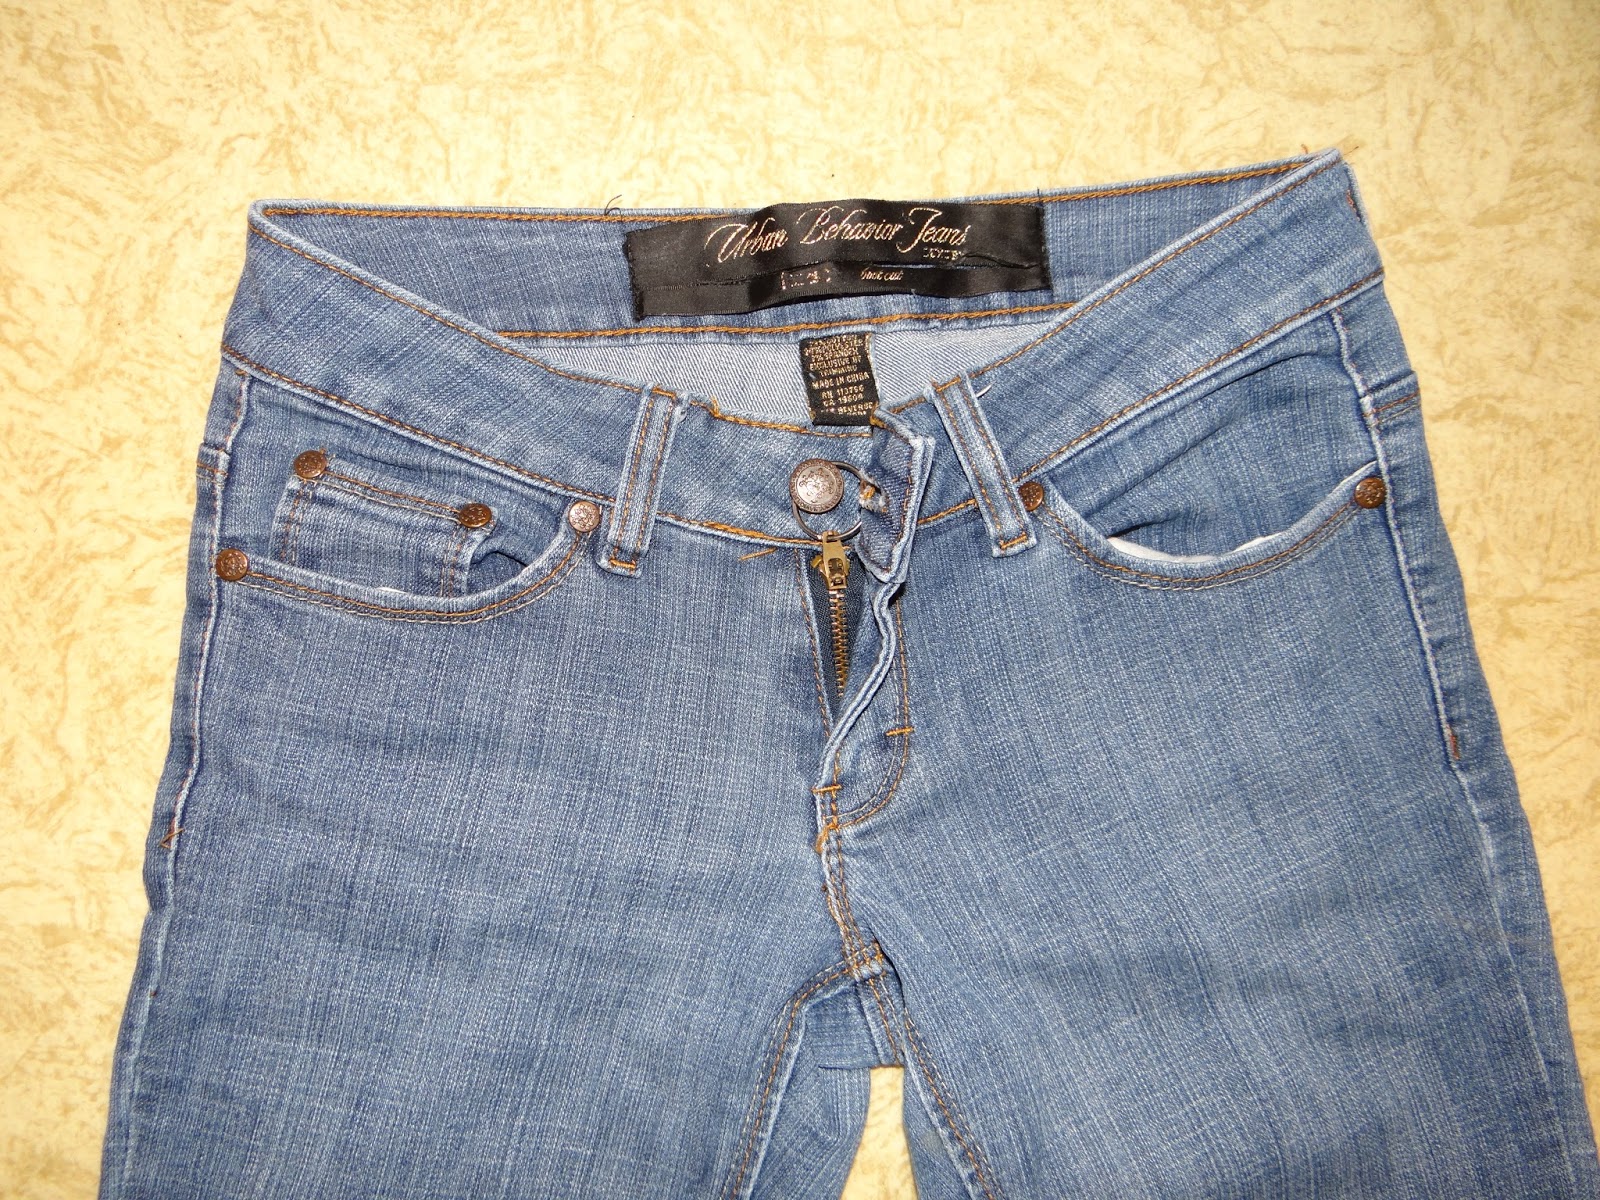
*Button your pants as you would normally. The key ring should not be visible, as is the case with these jeans:


Falling off Jeans Buttons:
Here's what I did when the button on a pair of my jeans started tearing away from the fabric:
Materials:
*All purpose, fabric safe adhesive (such as Helmar 450 Quick Dry Adhesive)
*Small piece of scrap cloth
Directions:
*Glue the button and the part of the denim the button has torn away from back together. Set aside to dry.
*For added stability, glue a small swatch of fabric behind the button so that it covers both the back of the button and the surrounding denim, like this:


Fading Clothes:

Before

After
Materials:
*Fabric dye
Directions:
I wrote a blog post last July providing stove top dyeing instructions. This time around I tried dyeing my jeans in the washing machine using the Rit dye washing machine instructions, which can be found here or on the back of the bottle of dye.
Torn Lace Trim:
 Before
 After
After


Materials:
*Stitch ripper or sharp scissors
*Sewing machine or needle and thread
*New lace trim (optional)
Directions:
*Carefully remove the stitches holding the lace to the shirt.
*If the fabric is sturdy enough, you can resew along the previous seam. Otherwise, fold the fabric over until you will not be sewing along the area where the original stitches were and resew.
*Sew on new lace, if you wish.
Looking for more ideas? Check out the apparel and accessories portion of my blog.
*Sew on new lace, if you wish.
Looking for more ideas? Check out the apparel and accessories portion of my blog.
No comments:
Post a Comment