Thursday, July 27, 2017

Legendary Pokemon Articuno Paper Earrings


     This past weekend Pokemon GO released the first of the legendary Pokemon, including Team Mystic mascot Articuno.  Articuno is my favorite legendary bird, so I knew I had to make some craft to mark this event.  These earrings are made from cardstock, so they're not the most durable, but they're great for a costume or party favor.

Materials:
*Light blue cardstock
*Dark blue cardstock
*Ear wires
*All purpose adhesive
*Pencil
*Coin (I used a half dollar, but my earrings are pretty large, so you may want to use a smaller coin)
*Scissors
*Needle

Directions:

*Using the template below, cut out two Articuno shapes from the lighter blue cardstock.  This will work a lot better if you have a Silhouette CAMEO or other die cutting machine, but you could cut and trace.


*Trace your coin onto the darker blue cardstock to create two circle shapes.

*Cut out the circle shapes and glue the Articuno silhouettes to the circles.

*Use a needle to poke a hole in the top of each of the circles.

*Slide the ear wires through the holes.


Thursday, July 20, 2017

Pokemon Vaporeon Hair Bow

 
   Whether you're planning on celebrating Pokemon GO Fest from Chicago or in your own neighborhood, make one of these adorable bows to keep your hair off your face as you play.

Materials:
*Medium blue/teal felt
*Darker blue felt
*Off white felt
*Metal hair clip
*Scissors
*Paper
*Pencil
*Metallic marker or chalk
*All purpose adhesive

Directions:

*Cut a strip of the medium blue/teal colored felt as thick as you'd like your bow to be.


*Glue together the ends of the felt.


*Sketch out Vaporeon's ears.  Alternately, you can use the template I give below, although I didn't scan it before I cut it up, so it's a bit messier than usual.  I originally tried drawing both ears on the template, but I couldn't get them symmetric enough for my liking, so I just used the half of the template that's complete.  That rectangular spot in the middle is where the bow will be tied.  Make sure when you're cutting out your ears that you include that, or else you might bot be able to tie off your bow properly.


*Cut out the entire ear shape from the off white felt and cut out only the uppermost segment from the darker blue felt.


*Glue the darker blue felt to the cream colored felt.


*Cut a strip of the medium blue/teal felt as thick as you want your bow's tie to be.

*Pinch the thick strip of medium blue/teal felt that you're using to make your bow in the middle such that it becomes a bow shape.  Center the Vaporeon ears at the center of the bow.

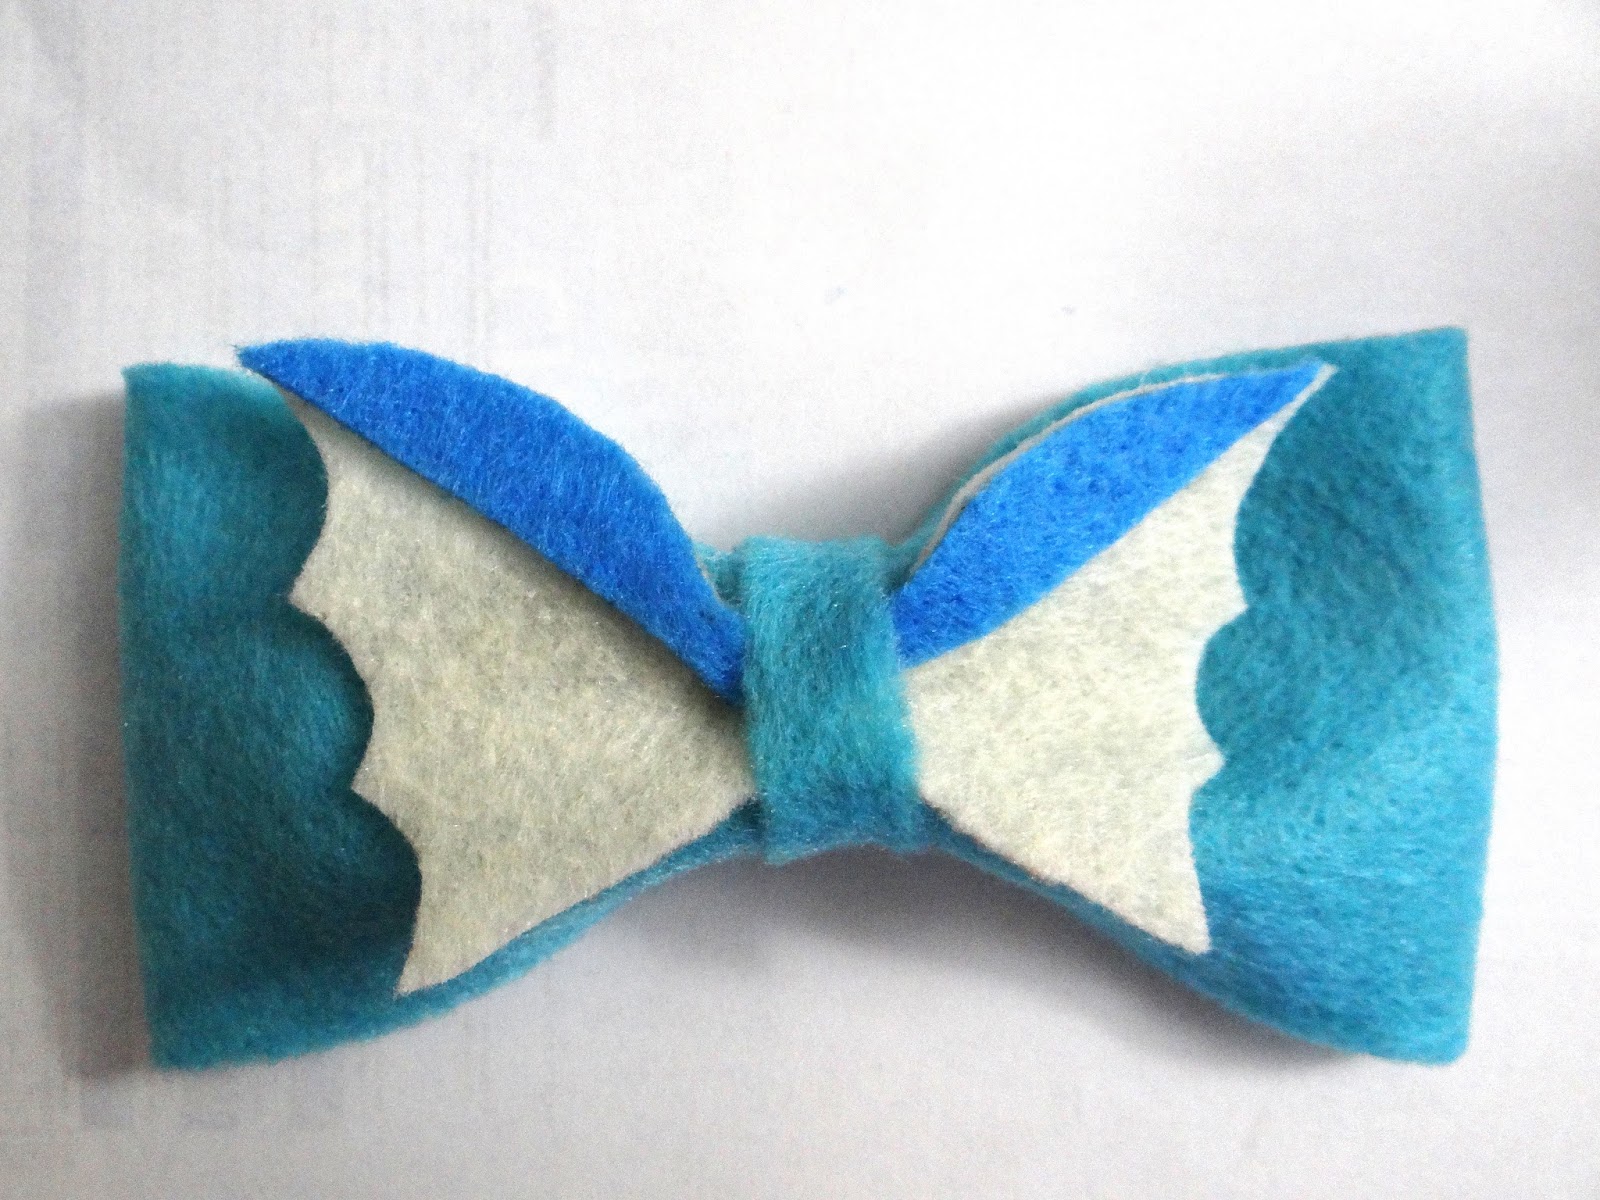
*Take the thin strip of medium blue/teal felt and glue one end to the back of the bow at the location of the pinch.  Carefully wind it around the pinched part of the bow and ears.  Glue down the other end at along the back of the bow.  You may also want to slip the metal hair clip piece under this strip of felt as well to better secure it in place, but I didn't think to do that.  Once you're done gluing down the thin strip of felt, your bow should look something like this:


*Cut a piece of scrap felt into the shape of Vaporeon's fin.  Make sure to round the bottom a little.


*Glue the fin onto the top of the bow.


*If you haven't done so already, glue the hair clip to the back of the bow.


Friday, July 7, 2017

A Different Kind of Scrapbook


     When I was a kid, my mom used to clip the comics from the Bangor Daily News and paste them into notebooks.  She created many volumes in this fashion.  My siblings and I got a kick out of reading them and they provided a source of comfort when we were home from school sick.  These collections of comics were a form of scrapbook.
     While many of us today associate with scrapbooking the art of preserving pictures, historically scrapbooks have been collections of "scraps" and memorabilia.  Articles, images, anything the scrapbooker thought was worth preserving could be pasted inside a book for safekeeping.  While some are themed, others, like mine, are a hodgepodge of collected tidbits.
     To get started, all you need is a notebook, a glue stick, and some "scraps" to paste into your book.  My book is still a work in progress and so far it includes comics, newspaper clippings, tear off calendar pages, cat memes, and infographics, among other things.

Materials:
*Notebook
*Glue stick or mounting squares
*"Scraps" such as comics, articles, images, etc.
*Markers or other decorating tools (optional)

Directions:
*Glue "scraps into your notebook.  Decorate as you wish with markers or other embellishments.

Thursday, June 29, 2017

Nail Polish Painted Utensils


     Jazz up plain cutlery with nail polish.  I just brushed polish over the handle, but if you're skilled at nail polish designs, you could do all sorts of neat decorations.

Caution: do not paint the whole utensil.  You only want to paint parts that people will not eat off of.  If your partygoers are at an age where it's likely they will try chewing on the handle, it's best to save this craft until they're a little older.

Materials:
*Plastic cutlery
*Nail polish

Directions:
*Paint the handle of your cutlery with nail polish.  You can always add glitter or small sequins too for some extra sparkle.

Here's my original design for the party.  I thought those stat sequins might get in the way too much or be uncomfortable to hold, so that's why ultimately I went with the other design.  With smaller star sequins, though, this might work well for a slumber party or star/space party.

Thursday, June 22, 2017

Glitter "Dipped" Cups


     Give your next party some extra sparkle with these easy to make glitter cups.

Materials:
*Paper cups
*Glitter
*Mod podge
*Sponge paintbrush

Directions:
*Cover your workstation with newspaper or something that will similarly protect it from stray glitter and glue.
*Dip your paintbrush in Mod Podge and carefully move the brush around the cup, marking out where you want the glitter to end.
*Fill in the area below this line with a thin layer of Mod Podge as well.
*Pour glitter over the cup.  Set aside to dry.
*Once dry, shake off excess glitter and then pour the excess glitter back into its container.

Thursday, June 15, 2017

DIY Starry Sky Streamers and Garland


     Starry streamers are a perfect decorations for sleepovers (or un-slumber parties), space themed parties, and many more.  They are inexpensive to make, but a bit time consuming (it took me hours to glue on all those stars), so be aware of the time investment before you get started.

Starry Sky Streamers

Materials:
*Black streamers
*Silver star sequins
*All purpose adhesive
*Scissors
*Tape measure
*Tape

Directions:
*Measure the width of your door and the width of your streamers and divide the width of the door by the width of the streamers to figure out how many streamers you'll need.
*Measure the height of your entryway and cut out streamers that are approximately this height.
*Glue on stars.  Originally I was gluing on diagonal stripes of three, one star at one side, the next higher up and in the middle, and the last still further up and at the other side.  However, this proved to be very time consuming, so I switched to alternating stars from one side to the other spaced as far apart as I thought I could get away with.
*Let dry.  Tape finished streamers above the entryway.

Star Garland

Materials:
*Silver glitter cardstock
*Pencil
*Scissors
*Black ribbon

Directions:
*Find a star template online, resize to the desired size, print, and cut out.
*Trace the template onto the back of the glitter cardstock to create as many stars as you'd like for your garland.
*Glue the stars to the ribbon.  Let dry.

Thursday, June 8, 2017

DIY Slumber Party Photo Booth Props


     Photo booth props make most any event more fun and DIY ones cost little to make.  With sleep masks and nail polish bottles, plus fun favorites like crowns and star glasses, these props are bound to be a hit at your next slumber party.  If you have a Silhouette CAMEO, load the templates into Silhouette Studio and you'll finish these props in a flash.

Materials:
*Cardstock in various colors
*Bamboo skewers or wooden dowels
*Scissors
*X-acto knife
*Rhinestones
*Duct tape
*Pencil
*All purpose adhesive

Directions:

*Resize and print out the templates given below:


*Cut out the templates and trace onto colors of cardstock of your choosing.

*Cut out and glue together the pieces of each prop.

*For the crown, once you've cut out the crown shape, glue on some rhinestones.

*Attach the bamboo skewer using duct tape.