Monday, May 5, 2014

Mini Polaroid Refrigerator Magnets


Materials:
*Digital photos and printer
*Magnetic backing
*Scissors

Directions:
*Crop desired pictures to square shapes and shrink them to the desired size.
*Paste squares into a word document, leaving plenty of white space between pictures.
*Print out pictures and crop them to look like Polaroids.
*Adhere magnetic backing to the backs of the pictures.
*Place on your refrigerator or another metallic surface.


Thursday, May 1, 2014

Recycled Paper Bookmark


     When I was a little girl, I used to make recycled paper bookmarks with my mom.  We'd punch heart and teddy bear shapes out of colorful sheets of construction paper and glue them to the back side of white paper that had already been used.  For this week's craft, I came up with a slightly more sophisticated take on this childhood craft.

Materials:
*Empty cereal box
*Scrap paper
*Acrylic paint (I used red, blue, yellow, green, white, and gold)
*Paintbrush
*Shape punches (e.g. heart and butterfly)
*Small circle punch
*Ribbon
*Scissors
*All purpose adhesive
*Water

Directions:
*Choose a paint color to use for the background of your bookmark.
*Mix together paint and water (I used a cream cheese container lid for this part) until paint reaches its desired thinness.
*Paint over the scrap paper.
*Set aside to dry.  If you don't have time to wait for it to dry naturally, you can speed up the process using a hairdryer.
*Once it's dry, cut out a rectangle of the paper and an equally sized rectangle of cardboard and glue together.
*Use water to thin out the various paint colors you want to use for your shape punches.
*Paint over the scrap paper.  You probably won't need very much of any particular color.  I had tons of leftover paper when I finished.


*Set aside to dry or dry with a hairdryer.
*Punch out shapes.
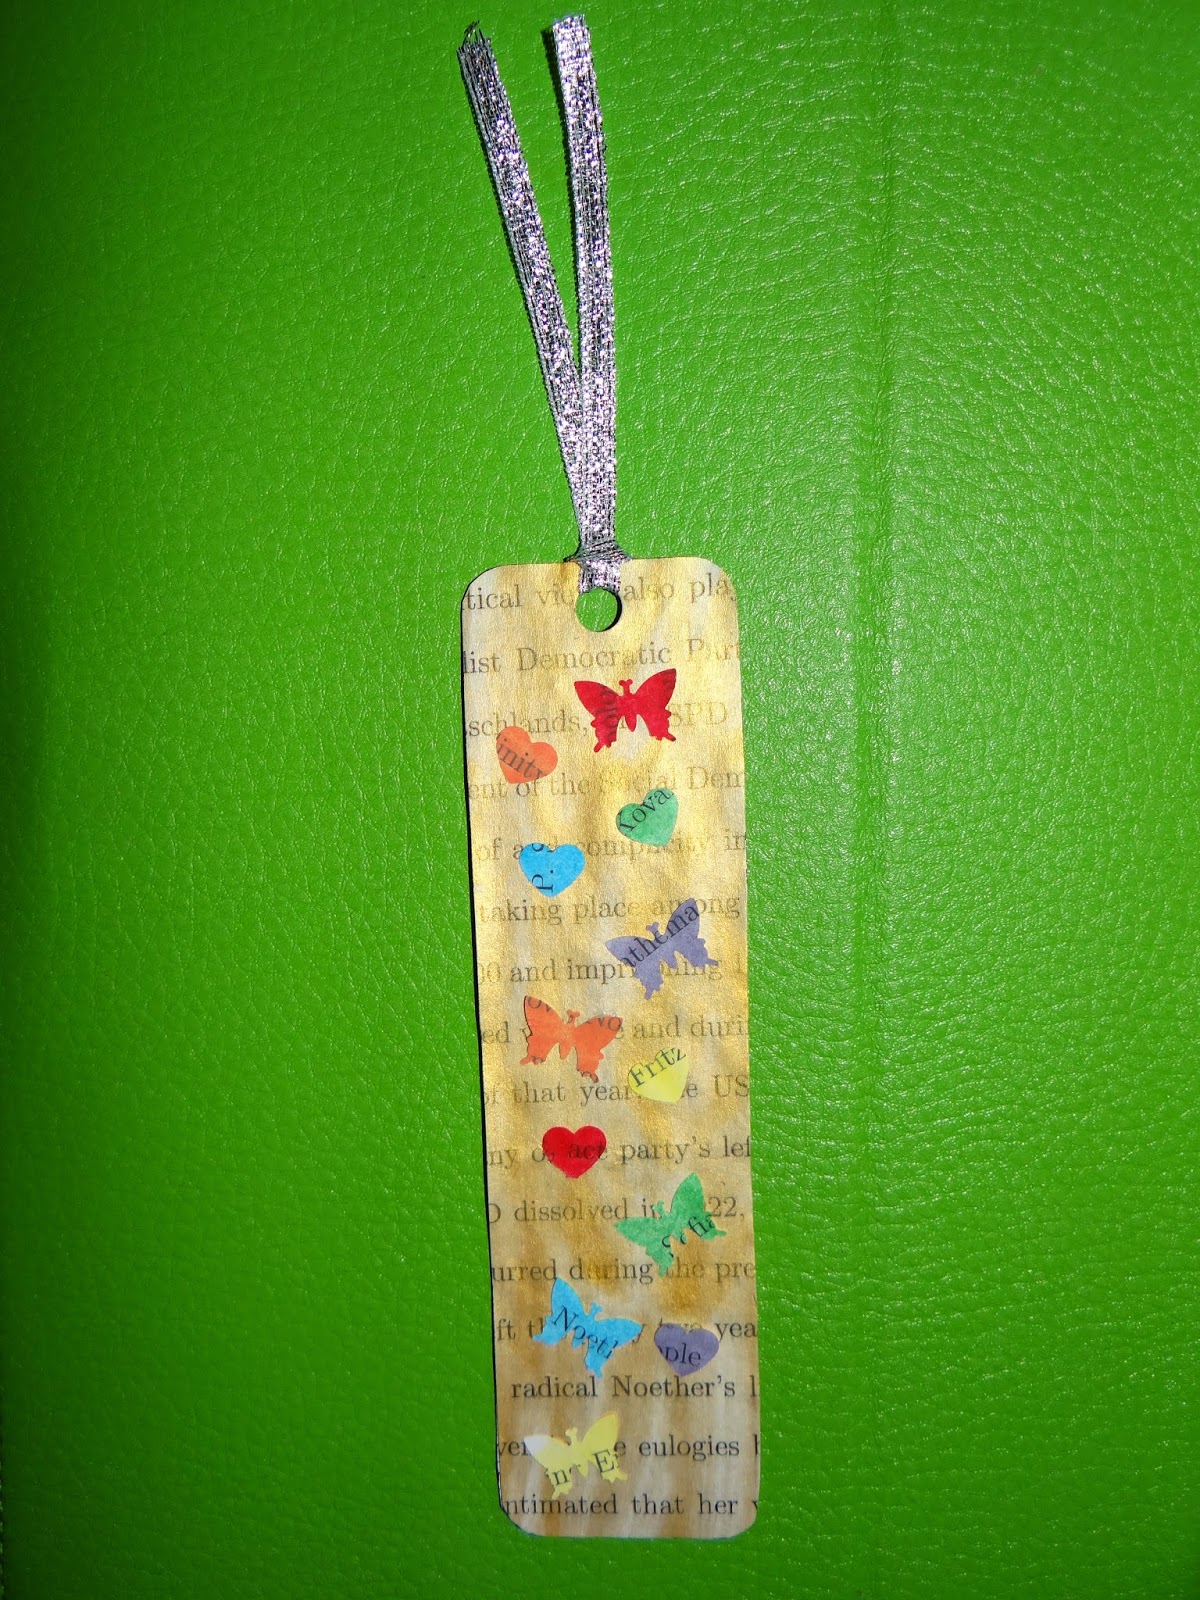
*Arrange along the bookmark and then glue down.
*Punch a hole near the top of the bookmark and loop ribbon through it.
*Note: to add another layer of meaning/sentimentality to your bookmark, use pages from something that has meaning to you.  I used pages from an old draft of my master's thesis.

Thursday, April 24, 2014

Perler Fuse Bead Drink Covers


     Warmer weather is here (unless you live in Maine like I do, in which case it could still transition back to winter at any moment), which for many of us means we'll be eating some meals outdoors.  Tired of finding drowned insects in a beverage you've had outside?  Try making one of these drink covers.

Materials:
*Fuse bead kit (e.g. Perler beads kit)
*Iron

Directions:
*Arrange beads on either a circular or hexagonal pegboard, using the patterns shown above for guidance.  There are two different styles of drink cover, one to allow for a hole through which to put a straw and one that you would have to remove to take a sip of your drink.  Either pattern can easily be altered to become the other by adding or removing a few beads.
*Cover your pattern with a sheet of waxed paper and iron the first side, then remove from the peg board, flip over, put waxed paper on top and iron the second side.  You can find more detailed directions here.
*Perhaps it's because I tend to use a hotter setting on my iron, but I've noticed that my fuse bead creations have a tendency to curl slightly.  To prevent this, while the drink cover is still hot, press it underneath a heavy book for several minutes.
*Note: These designs will only work on small drinking glasses.  You can make larger versions by using large fuse bead pegboards and adding additional beads.

Thursday, April 17, 2014

Glittery Clay Shoe Earrings


Materials:
*Clay
*Small metal shoe shaped cutter
*Glitter glue
*2 ear wires
*Needle
*Chain (optional)

Directions:
*Roll clay out until it is about 1/4" in thickness.
*Punch out two shoe shapes.  Using the needle, poke a small hole in each shoe, which is where the jump ring will go through.
*Bake the clay in the oven according to the directions on the package.  Once cooked, remove from the oven and set aside to cool.
*Once the clay is cool, add a thin layer of glitter glue to give the shoes some sparkle.
*Once dry, either attach the shoes to some length of chain and attach the chain to the ear wires, if desired, or fasten directly to the ear wires.

Thursday, April 10, 2014

Pom Pom Chick


     Here's a quick, easy, and inexpensive Easter craft.  I found this idea here.  I'm including below my own, slightly modified version of the instructions below.
Materials:
*Large yellow pom pom
*Medium yellow pom pom
*Black felt
*Orange felt
*Scissors
*All purpose adhesive

Directions:
*Glue together the large and medium pom poms.  The large pom pom forms the chick's body and the medium one serves as its head.
*Cut off a tiny piece of black felt.  Roll it between your fingers until it forms a ball and then glue it onto the medium pom pom to make one of the chick's eye.  Make the second eye in the same fashion.
*Cut out a diamond shaped piece of felt and fold it in half.  Press it between your fingers for several minutes, until it retains its crease down the middle.
*Glue the crease of the orange felt to the medium yellow pom pom to make the chick's beak.

Thursday, April 3, 2014

Glittery Easter Egg Garland


Materials:
*12 plastic Easter eggs
*Glitter
*Mod Podge
*Fuzzy yarn
*Paintbrush

Directions
*Mix some glitter into Mod Podge.
*Using the paintbrush, coat the eggs in the glitter glue mixture.  Set aside to dry.
*Once the eggs are dry, string onto the yarn.  I found that I had an easier time getting the yarn through the eggs when I put a little glue on the ends of the yarn and let it dry.

Thursday, March 27, 2014

Spring Pinwheel Earrings


     Spring is here, although if you live in Maine like I do, you wouldn't be able to tell.  Welcome the change of season with some fun paper pinwheel earrings.

Materials:
*Patterned paper
*2 mini buttons
*2 jump ring
*Ear wire
*Head pin
*All purpose adhesive
*Scissors
*Round nosed pliers
*Flat nosed pliers
*Small beads

Directions:
*It's somewhat difficult to verbally describe the steps needed to make these earrings, so I've included a picture below showing the necessary folding steps in addition to written directions.
*Cut out a small square from patterned paper (approximately 1.5" x 1.5").
*Fold the paper in half diagonally with the pattern side facing in.  Crease and unfold, then repeat the procedure with the other diagonal.  You should end up with something like the top right picture below.
*Cut along one of the diagonal folds 1/4 of the way in and then fold over as shown in the bottom left picture.
*Repeat with the remaining sides to get the bottom right picture.


*Repeat the entire procedure for a second square of paper to form a second pinwheel.
*Glue a small button in the center of each pinwheel.
*Poke a small hole in each of the pinwheels using a needle or similar implement.
*Pry open the jump rings with the pliers and slip each one through the hole in its respective pinwheel, then close the jump rings.
*Cut the "head" off two head pins, then curl the ends and clamp to the jump ring.
*Slide small beads onto the head pins, then create a loop at the top of each head pin and attach each one to its respective ear wire.