Monday, August 26, 2024

Exciting Things to Come


 No new blog post this week because things are pretty busy right now. I'm drafting the last quarter of my third book, editing a short story, and I have a talk coming up next week, which the flyer above details, so I haven't had a ton of time for crafting. But I do have some cool ideas in the works, so I wanted to to take a moment to share my plans with you. 

First up, I have a new Hallo-zine in the works. I decided to go with a themed issue this time. (Any guesses?) In it, you'll find a fun quiz, costume ideas, a new craft, an excerpt from one of my stories, and more. I still have a few pieces left to write, but I'm hoping to get this out in the next couple of weeks. 

After that, I have a number of costume ideas in store for you, so get ready to bust out your felt and removable vinyl. And yes, one of these costumes is Pokémon-related. I also have a couple of one-off crafts, and between those and the costumes, that should take us through Halloween season. 

I can't wait to share these with you all! 

Monday, August 19, 2024

More DIY Potion Bottles


Repurpose empty seasoning bottles in this fun Halloween craft. 


Materials: 


*Pre-washed seasoning bottles

*Plastic Halloween figures

*Potion label charms 

*Twine

*Hot glue

*Glitter, shaped sequins, sprinkles, or other "ingredients" to fill the potion bottles 


Directions: 


*Pick a Halloween figure and label that work well together. For example, I paired a bubbling cauldron with my witch's brew charm and a bat with my wool of bat charm. 

*Remove the lid from the seasoning container and hot glue the figure to the center of the lid. Let cool. 

*Tie the charm around the neck of the bottle using twine.

*Fill the container with glitter, sprinkles, sequins, colorful liquid, or something else that represents the potion ingredient. For example, I used witch's brew sprinkles for the witch's brew and shredded black felt for wool of bat.

*Seal the container. Now your potions are ready for display.

Wednesday, August 14, 2024

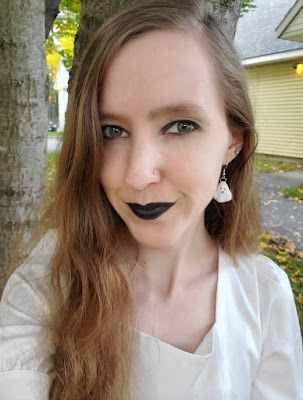
Clay Sheet Ghost Earrings


Add some spooky whimsy to your outfits with these adorable ghost earrings.


Materials:


*White oven-baked clay

*Jump ring

*Toothpick

*Ear wires

*Jewelry pliers 


Directions: 


*Take a small amount of clay and shape it into a thin circle roughly 1.5"-2" in diameter. 

*Shape into a sheet ghost shape. You may find it helpful to drape over the end of a pen or similar object. 

*Embed a jump ring in the top of the ghost's head. Make sure enough of the ring is sticking out so that you can slide an ear wire through.

*Use a toothpick to press a face into the ghost.

*Bake in the oven in accordance with the directions on the clay packaging. Let cool.

*Using pliers, attach ear wires to the ghosts.

Monday, August 5, 2024

DIY Bear Ears


I'm back! Sort of. I still have the tendon injury, which limits how much time I can spend writing. And since I'm a horror writer, I need to spend most my writing time focusing on my fiction. But I've made a number of crafts and DIYs over the past few years, and I miss sharing them with you all. So I hope to pop in from time to time with a new craft.

Since Halloween is on the horizon, I figured today I'd show you how I made these bear ears. I made them for a book release, which I'll tell you more about at the end of the post. But first, the tutorial. 

DIY Bear Ears

Materials:

*Black headband

*Black felt

*Pink felt

*All purpose or fabric adhesive

*Scissors 

*Marker for tracing 

*Bigger cylinder and smaller cylinder for tracing circles (sizes depend on your preferences for the ear size)


Directions: 

*Trace and cut out two larger circles in black felt and two smaller circles in pink felt.

*Center the pink circles on the black circles and glue together.

*Line up the circles along the headband where you would like them positioned and trim off the excess felt that dips below the headband.

*Glue the ears to the headband. Let dry. 


Grizzly: A Charity Anthology


I'm so excited to share that my short story "Jane" was accepted into Grizzly: A Charity Anthology! All proceeds from this anthology benefit Take Back the Night, an organization dedicated to ending sexual assault globally. Inspired by the man vs. bear debate, all of the stories have a bear theme, although in some cases, the bear is central to the story whereas in others, the bear exists in passing mention. The anthology is multi-genre, and my story is horror. I'm including the blurb below, and if you would like to learn more, you can check it out on Amazon or Goodreads. It is only available until September 10th, so if you'd like to have a copy, make sure to pick it up before then. 


The Blurb: 

Boys will be boys.

Bears will be bears…

Brace yourself for twenty mixed-genre tales, all tied together with a neat bear- shaped bow that your mother would be proud of. Guaranteed to make you ‘smile more often’ and rage like it’s ‘that time of the month’.

Written by femme SA survivors for all SA survivors, Grizzly is the charity anthology that aims to give back and bite back.

Sometimes, when you can’t find the strength to roar, a growl will do.

Thursday, February 3, 2022

Best Laid Plans


Hey everyone, I know it's been a while since I posted anything.  Unfortunately, it's also going to be a while before I post something again.

Back in mid-December, when I was in the midst of making my Holiday Barbie 2021 cosplay, I sustained a wrist injury from a combination of typing on a bad keyboard and hand-sewing through too much fabric.  I really wanted to keep going with both my writing and crafting, and so I pushed through pain that I shouldn't have.

I did eventually cut back and start taking it easy.  I thought I would bounce back quickly.  I didn't.  For some reason, my arms aren't healing properly.  Now, to be clear, I experience little to no pain the majority of the time.  As long as I'm not pushing myself to do more than my body wants, I'll be fine.  But unfortunately, my arms have a hard limit on what they are willing to do in a day.

For example, I can type for three hours exactly.  If I start going for more, I have a not as pleasant day the next day.  I haven't tried crafting much since my injury, but I'm sure there are definitely craft projects that are out of the question for now as well.

Since I only have three hours of writing time in me a day, I have to use that for my work.  Which means even if I were to make a craft, I wouldn't have the time to blog about it.  So I'll be taking a break from posting here until my arms have recovered some more.  I don't have a good sense of when that will be.  I'm hoping by Halloween season, but we'll see.  So farewell for now.  I hope to see you on here again in the not too distant future.

- Amber

Thursday, December 9, 2021

Making a Life-Sized Holiday Barbie 2021 Dress Part 2: Adding Details to the Bodice


My journey in making my own Holiday Barbie 2021 dress continues.  Last week, I painted the white corset I had chosen for the bodice silver.  This week, I began adding embellishments.  It turns out, sewing on a ton of rhinestones and faux pearl strings is pretty time consuming, so I'll have to update you on the rest of the embellishing in next week's post, but we're making progress.

Materials:

*Silver corset (if you need to paint a corset, see this post)

*The largest rhinestones you can find

*Faux pearl garland

*All-purpose adhesive

*Sewing needle

*White or silver thread

Directions:

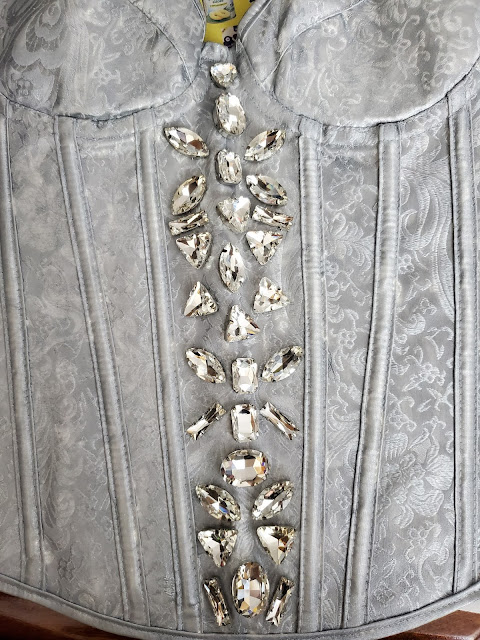
Note: The largest rhinestones I was able to find were about 30 mm high.  Thus, I was not able to replicate the pattern on Holiday Barbie's dress.  I used her pattern for some inspiration and then filled in the remaining space with designs of my own.

*Secure a small group of rhinestones to the corset using all-purpose adhesive.  Let dry.

*Sew the rhinestones into place to ensure that they stay on the bodice.  The all-purpose adhesive I use is reasonably sturdy, but for something like a clothing item which you'll be pulling on and off, I definitely recommend securing them with some thread to make sure they stay in place.

*Repeat the gluing and sewing with another small cluster of rhinestones.

*Keep repeating until the central panel is done.

*Next, take your pearl ribbon and glue it onto the corset.  Let dry.

*Sew the ribbon down for extra stability.  I basically sewed every third or fourth string section between pearls.

*The pearl ribbon maps out where the rest of the rhinestones will go.  Arrange your rhinestones, glue down, and sew them in place.

And that's what I've done so far, although the bodice is still far from complete.  Tune in next week to see the next phase of decorating the bodice.

Thursday, December 2, 2021

Making a Life-Sized Holiday Barbie 2021 Dress Part 1: Painting the Bodice


This holiday season, I have a rather large project I'd like to try my hand at.  Instead of doing one grand reveal, I wanted to try breaking it up into smaller pieces and posting about my progress as I go.  This could go really well or the project could go disastrously and then I've documented my failure for you all, but either way, it will be a learning experience.  Also, this way I hopefully won't put it all off until the last minute.  If I need weekly content, I'll presumably have to work on it a little here and there so that I can share something with you.

As a kid, I loved Barbie.  I remember seeing Holiday Barbie in stores in her beautiful dresses and wanting a doll of my own, but I never actually had one.  I also loved the holiday Barbie ornaments, but again, didn't have one.  Well, I ended up stumbling across images of Holiday Barbie 2021, and I was in awe of her dress.  I'm like, I'm a grown adult, I can buy myself a Holiday Barbie AND Holiday Barbie ornament and fulfill a childhood dream.  But then I thought to myself that it would be even cooler to become Holiday Barbie.

I scoured the internet for a dress like Holiday Barbie's, but to no avail.  And then I thought, maybe I could make myself a Holiday Barbie dress.  I spent hours combing the internet for the perfect supplies.  I debated and debated whether it was actually a good idea to take on this project, and eventually I hit submit.  And here we are.

Now I know what you're probably not thinking, but absolutely should be: But Amber, you hate sewing.  And I kind of do.  I don't make a point of this, and I love what sewing can do for me, but the actual sewing process I do not really enjoy.  So why make myself a dress?  Well, once I have an idea in my head, sometimes it's very hard to nix it, and I just could not get over the idea of how cool it would be to have Holiday Barbie's glamorous dress.  This may prove to be a spectacularly bad idea.  Or a great idea.  I'm leaning toward bad idea, based on preliminary results, but only time will tell.

Holiday Barbie's dress has a beautiful silver bodice.  To minimize the amount of sewing I would have to do, I picked up a corset which I will be modifying to make the bodice.  I could not find an affordable silver corset with either a back or side closure, so I ended up buying a white one that I could paint silver.  Today we'll be focusing on that part of the process.

Materials:

*White corset

*Silver paint

*Textile medium

*Paintbrush

Directions:

*Cover your workstation in newspaper or some other protective layer to keep it from getting covered in paint.

*Lay the corset down on the newspaper.


*Mix together the paint and textile medium in the proportions given on the textile medium bottle.  Mine was two parts paint to one part textile medium.  This will essentially turn your acrylic paint into fabric paint.  You're supposed to iron it to set the paint, but I don't think this corset is ironable, so I'll just use the corset very carefully.  Once the rhinestones are on, it will be a challenge to wash anyway.

*Once the front is dry and has been set, paint the back.


 *Optional: Paint the inside of the corset.  I painted the inside of the straps, since I was worried about that portion being visible.

Now we have a silver corset.  It's kind of pretty, but it's not very Holiday Barbie.  Next I'll be adding some rhinestones in hopes that this will make it a little more like Barbie's dress.

The big issue I'm having at the moment is that the corset arrived folded in half, and there is a significant crease in that location.  I should have tried tackling that before painting, but I didn't, and so now I'm trying to press it out using a heavy textbook.  But I have a feeling it's there to stay.  So not super optimistic, but we'll see how that goes.