Saturday, October 6, 2012

Glow in the Dark Furry Eyeball Wreath


Materials:
*Foam wreath
*Black faux fur
*12 glow in the dark ping pong balls
*Black, red, blue, green, and purple permanent markers
*All purpose adhesive
*Scissors

Directions:
*If not already in strips, cut faux fur into strips and wrap around the wreath.  Glue down the fur using all purpose adhesive as you wrap it.  Let dry.
*While the wreath is drying, use the permanent markers to decorate the ping pong balls to look like eyeballs.
*Arrange the ping pong eyeballs in a manner that you find pleasing, then glue them to the wreath.

This is what my wreath looks like in the dark. 

Friday, September 28, 2012

Design Your Own Board Game


     A couple of years ago, Brian and I made a Halloween board game.  While it would be impossible to give exact directions on how to make a board game since there are so many different things you can do with games, here are some tips to help you get started, using Brian's and my board game as an example.

Materials I used:
*Photo paper
*Camera
*Paint (computer program)
*Microsoft Publisher
*Mounting squares
*Grocery store pizza box
*Printer paper
*Cardstock

Directions:
*Choose a theme.  Brian and I decided that we wanted a spooky Halloween game.
*Determine the object of the game.  What is it that a player will have to do to win the game?  For our game, we decided that the winning player would have to escape from a ghoul infested cemetery.

*Start thinking about the layout of your game board.  What will the path look like?  Will you have any special squares?  Brian and I have squares that require players to draw a card, that instruct players to take a particular shortcut, that turn players into monsters, and that turn players human again, among others.  We had special "open grave" squares that if a player landed on one, she or he would lose a turn.

*Many board games involve cards.  If you would like to include a deck of cards in your game, ask yourself what type of tools your cards will afford players.  What can they do to aid a player and what can they do to thwart a player?  In our game, we have cards that require players to move forward or backward and to move to special squares, we have cards that will turn a player into a monster, and we have cards that will turn a monster player human again.

*Once you have outlined a basic concept for your game, it's time to start thinking about the mechanics and the graphics of your game.  Will players roll dice to determine their movement, or is there some other mechanism you would like to use to determine the distance players travel?  What kind of images will you use on your game board and on your deck of cards (if you are including a deck of cards)?  What will you make your tokens out of?  What are the maximum and minimum numbers of people who can play your game?  Brian and I used a die in our game and we used images of tombstones and other cemetery related imagery.  We used paper tokens; the human ones Brian drew and the monster ones we printed from this site.  Our game is designed for 2-4 players.

*Now it's time to start designing your game.  How you go about it is really up to you.  Brian and I designed all of our graphics in Paint, with the exception of the grass and the rocks.  We photographed the rocks and the grass that we used as our board game.  After creating all of our images, we put the game board together in Microsoft Publisher and we used Microsoft Publisher to put together the images on the cards as well.  We then printed the game board onto a couple of sheets of photo paper and adhered it to cardboard obtained from a grocery store frozen pizza box.

*Write up a set of rules for your game so that others can understand how your game works.  This may also help you tie up some loose ends that you may not have thought about before.  For example, you may want to write down a note about whether two players can occupy the same space at once and if not, what happens when two players land on the same square?

If you would like to see Brian's and my game in action, check it out here or on YouTube

Friday, September 21, 2012

Stylish Storage Containers II


Need some ideas for creative storage containers?  Here are a couple new ones and if you're still looking for more ideas, see my original post last fall, Stylish Storage Containers, which contains five more ideas.

Duct Tape Oatmeal Canister

 
     I needed a container to store my duct tape in and realized that an oatmeal canister would be the perfect size. When figuring out how I wanted to decorate my container, I figured that nothing could be more appropriate for this canister than duct tape. 

Materials:
*Empty oatmeal canister
*Duct tape in various colors and patterns
*Permanent markers
*Scissors

Directions:
*Wrap five pieces of duct tape of varying colors and/or patterns around the canister.
*For the lid, cut out a little rectangle of duct tape.  Place it on the lid so that the bottom corners of the tape are touching the edge of the lid.
*Cut out another rectangle of duct tape and place it so that one corner touches the lid in the same spot as one of the corners of the first piece of duct tape and the other corner touches another part of the lid.
*Repeat the procedure until the entire lid has been covered.
*Add a piece of patterned duct tape or some other adornment to the center of the canister to cover up any gaps in duct tape.
*Use a permanent marker to conceal gaps in the duct tape around the edge of the lid.


Geometric Holographic Pen Bucket
 

     I've always been fond of holographic paper.  These days it reminds me of the Give Yourself Goosebumps books that I adored when I was a child.  When I found holographic paper at my local JoAnn Fabrics store, I knew that I wanted to incorporate it into my crafting.  Here's my second craft project using holographic paper:

Materials:
*Empty, clean ice cream container
*Five sheets of 8 1/2 x 11 self-adhesive holographic paper in varying colors and patterns
*Scissors

Directions:
*Cut three strips from each paper about 8 1/2" in length and 1" wide.
*Cut these strips into triangles.
*Adhere the triangles to the container in a pattern you find pleasing.

Thursday, September 13, 2012

Tie Dyed Sheet


Materials:
*Fabric dye
*Rubber bands
*White or light colored sheet.

Directions:
*Divide the sheet into sections using rubber bands.  You should end up with something that looks kind of like this:


*Prepare dye solution in your sink according to the directions on the dye bottle.
*One by one, dip each section of your sheet into the dye solution, holding it in the dye for about 3 seconds.  This part can get very messy, so you shoud probably wear clothes that you wouldn't mind staining.
*Rinse the sheet under warm water, then throw in the washing machine with the rubber bands still on.
*Once the sheet is done washing, remove the rubber bands and set it out to dry.
Note: you can use the remaining dye in the dye bath to tie dye other things like T-shirts, towels, etc using the same method.  I tie dyed a T-shirt using the excess dye.

Thursday, September 6, 2012

Fun Fractal Origami Paper


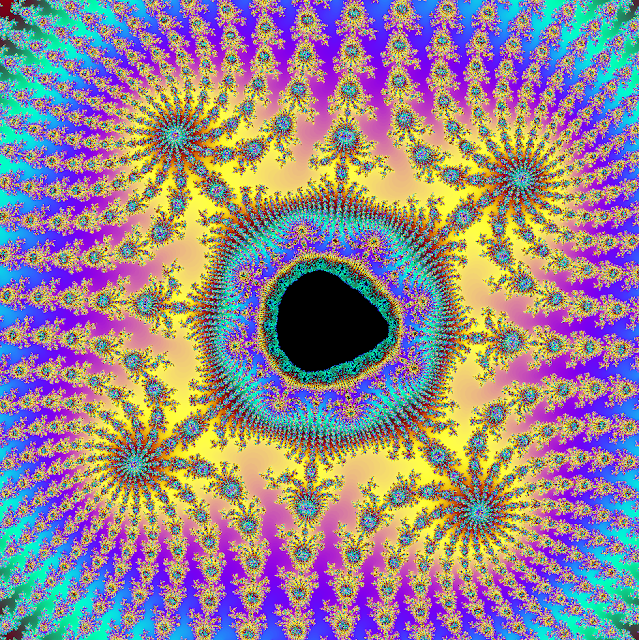
Brian created a program to generate the Mandelbrot fractal and I saw so many cool images that I couldn't help but want to use them in my crafts.  I ended up using the images to make origami paper.

Materials:
*Printer paper
*Fractal image
*Printer
*Scissors

Directions:
*Select a fractal image.  You can choose one of the ones I've shared below if you would like, or you can choose one of your own. 
*Print the fractal image onto a sheet of ordinary thickness printer paper.
*If you would like double sided origami paper, print a block of color on the other side.
*If the paper begins to wrinkle, place it underneath a heavy book for a little while to flatten it back out.
*Cut out the square containing the fractal image.  Now you have your own patterned origami paper.

Here are a few origami creatures I made using my fractal origami paper.  I found the directions for the butterfly here and the swan here.  The site I got these instructions from has instructions for all kinds of cool origami creations.


Here are some cool fractal pictures to use for your origami paper:


Thursday, August 30, 2012

Growing Alum Crystals and Treasure Chest Display


Alum Crystals

Brian and I have been experimenting with growing different types of crystals.  We started with a dollar store crystal kit, then tried growing table salt crystals.  Neither of these crystals grew as well as we had hoped they would, but then we tried growing alum crystals and they came out pretty well.  I'm including a link to the video I worked from in addition to my own, slightly modified directions. 

Materials:
*1/2 cup of hot water
*2 1/2 tablespoons of alum (a pickling spice available in most grocery stores)
*7-10 drops of food coloring (optional)

Directions:
*Add alum to the hot water and stir until it dissolves.  If you end up with a little bit of alum that won't dissolve it probably will not make a difference, but you can always heat up the solution a little more and the remaining alum should dissolve.
*Add food coloring to the solution.
*Let the solution sit undisturbed for some time.  I made my solution before bed and let it sit overnight and observed crystals forming by the next morning. 
*Let the crystals sit in solution until they reach the desired size.  If they do not grow as much as you would like them to, you can remove the large crystals from the solution, heat up the solution and dissolve any remaining alum, and then place the large crystals back into the solution once it has cooled.
Note: Food coloring may hinder the growth of crystals some, so if crystal size is more important to you than color, you may want to leave out the food coloring.

Treasure Chest Display
This craft can serve as an excellent way to display your alum crystals, but there are many other possible uses for it as well.
Materials:
*Jewelry box
*Gold paper
*2-3 sheets of paper with wood pattern
*Round hole punch
*Rhinestones
*Faux pearls
*String
*Glue
*Scissors
Directions:
*Cut out a rectangle of wood patterned paper equal to the size of the bottom of the jewelry box.
*Punch out gold circles and glue them to the wood patterned rectangle to make it look like the floor of the treasure chest is covered in gold coins.
*Add rhinestones and strands of faux pearls as you wish.
*Remove the jewelry cushion inside the box and set it aside.
*Cover the inside and outside of the jewelery box and lid with wood patterned paper, except for one side on the lid and one side on the box where you will be hinging the lid to the box.
*Cut two strips of wood patterned paper and use them to connect the lid to the box.
*Cover the rest of the inside of the box with wood patterned paper.
*Place the jewelry cushion back inside the box.
*Place the decorated piece of paper on top of the jewelry cushion.
*Arrange your alum crystals inside your treasure chest display. 

Saturday, August 25, 2012

One Year of Crafts

     Today marks the one year anniversary of my craft blog.  To commemorate this anniversary, I decided to make some scrapbooking pages showcasing the crafts I've blogged about this year.


     Looking at the pictures, all I can think is that those are a lot of crafts.  I can hardly believe that I made all of them.  I'm pretty sure the number of craft projects I've made this year has far surpassed the number of crafts I've made in any other one year interval, which is awesome.  My personal favorite crafts were Melted Crayon Art 2.0 and Remaking Childhood Crafts.  My second melted crayon project came out sparkly and pretty and makes very nice wall decor and remaking the pages from my childhood book really pushed me in my papercrafting.
     Now for some statistics, just because I'm a math geek.  My blog has received 2,432 views this year.  My most frequently viewed craft was Fuse Bead Bowls, viewed 161 times, followed by Memento Board, viewed 117 times.  Last month I had a record number of blog views, 369 views in one month. 
     Now for the moment you have all been waiting for: the winner of the prize package is Katie H. from Veazie.  Congratulations, Katie!  I am immensely grateful to all of you who have been following my craft blog and everyone who has taken the time to look at my blog posts.  I hope that the next year will prove to be as awesome as this one. 
     So, what do you think?  Which blog posts have you enjoyed most?  Let me know in the comments or email me at hathaway.amber@gmail.com.