Showing posts with label Miniatures. Show all posts

Wednesday, December 9, 2020

DIY Book Ornament


Now that I've finished my PhD, I've finally had the chance to get back into reading, and have been chipping away at the edits on my novel, which has been in the works for a while now.  I thought it would be fun to make a book ornament for my tree to celebrate my writing progress as well as my return to reading.  I used scrap paper to make the pages for my ornament, and since the scrap paper happened to have text from my work in progress, I decided to make a mock cover for my work in progress.  Now my novel is actually a horror novel, so this mock cover does not at all give the right impression, but I didn't have a lot of time to work on it and there's a good amount of symbolism in it, so it worked for me.  I've included my mock cover below in the directions section, in case you wanted to use it, but if you google miniature book cover, you can find tons of printable book covers that are free for personal use.

Materials:

*Matte photo paper
*Scrap or plain printer paper
*Two jump rings
*Two pairs of jewelry pliers
*Sewing needle
*Ribbon or thread
*Glue
*Ruler
*Pencil
*Scissors

Directions:

*Print out a copy of your cover design onto matte photo paper.  I'm including the mock cover I made below, but you can also find tons of printable mini book covers online that are free for personal use.

*Cut out your book cover image and fold it into a cover shape.

*Using a ruler and pencil, section your paper into strips.  Mine were a little over 1.5" wide, the width of the ruler, but you may want to make yours larger or smaller, depending on the desired size of your ornament.  (I messed up on the first strip, so that's why there's a set of double lines.)

*Cut out your strips and accordion fold them to fit inside your book.

*Use a sewing needle to poke a hole in the spine of the cover and link two jump rings through the hole.

*Cluster your accordion folded pages together and glue them into the spine of the book.

*Slide some ribbon or thread through the top jump ring and tie it off to form a loop so you can hang up your ornament.

And that is how you can make your very own book ornaments.  I'm excited for this new addition to my tree, and hopefully in a few years I'll be able to make a different one with the actual cover for this novel :)

Thursday, December 13, 2018

DIY Harry Potter Inspired Magic Wand Ornaments


     These magic wand ornaments are inexpensive and easy to make and are great gifts for magic lovers of all ages.  In addition to ornaments, these could serve as wands for dolls or stuffed animals (see this post for a different miniature wand tutorial).  If you put up a Halloween tree, these ornaments could be great for that too.

Materials:

*Toothpicks
*Clay
*Paint
*Jump rings
*Thread or thin ribbon
*Paint brush

Directions:

*Take your toothpick and form a handle covering the end of it using clay.

*Insert the jump rings into the end of the handle such that about half of the ring is embedded in the clay.  This will be where you hang your ornament from, so make sure it's in securely.

*Add details to the clay if you would like to.  You don't want to do the detail work before adding the jump rings, or you may squish your design in the process.

*Once you're satisfied with the design, bake clay in the oven following the directions on the packaging.  I baked mine for about 8 minutes at 225° F.

*When the ornaments have cooled sufficiently, paint the wands in whatever colors you would like.  Let dry.

*Loop some ribbon or thread through the jump rings so you can hang your wand from your tree.

Wednesday, November 8, 2017

DIY RC Roomba for Mini Shark Cat


     I'm excited to present to you one of my favorite crafts I've made.  If you've seen my Halloween costume contest cat trophies, you've seen my original shark cat.  I liked it so much that I decided to make myself a shark cat.  When I made its Roomba, I mentioned to Brian that it would be cool if the Roomba actually moved.  He told me that we probably could make that happen and that's how shark cat came to be.  Before we get to the instructions, here's a video I made of my shark cat a an homage to the original video that inspired my craft.  I didn't have a toy duck, so I let shark cat chase around a wind up Easter chick.  I hope you enjoy!


Materials:

*Small remote control car (such as this one)
*Metal jar lid
*Silver paint
*Black paint
*Paintbrush
*Mini magnets (such as these ones)
*Screwdriver
*Cat figurine with shark costume (I give a rough sketch of how to make the costume in this post)

Directions:

*Paint the top of the jar lid silver.  Let dry.

*Add accents with black paint to make the lid look like a Roomba.  Let dry.

*With the RC car turned off, unscrew the screws attaching the top of the car to the bottom.

*Screw the screws into the screw posts on the bottom part of the car, in the opposite direction of the way in which they were screwed in originally.

*Place one magnet on top of each screw.

*Place the jar lid over the bottom of the RC car.  The magnets should hold it in place.

*Now your shark cat is ready to roll!

Thursday, April 6, 2017

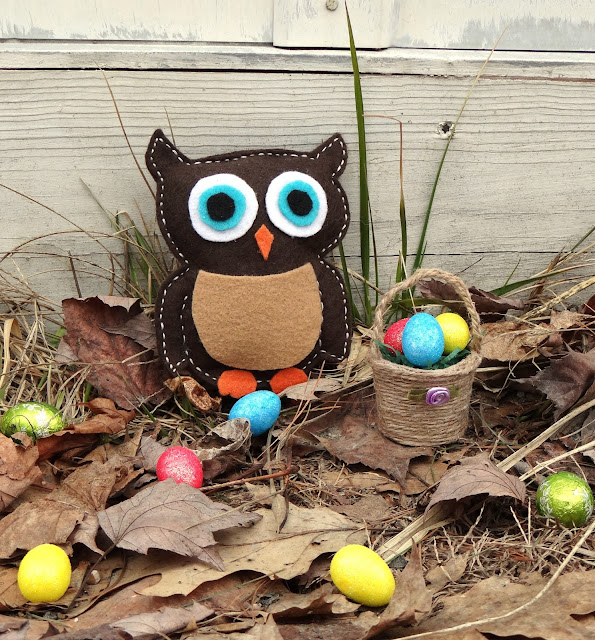
Mini Easter Basket


     Transform an old medicine cup into an adorable mini basket.

Materials:
*Plastic medicine cup
*Twine
*All purpose adhesive
*Green tissue paper
*Mini foam eggs
*Ribbon rose
*Scissors

Directions:
*Cut three lengths of twine long enough that they could reach from the bottom of the medicine cup, loop up to form a handle, and reach down to the bottom on the other side.
*Braid the three pieces of twine together and then glue on to form the handle.
*Wrap twine around the medicine cup, gluing down as you go.  Let dry.
*Once you've finished gluing down the twine, embellish with a ribbon rose or other decoration of your choice.
*Wad up some paper (tissue paper would work fine, but you could also use scrap paper) and stuff it in the bottom of the medicine cup.
*Cut very thin strips of green tissue paper to create the Easter "grass."  Layer it atop the paper,
*Add a few teeny eggs and you're ready for your very own mini egg hunt.


Happy egg hunting!

Thursday, March 30, 2017

Mini "Crystal" Ball


     Yes, I know Halloween is still months away.  Why do you ask?  While the Halloween bug still is in my system (when isn't it?), my main motivation for making this craft was the fact that it's the middle of the semester.  During this hectic time of year, I need crafts that are super quick to make.  You'd be hard pressed to find a craft that's quicker to make than this one and the end result looks pretty nice.

Materials:
*Clear glass marble
*Bead cap
*All purpose adhesive

Directions:
*Glue bead cap to the marble.  Set aside to dry.  That's it!

Thursday, March 23, 2017

Mini "Magic" Wand


     Okay, so I know Halloween is still months away, but I came up with the idea for these adorable mini "magic" wands and I could not wait that long to try it.  The procedure is similar to the one I used to make my full sized prop "magic" wands.  They are the perfect size for Barbie's Halloween shindig, but could work for many other dolls as well.

Materials:
*Toothpicks
*All purpose adhesive
*Plastic crystal bead in the color of your choice
*Paint in the colors of your choice
*Paintbrush

Directions:

*Glue a plastic crystal bead to the end of a toothpick.

*Layer on all purpose adhesive to create a handle for your wand.  You could probably also use hot glue or perhaps other glues to achieve a similar effect.  I wound the glue around the part of the toothpick where I wanted the handle to be in a spiraling motion and then set it aside to dry.


*Paint the handle of the toothpick.  Let dry.


*Paint the remainder of the wand.  Let dry.

Thursday, March 16, 2017

Mini Fairy House


     Wait, don't throw that container out!  Empty plastic bottles such as toothpick containers, rounded makeup containers, and aspirin bottles are perfect for making tiny fairy houses.

Materials:
*Empty plastic container (e.g. toothpick holder)
*Toothpicks
*Gold seed bead
*Lots of teeny pebbles
*All purpose adhesive
*Brown paint
*Gray paint
*Red paint
*White paint
*Paintbrush
*Clay


Directions:

*Paint the container gray.  This way, if you end up with small gaps between rocks that are hard to fill in, it will look like there is grout or cement or something similar between the rocks.

*Snip the ends off of three toothpicks and then cut each toothpick in half.  Paint five or six of these toothpick halves brown and set aside to dry.

*Once dry, glue on the painted toothpicks to form a door.

*Glue a gold seed bead onto the toothpicks for a doorknob.

*Glue rocks onto the container, filling in as much of the space as you can.

*Craft a mushroom shaped roof from clay.  Bake or dry following the directions given on the packaging.

*Paint the roof red and then let dry.  Once dry. paint on white spots.  Set aside to dry.

This is what the two pieces looked like before I glued them together.  The mushroom roof really does add to the fairy house's aesthetic.

*Once the roof is completely dry, glue it to the top of the container.

*To make an owl fairy inhabitant, punch two butterfly shapes from cardstock and glue to the back of the bead such that one wing sticks out on either side of the owl bead.

Thursday, March 31, 2016

Mini Checkers Board


Materials:
*Mini image of a checkers board
*Thin cardboard (e.g. from a cereal box)
*Scissors
*Hole punch
*Cardstock in two different colors
*All purpose adhesive

Directions:
*Print out an image of or construct a mini checkers board, with squares just slightly wider than the size of a circle produced from a hole punch.  I took a picture of my butterfly checkers board and then resized and printed it.
*Reinforce the mini checkers board by gluing some thin cardboard to the back.
*Punch out game pieces from cardstock in two different colors.  You can either glue the pieces to the game board or leave them unglued so that they can be moved around.

Thursday, March 24, 2016

Mini Colored Pencils


     Here's the next installment in my miniseries (pun courtesy of Brian).

Materials:
*Toothpicks
*Box cutter or other reasonably sharp cutting tool
*Emory board or sandpaper
*Full size colored pencils
*Paint
*Paintbrush

Directions:
*Cut a toothpick in half using a box cutter or other cutting implement.  Scissors work too, but I didn't like the way they squished the wood around the cut site.  The two halves can be used to make two mini colored pencils.
*If the end of the pencil is a bit jagged after cutting, file it down with an Emory board or sandpaper.
*Paint the pencil the color that you would like it to be, leaving the pointed tip unpainted.  Set aside to dry.  I like painting the whole pencil rather than painting one side and letting it dry, then comping back to paint the other and I found that Perler fuse bead crafts are a good way to handle this.  You just paint the toothpick except for both ends and then stick the pointed end in one of the holes in the fuse bead creation.  You then carefully paint the end that is now sticking up in the air.
*Once the pencil is dry, color the very tip using a colored pencil.  You could also paint the tip, which is what I found I had to do for the white one to get the color to show up.

Thursday, March 17, 2016

Itty Bitty Books

This is roughly the actual size of the mini book I made.

Materials:
*Paperboard or other thin cardboard/heavy paper, such as an old cereal box, heavyweight junk mail, etc.
*Scrapbooking paper with small pattern
*All purpose adhesive
*Scissors
*Pencil
*Ruler
*Plain paper
*Paper to use for mini pages

Directions:
*Decide what size you would like your mini book to be.  The first books I made were about 3.5 cm high and a little more than 2 cm wide.  Draw two rectangles of the desired dimensions on your paperboard/cardboard to make the front and back covers and another, thinner rectangle to make the spine.  Cut out these three pieces.
*Lay out your rectangles on your sheet of scrapbooking paper, with the thin rectangle sandwiched between the two wider rectangles, and a slight gap of space between each piece, as shown below.  Glue the three pieces down.


*Cut around the rectangles, leaving about 1/4" or so of space around the edges of the cardboard and then cut off square chunks at the corners, as shown below.


*Cut slits at the top and bottom where the spine of the book is.  It's kind of hard to see in the picture below, so if you can't tell exactly what's going on, check out the picture after for further guidance.


*Fold over the overhanging paper at the sides and glue down.  Repeat with the pieces of paper at the top, ignoring for the time being the tabs at the spine.


*Glue down the tabs at the spine.


*Cut out rectangles of paper just slightly smaller than the size of the book covers and glue over the inside of the covers.


*Print out mini pages sized to fit in your book.  The way I did this was I opened up an old document in Word or Adobe Reader and then changed the view to display two pages at once.  I then took a screenshot of the two pages and pasted this into Paint.  I moved one of the pages up against the other so that there was no longer a gap between them and then I selected the two pages together and pasted them into Word.  I then shrunk them down to fit the book.  From here if you're not too concerned about the text you're using, you could just copy and paste the two pages a bunch of times, or you could take screenshots of different pages and repeat the procedure with those pages.

*Print out enough pages to fill your book.  This will vary depending on the thickness of the spine.  For this one, I used five copies of the stuck together two pages.  Cut out pages, leaving them stuck together in groups of two.

*Fold in half along the divide between the two pages.


*Place pages in a stack, gluing together the blank sides as you go.


*Glue along the spine and stick into the hardcover part.  Now you have your book!  Make a whole bunch of them!


Thursday, October 2, 2014

Halloween Mini Paper Witch Hats


     I decided to try a video tutorial for this craft project.  I have a poll on the right hand side of the page in which you can tell me what type of craft tutorial you like best, be it video, written, or pictorial.  I'd like to be able to make this blog as helpful to you as possible, so let me know what you think, either in the poll or in the comments.
     For written directions and the required template, visit Joann.com.  Note that I made these hats for decorative purposes, but if you'd like to make it wearable, just glue the hat to a headband and you're all set.

Monday, May 5, 2014

Mini Polaroid Refrigerator Magnets


Materials:
*Digital photos and printer
*Magnetic backing
*Scissors

Directions:
*Crop desired pictures to square shapes and shrink them to the desired size.
*Paste squares into a word document, leaving plenty of white space between pictures.
*Print out pictures and crop them to look like Polaroids.
*Adhere magnetic backing to the backs of the pictures.
*Place on your refrigerator or another metallic surface.


Thursday, October 25, 2012

Halloween Tree

The Tree:

Materials:
*Black wire
*Styrofoam base

Directions:
*Determine the height that you would like your Halloween tree to be.  Cut six lengths of wire about an inch longer than the desired height and twist the wire pieces together.  This will form the trunk of your tree. 
*Note: the trunk may seem rather narrow after the initial step and you can add more wires if you would like a thicker trunk, but once you start wrapping wire around for the branches your trunk will become wider anyway.
*Cut another length of wire about as long as the six lengths of wire you used to form the trunk. 
*Begin wrapping the wire around the trunk and continue wrapping until you reach the height at which you would like the highest up branch to be.  Bend the wire to form a branch.
*Take a second piece of wire and wrap it around the trunk until you reach the location of the branch, then twist the branch and the new piece of wire together.  If you would like the branch to fork, bend the ends away from each other before twisting and make sure not to twist them together.
*Depending on how thick you would like your branches to be, you may want to add a third, fourth, and maybe a fifth piece of wire to the branch.
*Continue creating branches in the manner in which you made the first branch.  As you go, the trunk will become thicker and you may find the need to cut your lengths of wire a bit longer to make branches of the desired length.
*Once you have constructed your tree, stick the end in a piece of styrofoam which will hold the tree up.
Decorating the base of the tree:

Materials:
*Foam
*Gray paint
*Glue
*Dried grass
*Small Philip's head screwdriver, butter knife, or some other implement that can be used for carving letters.

Directions:
*Glue dried grass all around the base of the tree.
*To make the gravestones, cut a thin piece of foam board into the shape of a tombstone.
*Use the Philip's head screwdriver to engrave the stone and add cracks and other marks to it.
*Paint the stone gray and let dry.   
*Once it has finished drying, glue it to the styrofoam base.

Ornament ideas
Bat:
Materials:
*Black pom pom
*Black felt
*Googly eyes
*Chalk
*Scissors
*Thread
*All purpose adhesive

Directions:
*Find a template for bat wings such as this one and resize the wings so that they are about 1 1/2" wide.
*Trace the wing pattern onto a piece of black felt and cut out the wings.
*Glue a pom pom to the center of the wings to make the bat's body.
*Glue two googly eyes to the pom pom to make the bat's eyes.
*Attach a piece of string to the bat so that you can hang it from your tree.

Ball ornament:
Materials:
*Round bead of your choice
*Head pin
*Thin wire
*Pliers
*Wire cutters

Directions:
*Loop a piece of wire and slide it onto the head pin.
*Slide the round bead onto the head pin.
*Wrap the piece of wire around the round bead.  When you reach the top of the bead, wrap the wire around the head pin just above the top of the bead a few times, then trim off any excess wire.
*Use pliers to bend the head pin into an angular shape.

Cat:
Materials:
*Black clay
*Gold glitter glue
*Glue
*Thread

Directions:
*Mold clay into the shape of a cat, then bake in the oven according to the directions on the clay package.  Remove the finished clay from the oven and let cool.
*Once the clay has cooled, give the cat glittery eyes using gold glitter glue.
*Attach a piece of string to the cat so that you can hang it from your tree.

Candy ornament:
Materials:
*Aluminum foil
*Permanent marker in a Halloween color
*Small round bead
*Scissors
*Glue
*Thread

Directions:
*Color a rectangle of aluminum foil using your permanent marker.
*Glue your round bead into the center of the aluminum foil rectangle on the uncolored side.
*Take two opposite sides of the aluminum foil and slide one piece over the other, closing the bead inside.
*Twist the ends of the aluminum foil.
*Attach a piece of thread to the candy so you can hang it from your tree.

*Looking for some more cool Halloween decorating ideas?  Check out my creepy doll Halloween decoration, fuse bead Halloween magnets, and Halloween curtain blog posts from last year. 

*Also, here's a cute printable Halloween door hanger that I hang up on my front door every Halloween.  To make it more durable than the standard printable craft, cut out a piece of a cardboard cereal box to insert between the two sides of the hanger and adhere in place using double sided tape.  Then laminate either using a laminating machine or by covering the hanger in packing tape.


Thursday, March 1, 2012

Miniatures Part II

Miniature Board Game

Materials:
*4x6 sheet of photo paper
*Empty cereal box
*Scissors
*Mounting squares or glue
*Color printer
*1 or 2 miniature dice
*Clay
*Cardstock

Directions:
*Using Paint or a similar program, design a board for the board game
*Print the game board onto the sheet of photo paper
*Cut out the game board and attach it to a square of cardboard the same size
*Create cards by designing the back of the cards in Paint or a similar program.  Print several of these images on a sheet of cardboard, cut out and stack
*Shape miniature pawns out of clay.  I made mine out of paper because my miniature board game was based on a full sized board game Brian and I designed (the monster pictured in the center of the board can be found here), but clay pawns would be more durable
*Add miniature dice to finish the look

Miniature Stocking
Same directions as for the large sized stocking

Thursday, February 2, 2012

Miniatures: Part I

Miniature Wall Art
Materials:
*Clay
*Wooden or paper letter
*Scrap of patterned paper
*All purpose adhesive
*Scissors

Directions:
*Shape miniature photo frame out of clay
*Bake frame in oven according to the directions on the package
*Cut out a scrap of patterned paper the same size as the photo frame
*Center the letter on the patterned paper, then glue down
*Glue the back of the photo frame to the patterned paper

Googly Eyed Bears
Materials:
*2 medium sized pompoms
*6 small pompoms
*2 small googly eyes
*All purpose adhesive

Directions:
*Glue the two medium sized pompoms together to form the body of your teddy
*Glue the small pompoms on to form arms, legs, and ears
*Glue on googly eyes

Miniature Memento Board
Same directions as the large sized memento board, minus the frame and done on a smaller scale