Thursday, May 26, 2016

Tissue Paper Flower Garland


Materials:
*20" x 20" sheets of tissue paper in 3 colors of your choice, four sheets of each color for a total of 20 sheets.
*Twine
*Stapler
*Scissors

Directions:
*Cut each sheet of tissue paper into four 10" x 10" squares.  Each set of four squares will make one flower.
*Fold four sheets together accordion style, using 1.5" folds and then staple the midpoint of the folded paper.


*Shape the ends.  I used three different styles for the ends to get three different floral looks (the rounded edges are used for this tutorial; see the other styles toward the bottom of this post), but feel free to experiment with different cuts.


*Spread out one side like this:


*Carefully peel up the first layer of tissue paper, pulling it toward the staple.


*Then lift the second layer.


*Next lift the third layer.


*Finally push up the bottom layer a bit.


*Repeat the process with the other side.  Fluff and spread the layers/petals until you have an arrangement you're happy with,


*Here are the other two petal styles and their resultant flower shapes:


*Once you've made all of your flowers, staple the backs to the twine.


*Once all of the flowers are attached, string them up.  Now you have a flower garland.

Thursday, May 19, 2016

Paper Flower Candle Holder


     Looking for a way to make plain, LED tealight candles look nicer?  Add a paper flower candle holder.  This incarnation of the craft can be somewhat time consuming because it requires cutting out all of the detailed areas, but if you don't cut out the detailed areas you could have a much faster and still pretty flower holder.  I got my inspiration for this craft from this site.

Materials:
*2 sheets of copy paper in color of your choice
*Double sided tape
*Scissors
*X-acto knife
*LED tealight candle (you could probably use a regular candle as well, as long as it was in a glass holder so you minimize the risk of burning the paper)

Directions:
*Size the below template so that your tealight candle would fit in the center of the smaller flower and then print out and cut out the template, using your X-acto knife to cut out the detailed regions.


*Trace two copies of the large template and one copy of the small template onto the copy paper and then cut out.  I took a shortcut on this step and used my Silhouette CAMEO to cut everything out.


*Bend up the petals on the smaller flower like this:


*Curl the petals of one of the smaller flowers like so and then tape the bottom of the smaller flower to the center of this larger flower.


*Curl the petals of the remaining flower a little and then tape the bottom of the two flowers stacked together to the center of this flower.


*Place the candle in the center and you're done!

Thursday, May 12, 2016

Galaxy Print Owl Cutout Notebook


     My sister gave me this adorable owl cutout notebook (I think she got it at Dollar Tree, so if you're looking for the exact notebook I used, that's a good place to check).  The plain brown cover was kind of boring, though, so I decided to spruce it up with some paint.

Materials:
*Owl cutout notebook (this will work for any notebook, but you won't have the owl cutout unless it's already a part of your notebook)
*Black, blue, purple, white, and red paints
*Paint sponge brush
*Regular paintbrush
*Aluminum foil (if your notebook has the cutout)
*Tape or glue (if your notebook has the cutout)

Directions:
*This is what the original notebook looked like:


*Cover your work space in scrap paper and tuck a sheet of paper beneath the cover to protect the top page from paint.


*Paint the cover black and then let dry.  (I took the picture while the cover was still partially wet, so that's why it looks like there are two different shades of paint there.)


*Sponge on patches of dark blue.  I took regular blue paint and added a little bit of black to get this shade.  Let dry.


*Add some light blue paint.  I mixed white and blue together to get this color.  Let dry.


*Add some purple.  You can see here that I used two different shades of purple, regular purple and a lighter purple which I made by mixing purple and white.  Let dry.


*Add some pink.  I made this dusty rose color by mixing a bit of purple with some red and a lot of white.  A more vibrant shade of paint might work nicely, though.  Let dry.


*Dip your paintbrush in white paint and flick it with your finger to create the stars.  You'll want to make sure your work station is well covered for this step.  Let dry.


*Once the cover has dried, pull out the sheet of paper you were using to protect the inside cover.  Tape or glue some aluminum foil behind the owl cutout for a shiny effect.  Alternately, you could use a contrasting color to really make the owl shape pop out from its surroundings.

Thursday, May 5, 2016

Popsicle Stick and Washi Tape Photo Frame


Materials:
*Popsicle sticks
*Washi tape
*Black and white photo
*All purpose adhesive
*Plain paper or paperboard (optional)

Directions:
*Lay out popsicle sticks long edge to long edge until you have enough to make a frame for your photo.
*Cover your popsicle sticks with washi tape.  For the sticks that I knew were going to be covered up by the photo, I just covered the ends to save on tape.


*Once you've finished adding tape, glue sticks together long edge to long edge.


*Glue down photo.
*For reinforcement, you can add some plain paper or some paperboard to the back of the frame.

Thursday, April 28, 2016

Nebula in a Bottle/Magical Potion Vial


     Here is a multipurpose craft.  I made it to be a nebula in a bottle, but when I was done I realized it could also make for a neat "magical" potion.  Although Halloween is still months away, if you're looking for some not so creepy decor ideas, you may want to keep this craft in mind.

Materials:
*Vial or bottle with a cork
*Food coloring in color of your choice
*Water
*Silver glitter
*Cotton (I used stuffing because that was what I had on hand, but if you want more of a color contrast like some of the other nebula in a bottle crafts have, you'll want to use cotton).

Directions:
*Add a few drops of food coloring to some water, until you reach your desired color.


*Using a measuring cup or some other instrument that will allow you to pour liquid in a little at a time, add some of the colored water to the bottle/vial.


*Add some cotton and then pack it down.  If you pack it very densely, more of the white will show through, whereas if you go for a looser packing, you won't see as much of a color gradient.


*Add some glitter and mix it around inside the bottle.  I was using a very small vial, so I used the long straight end of a mixer blade for mixing purposes.


*Add more colored water.


*Add more cotton, followed by more glitter, and then mix.  Fill up any remaining space with colored water.  Put the cork back on and now you're done!


*Note: I've read that if you add clear nail polish to the bottom/sides of the cork you can prevent the dye from seeping through the cork.  I didn't have any clear nail polish on hand, so I couldn't try it myself, but I figured I'd throw the idea out there in case any of you were interested.

Thursday, April 21, 2016

Clay and Wine Cork Stamp


     There are tons of neat crafts out there for using wine corks, but many of these require stockpiling large numbers of corks.  If you only have a few corks on hand, here's a good way to reuse them.

Materials:
*Polymer clay
*Wine cork
*All purpose adhesive
*Aluminum foil
*Optional: shape molds

Directions:
*Cover your work space.  I used the aluminum foil I was going to use to bake it on to cover my work space.
*Create the shape that you would like your stamp to have.  If you're using a mold, you can just squish the clay into the mold.  It doesn't matter if there's excess clay sticking out over the edge; in fact, that makes it easier to make your stamp.


*Cover the top of the wine cork with about 1/4" thick slab of clay.  If the surface of the clay is uneven, you can flatten it against a (covered) table or other flat surface.


*Add the shape to the clay on top of the wine cork.  If you're using a shape mold, you can just press the cork against the mold and the two pieces of clay should stick together.


*Mold the edges of the two layers of clay together.  It doesn't have to be perfect.  You just need them to hold together so your stamp doesn't break on you.

*Press the clay end of the cork straight down against a flat surface very lightly.  This is important, because you need your shape to be flat to work well as a stamp.  I skipped this with the butterfly stamp because I thought it would work well enough and I didn't want to squish away the wing detail, but when I try to stamp with it, it misses chunks of the middle of the butterfly.  It's better to have a functional stamp with less detail than a stamp that doesn't work.

*Carefully pull the clay off the end of the wine cork and bake according to the instructions on the packaging.  Once it's finished, pull it out of the oven and set it aside to cool.


*As soon as the clay is cool enough to handle, glue it to the end of the wine cork and then set aside to dry.  Once dry, it's ready to use!  As you can see from the picture below, the heart one works all right, but the butterfly stamp only produces a partial butterfly.  That's why the flattening step is so important.


Thursday, April 14, 2016

5 Minute Wire Ring


     Make yourself this cute new accessory in no time!  I got the idea from this site.

Materials:
*Wire
*Bead of your choice
*Wire cutters
*Glue of your choice
*Thin, cylindrical object to shape the wire

Directions:
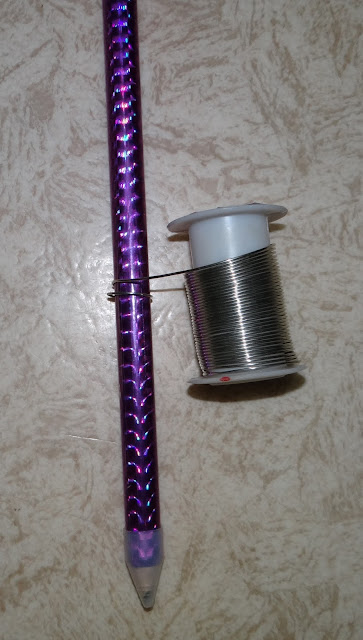
*Find a thin, cylindrical object, like a jumbo pencil, to wrap the wire around.  It should be about as thick around as your finger.  Loop the wire around like in the picture below:


*Snip off the shaped wire, making sure to leave a little excess.
*Add your bead to one end of the wire and try sliding the ring back and forth over your finger:


*If it is secure, but you can still get it off, then snip off the excess and glue in the other end.  If not, try adjusting the wire until it fits as you want it to, then snip off the excess and glue in the end.  I actually haven't glued mine yet; it seems to be holding together pretty well on its own.  However, if you want to make sure the bead doesn't fall off, glue is probably the way to go.